Support
Setting up Zoho CRM Webforms for Marketing Attribution and capturing UTM parameters
Step-by-step setup to add Madlitics fields to Zoho CRM Webforms to see which channels bring in your customers.
Start capturing attribution →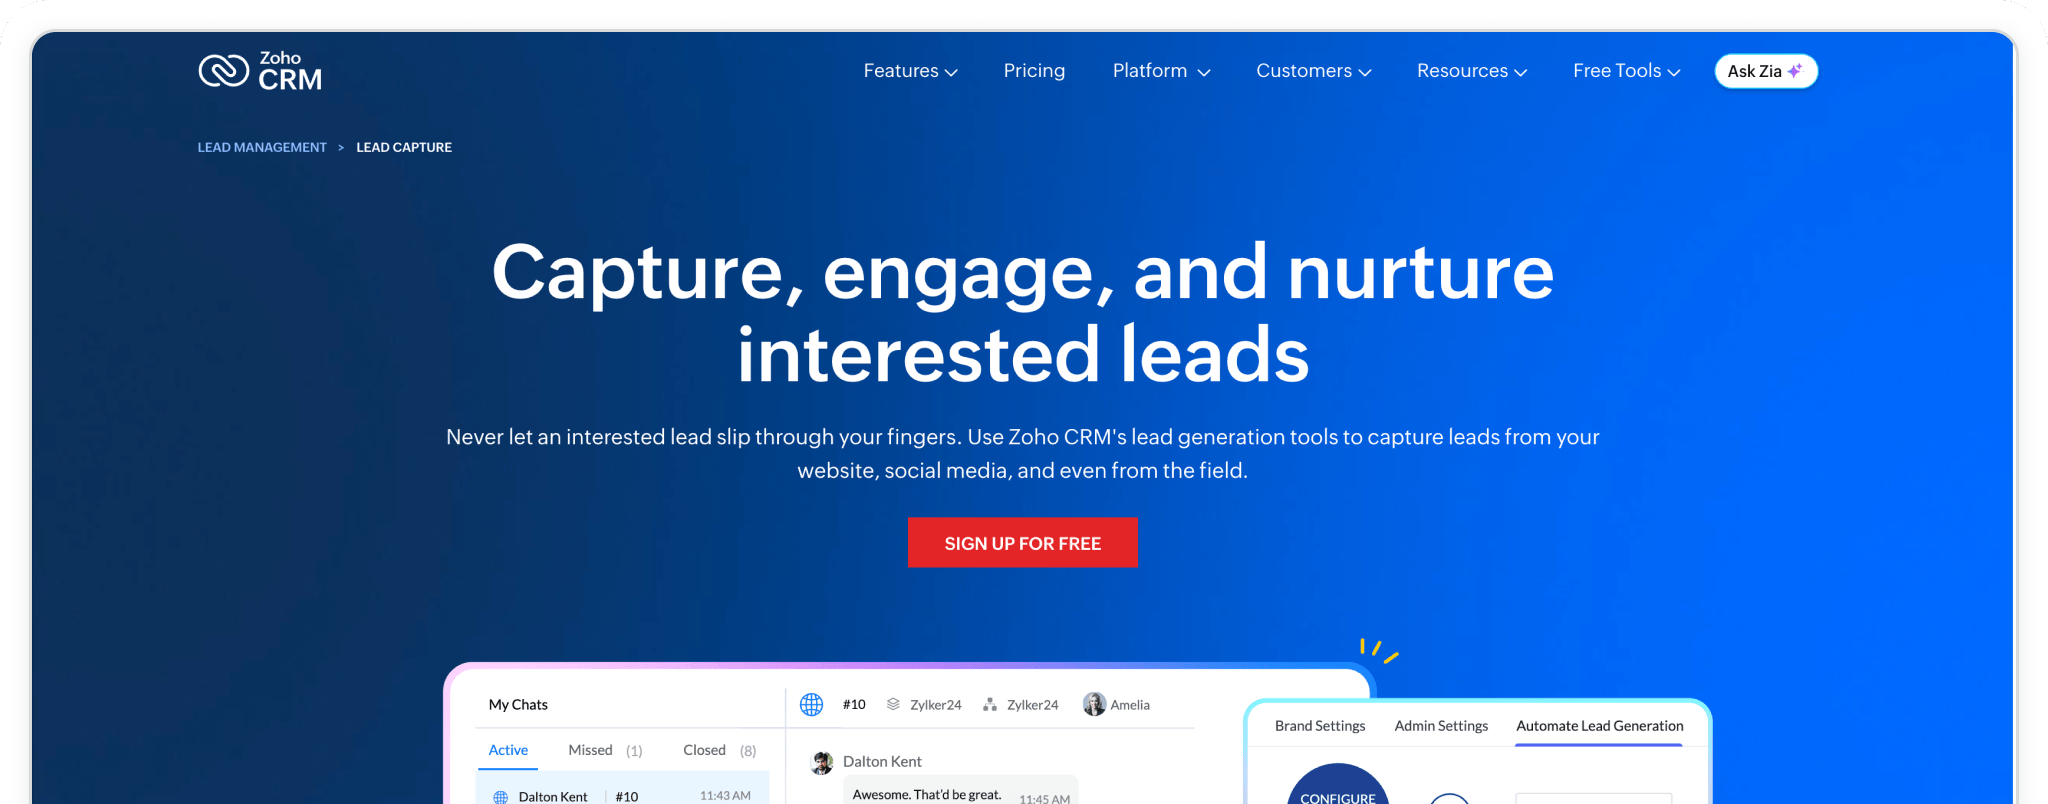
Zoho CRM Webforms is a built‑in lead capture tool that lets you create forms directly inside your Zoho CRM environment and store submissions as records in real time. It’s designed to sit at the top of your funnel, so every lead you collect is automatically mapped to your CRM fields, layouts, and workflows from the moment they submit.
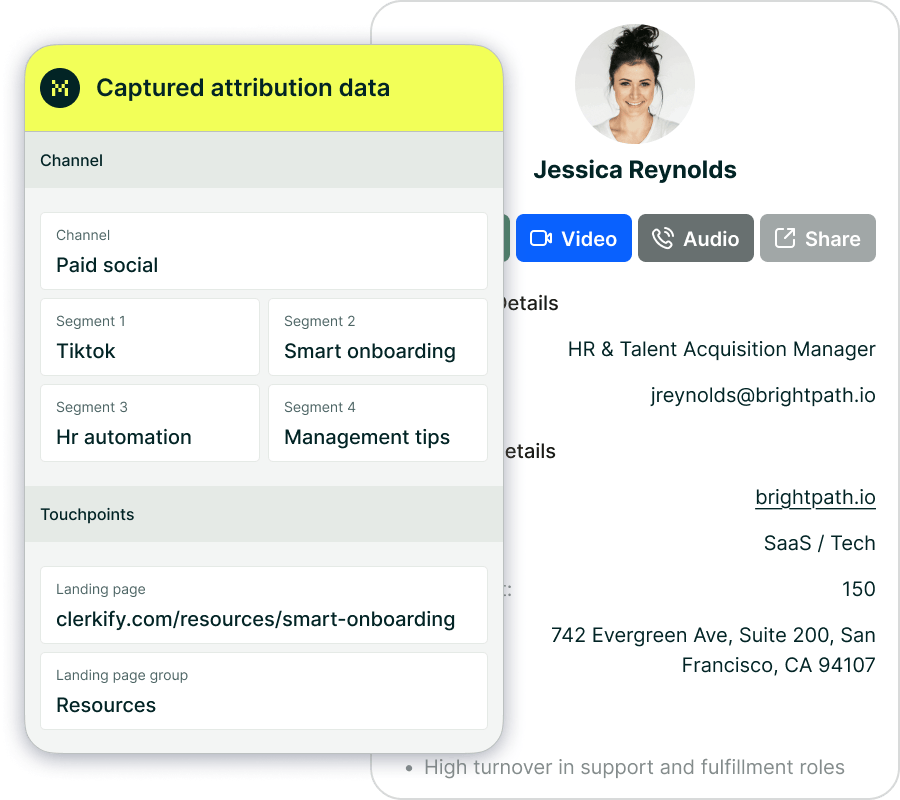
By pairing Zoho CRM Webforms with Madlitics, every submission is automatically enriched with marketing attribution data. This helps you connect each lead to the channel, campaign, segments, and landing page that drove them—without changing the way visitors fill out your forms.
In this guide, we’ll walk through creating a Zoho CRM Webform, adding Madlitics tracking fields, and publishing it so you can start collecting clean, UTM‑style attribution data that flows straight into your CRM.
With this setup, you can:
💆 Heads-up: Make sure Madlitics is installed on the domain that hosts your Zoho CRM Webforms. The form alone won’t capture attribution data; Madlitics needs to be active on the page to pass visitor details into submissions.
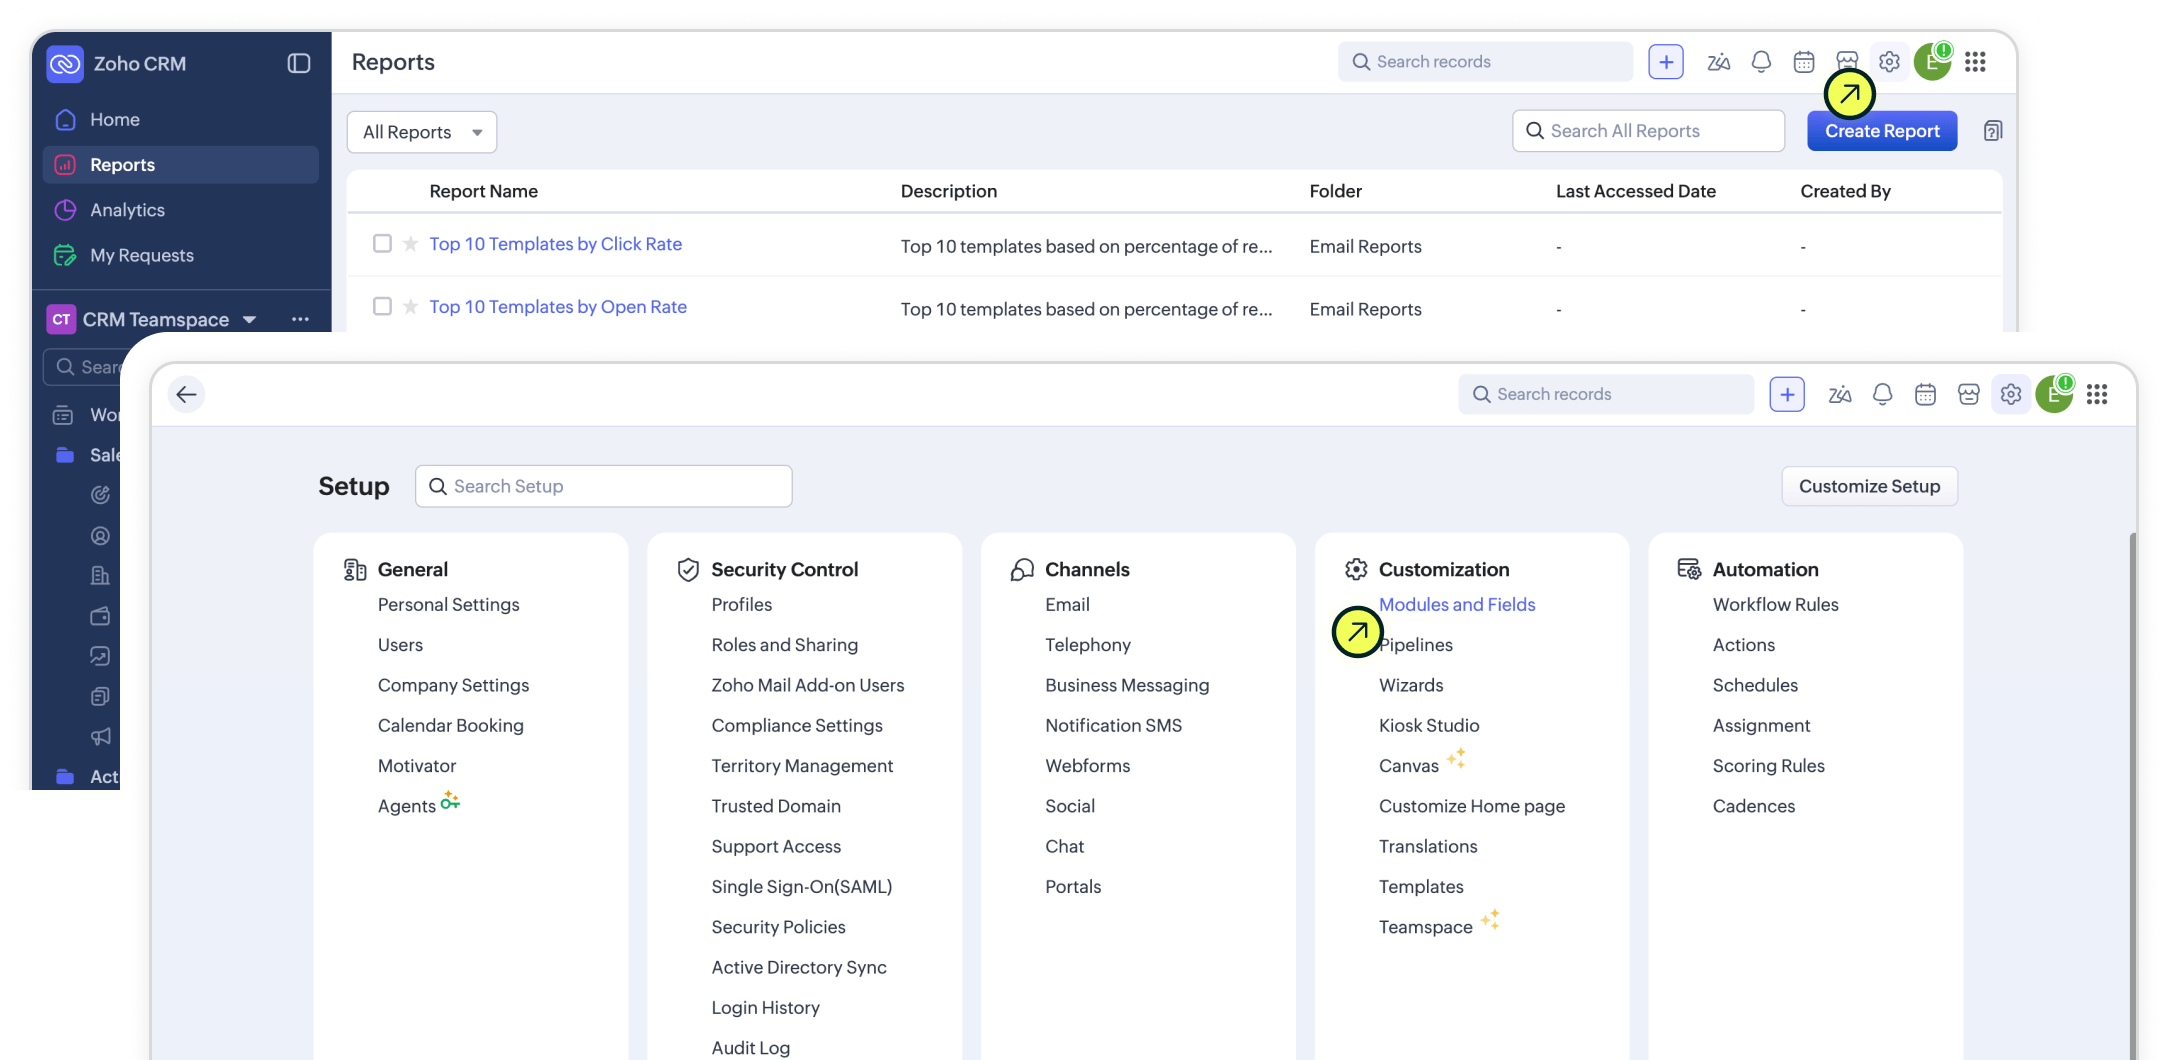
Start by opening your Zoho CRM dashboard and navigating to the 'Setup' gear in the top‑right navigation. From there, go to Modules and Fields under the Customization section. This is where you’ll manage the structure of your CRM records and tailor them to your attribution needs.
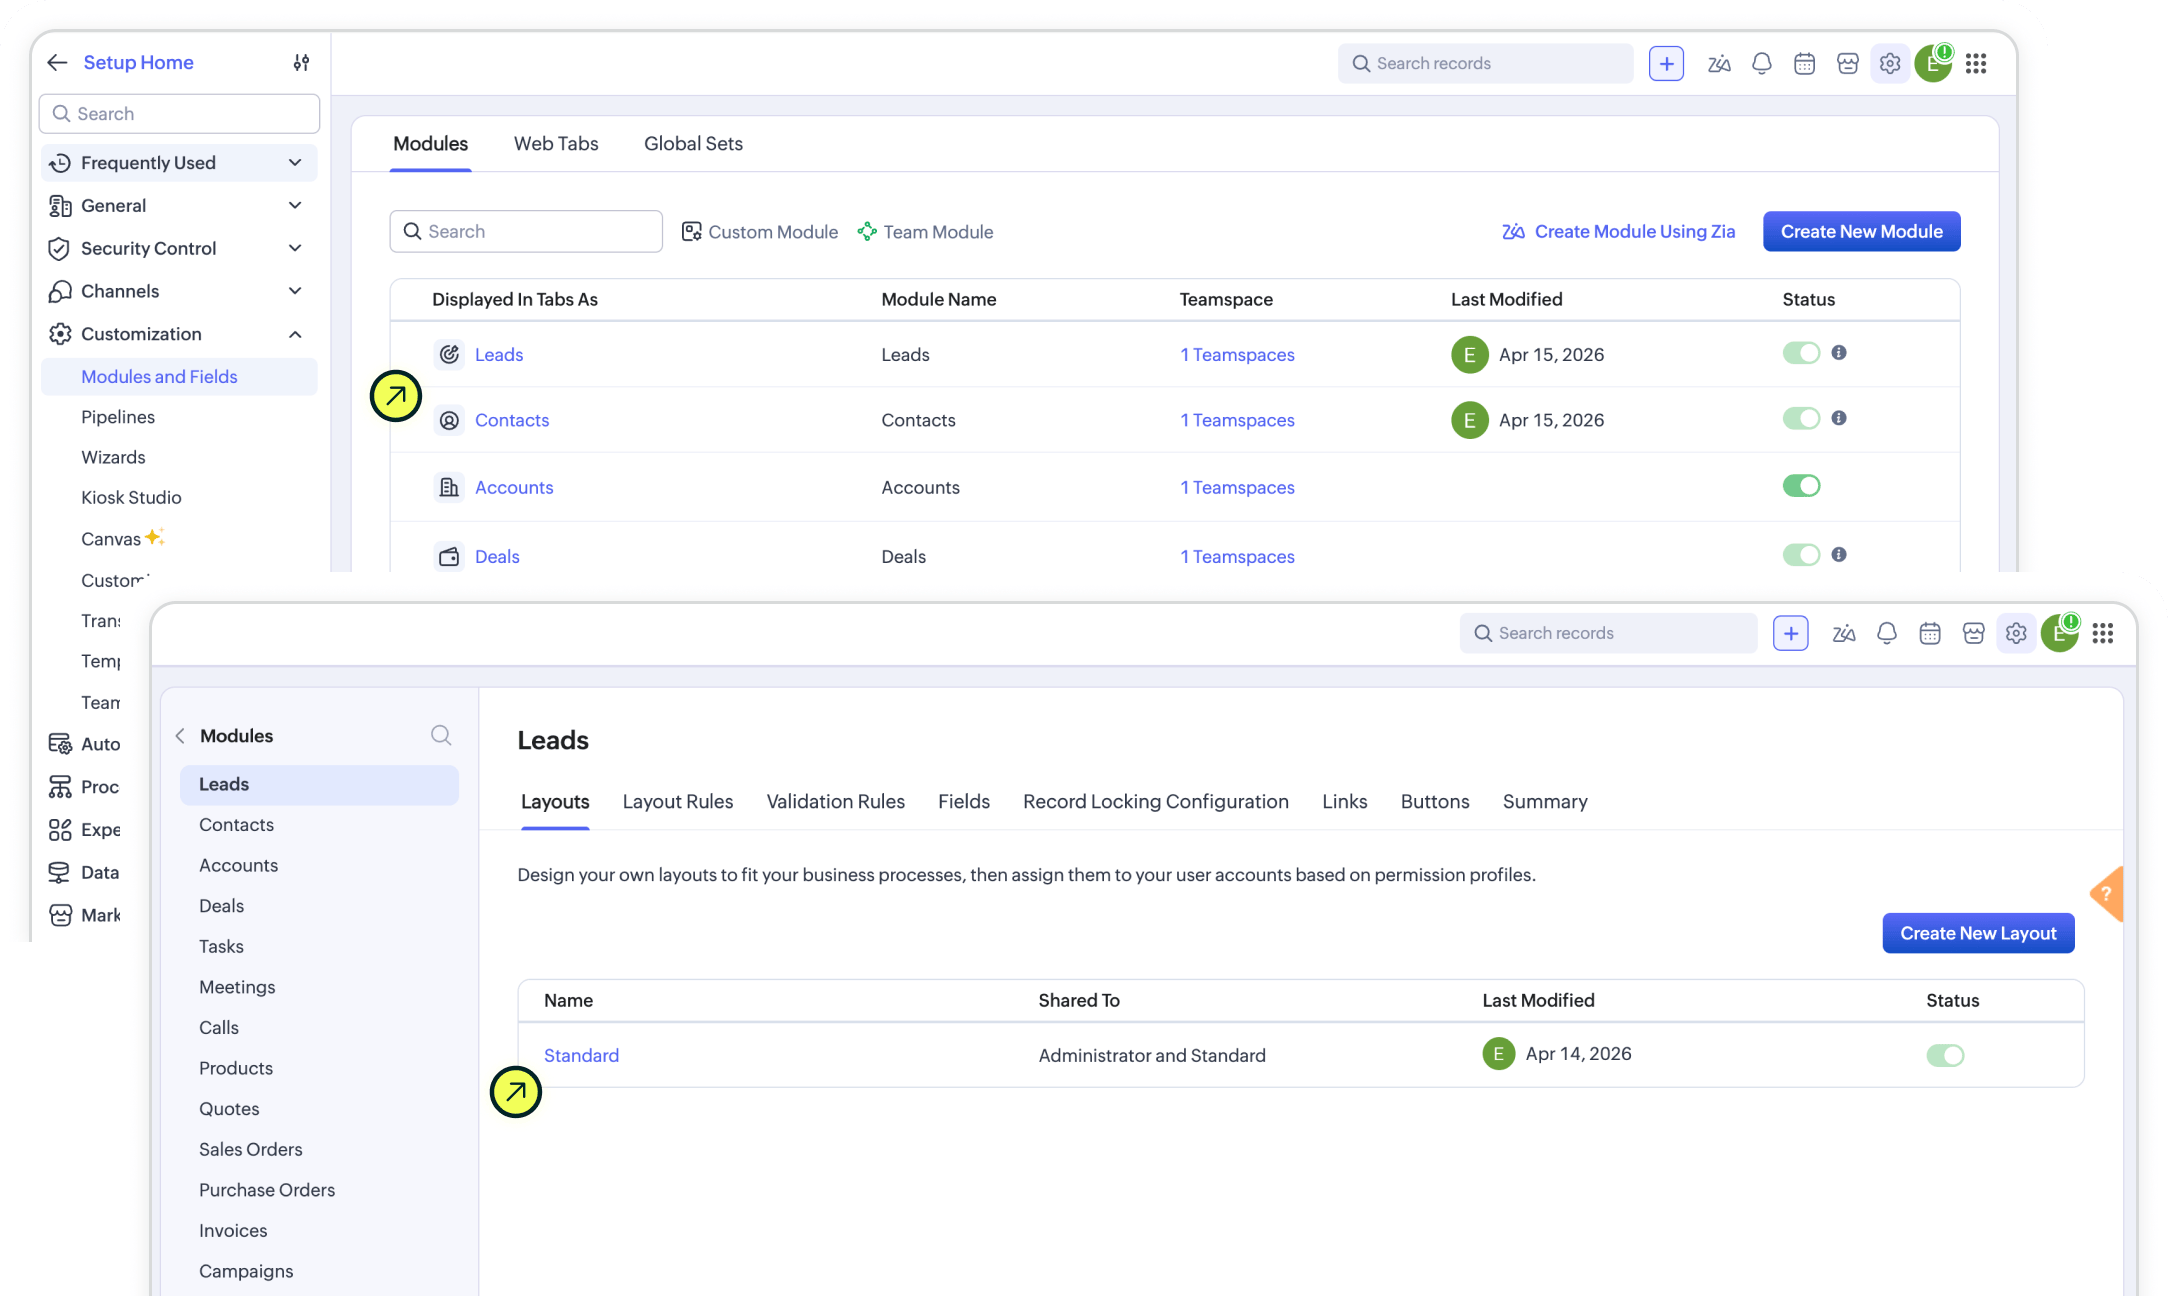
Select the Leads module (could also be Contacts or wherever you prefer to store customer records), since this is where your web form submissions will be stored. Inside the Leads module, open the Layouts tab and choose your active layout, usually 'Standard' (feel free to create a new layout if that's a preference).
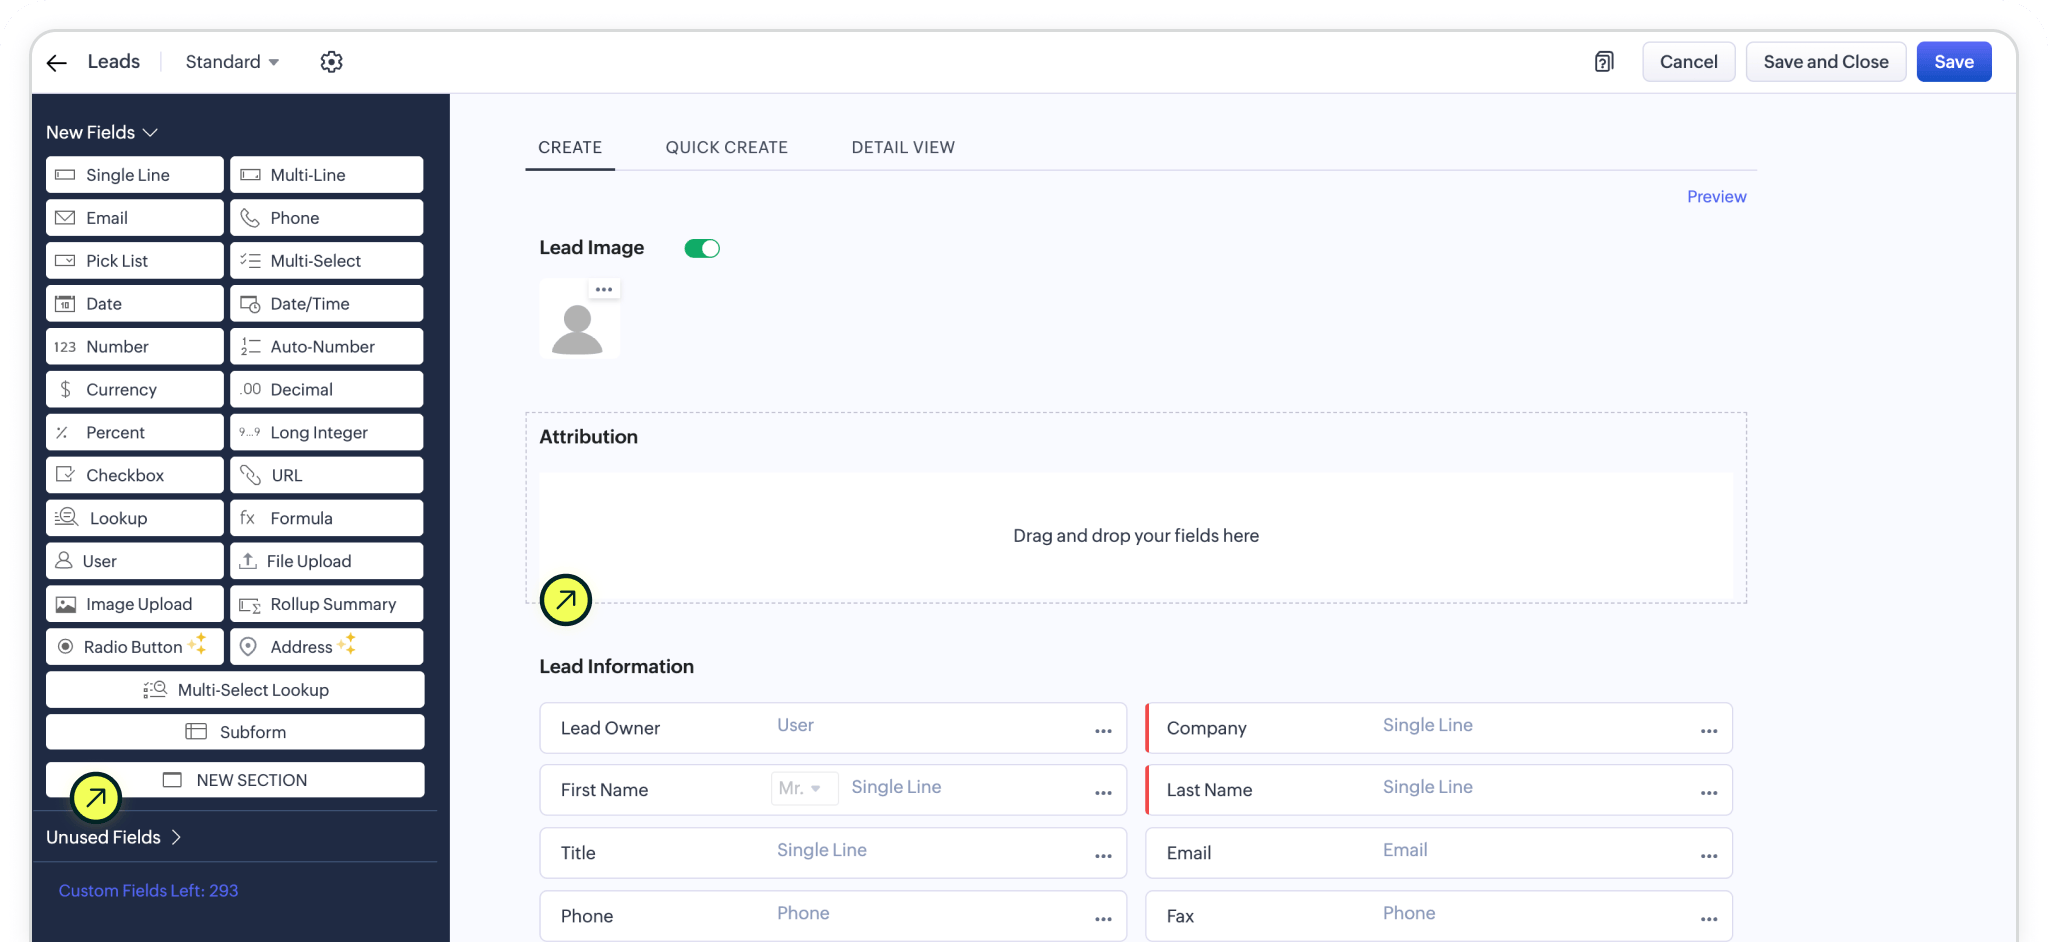
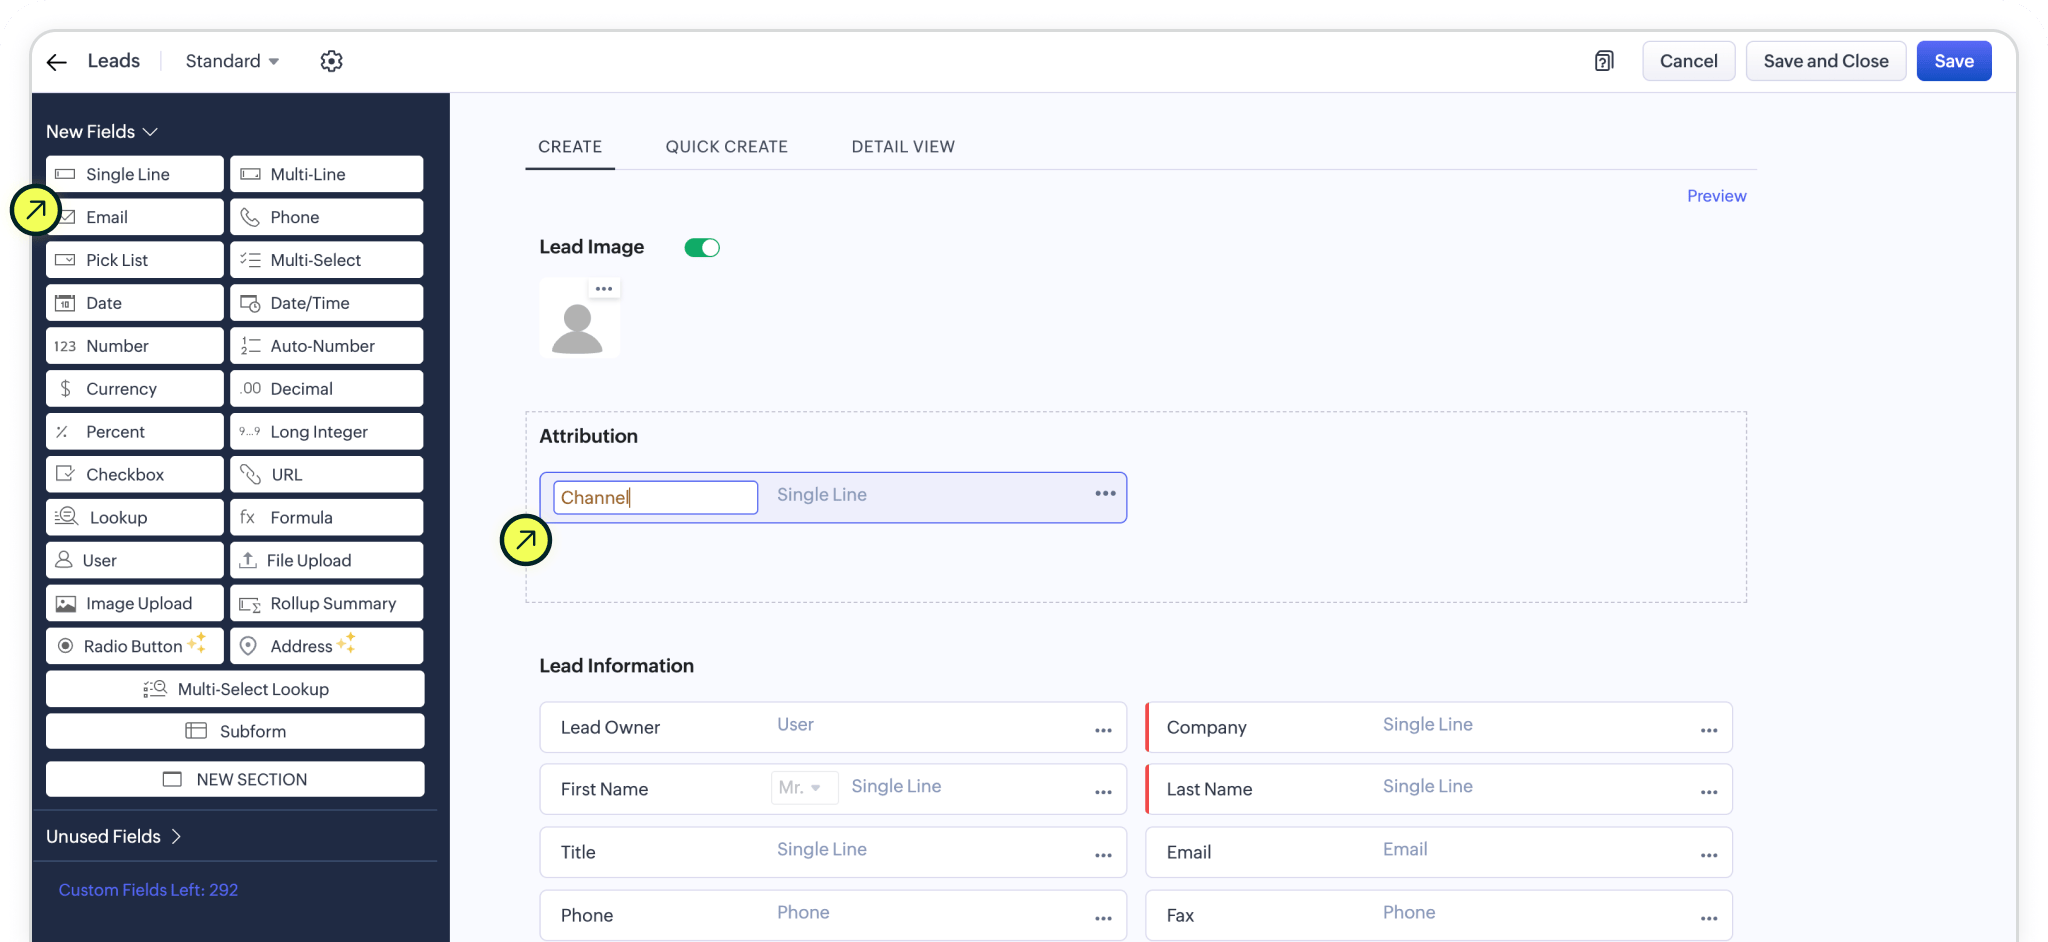
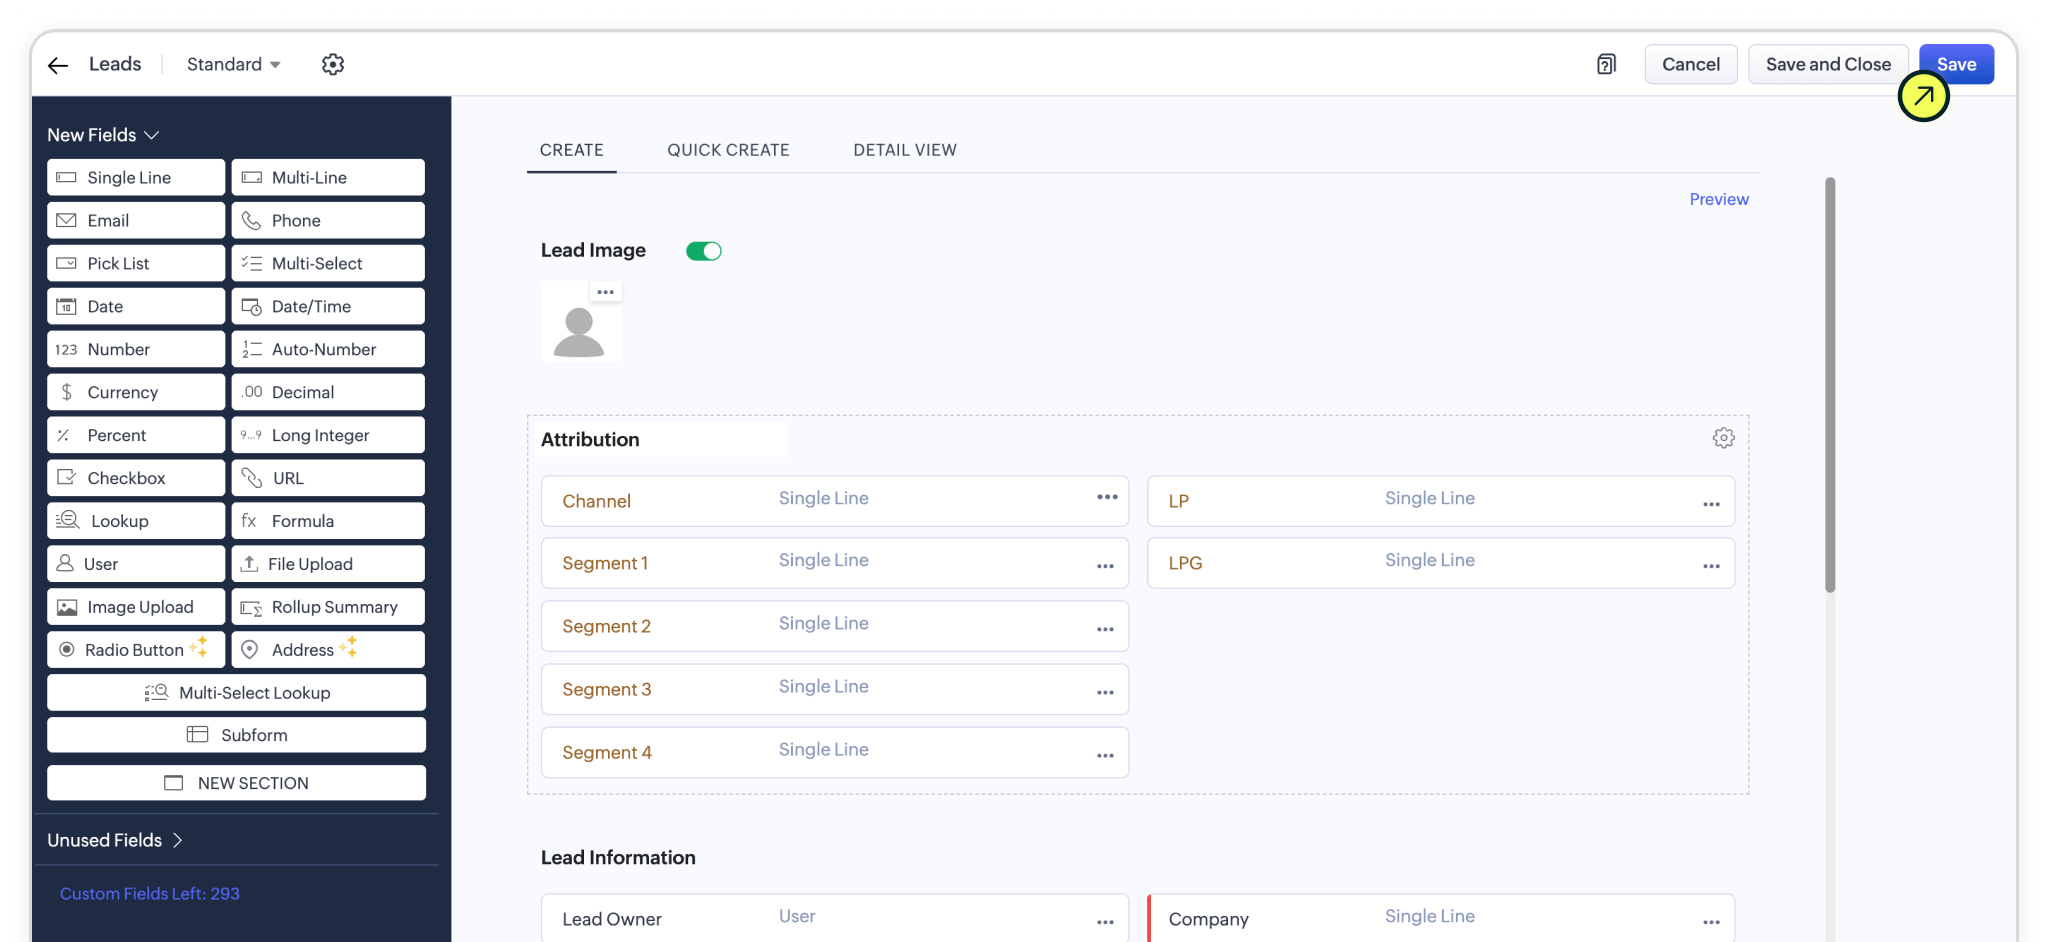
In the layout editor, create a new section called Attribution to keep your marketing data organized and easy to find. Then add seven 'Single Line' fields to this section, with the following field labels: Channel, Segment 1, Segment 2, Segment 3, Segment 4, LP, LPG. These fields will store the attribution data for each lead. Once all fields are added, click Save to apply your changes.
At this point, your Zoho CRM is ready to receive attribution data. In the next step, you’ll connect these fields to your Zoho CRM Webform so the data flows in automatically.
Channel).
Channel, Segment 1, Segment 2, Segment 3, Segment 4, LP, LPG.

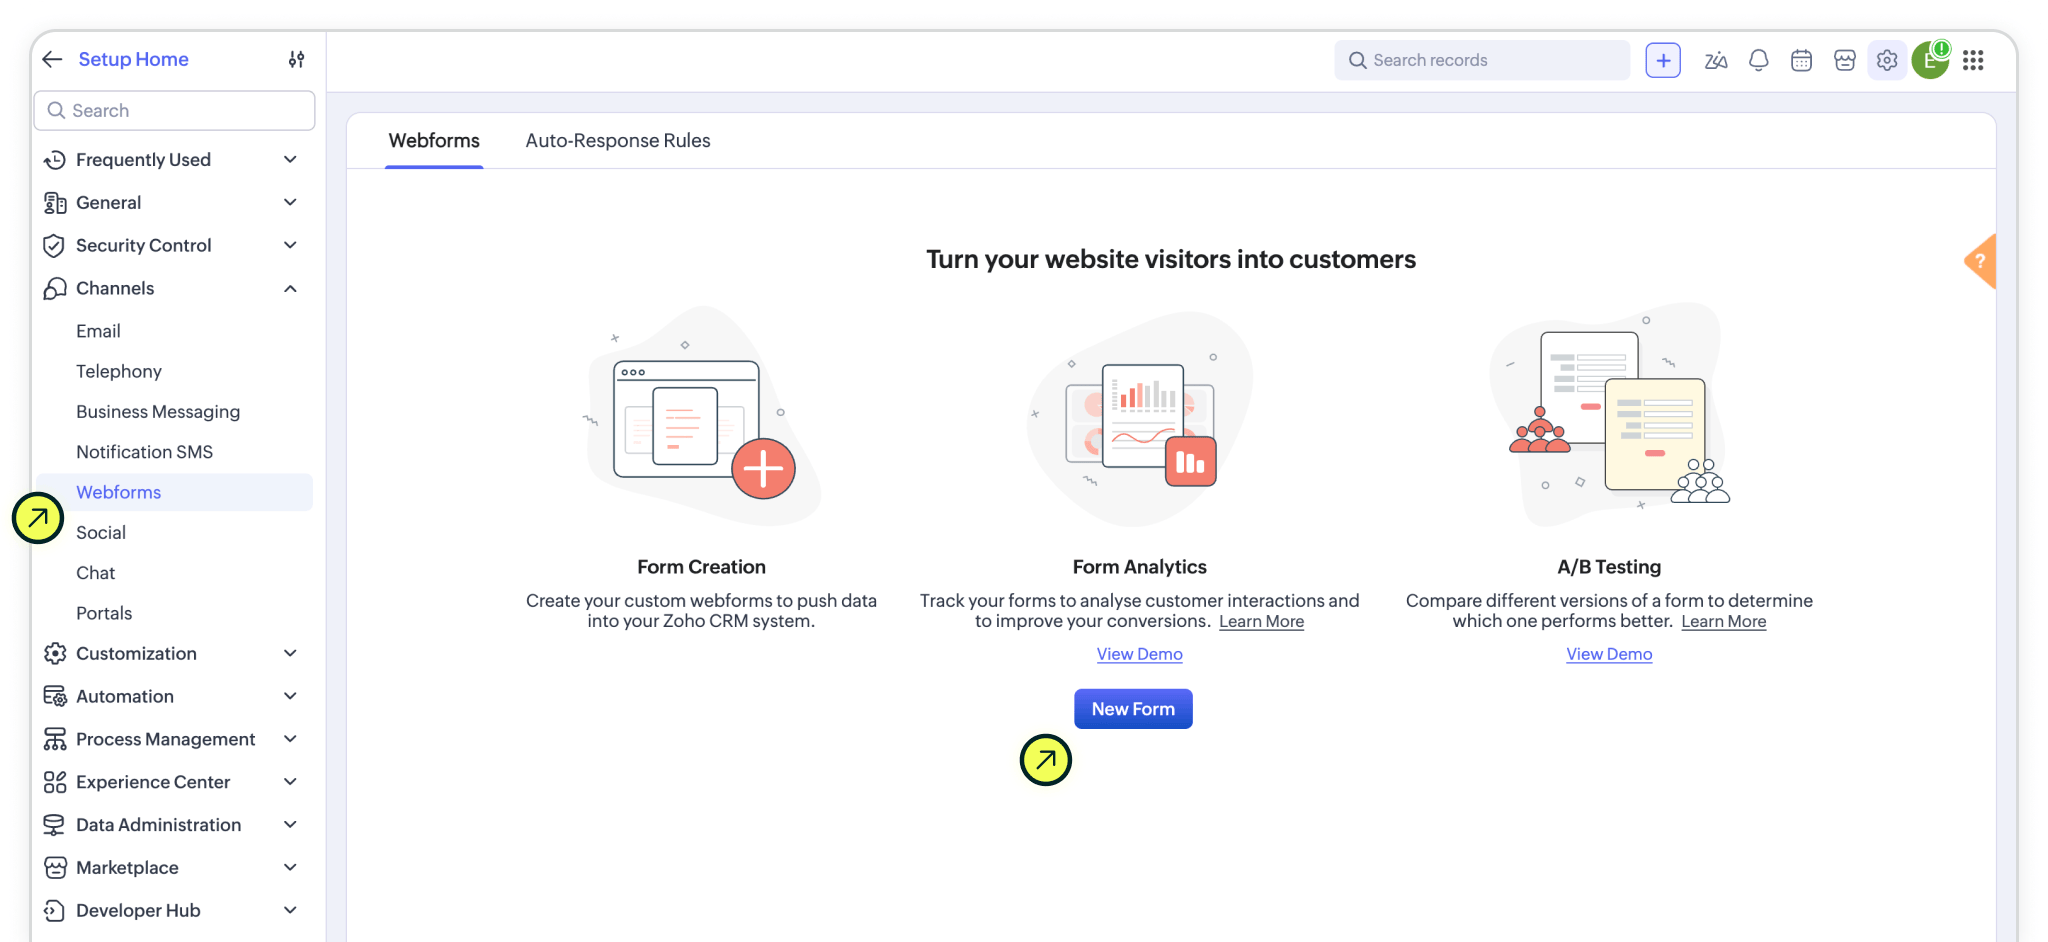
Next, navigate to 'Webforms' from the left-hand menu (under Channel back on the Setup home screen), in your Zoho CRM setup. This is where you’ll create and manage the forms that capture new leads.
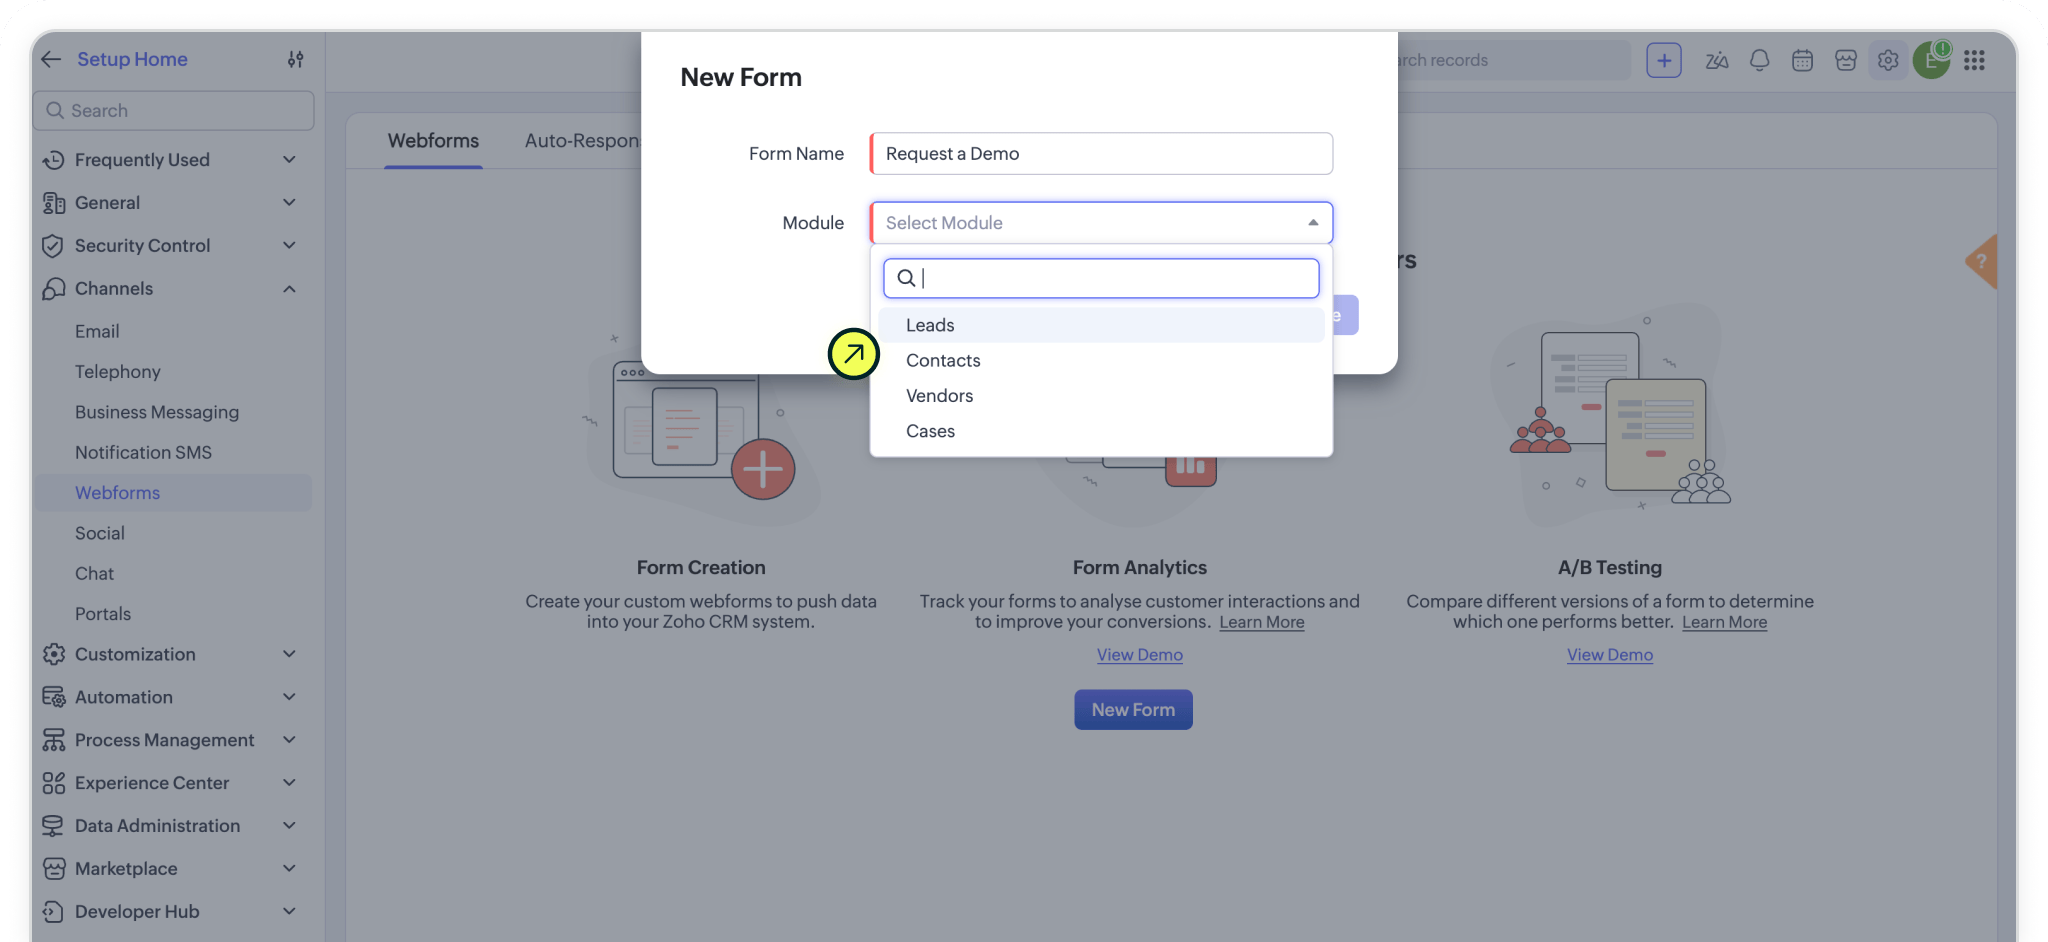
Click the 'New Form' button to create a new webform, or select an existing form if you already have one in place. When prompted, choose the 'Leads' module (updated in the previous step) so submissions are sent to the correct location in your CRM.
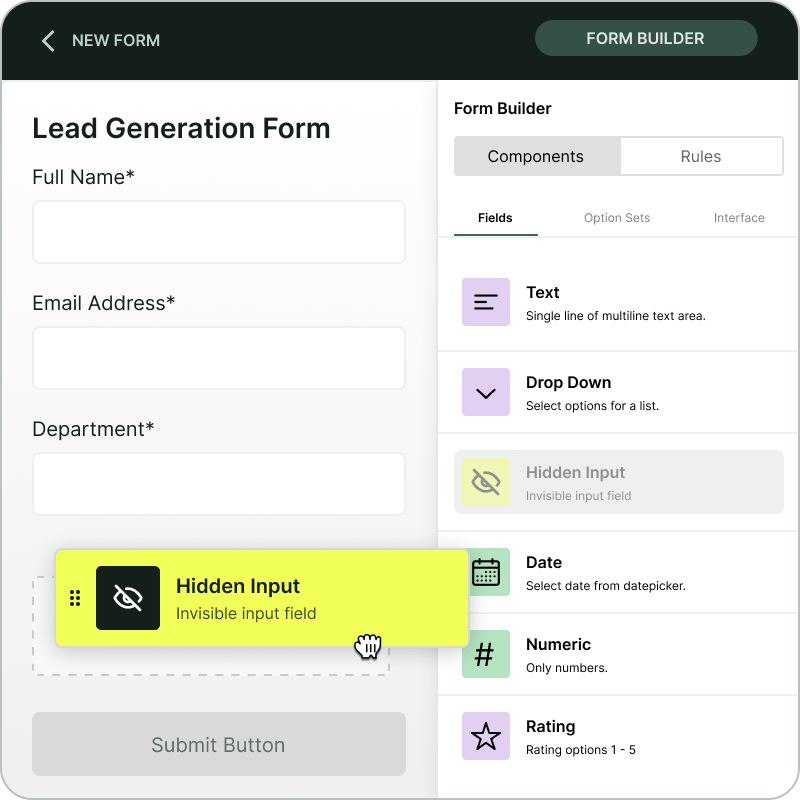
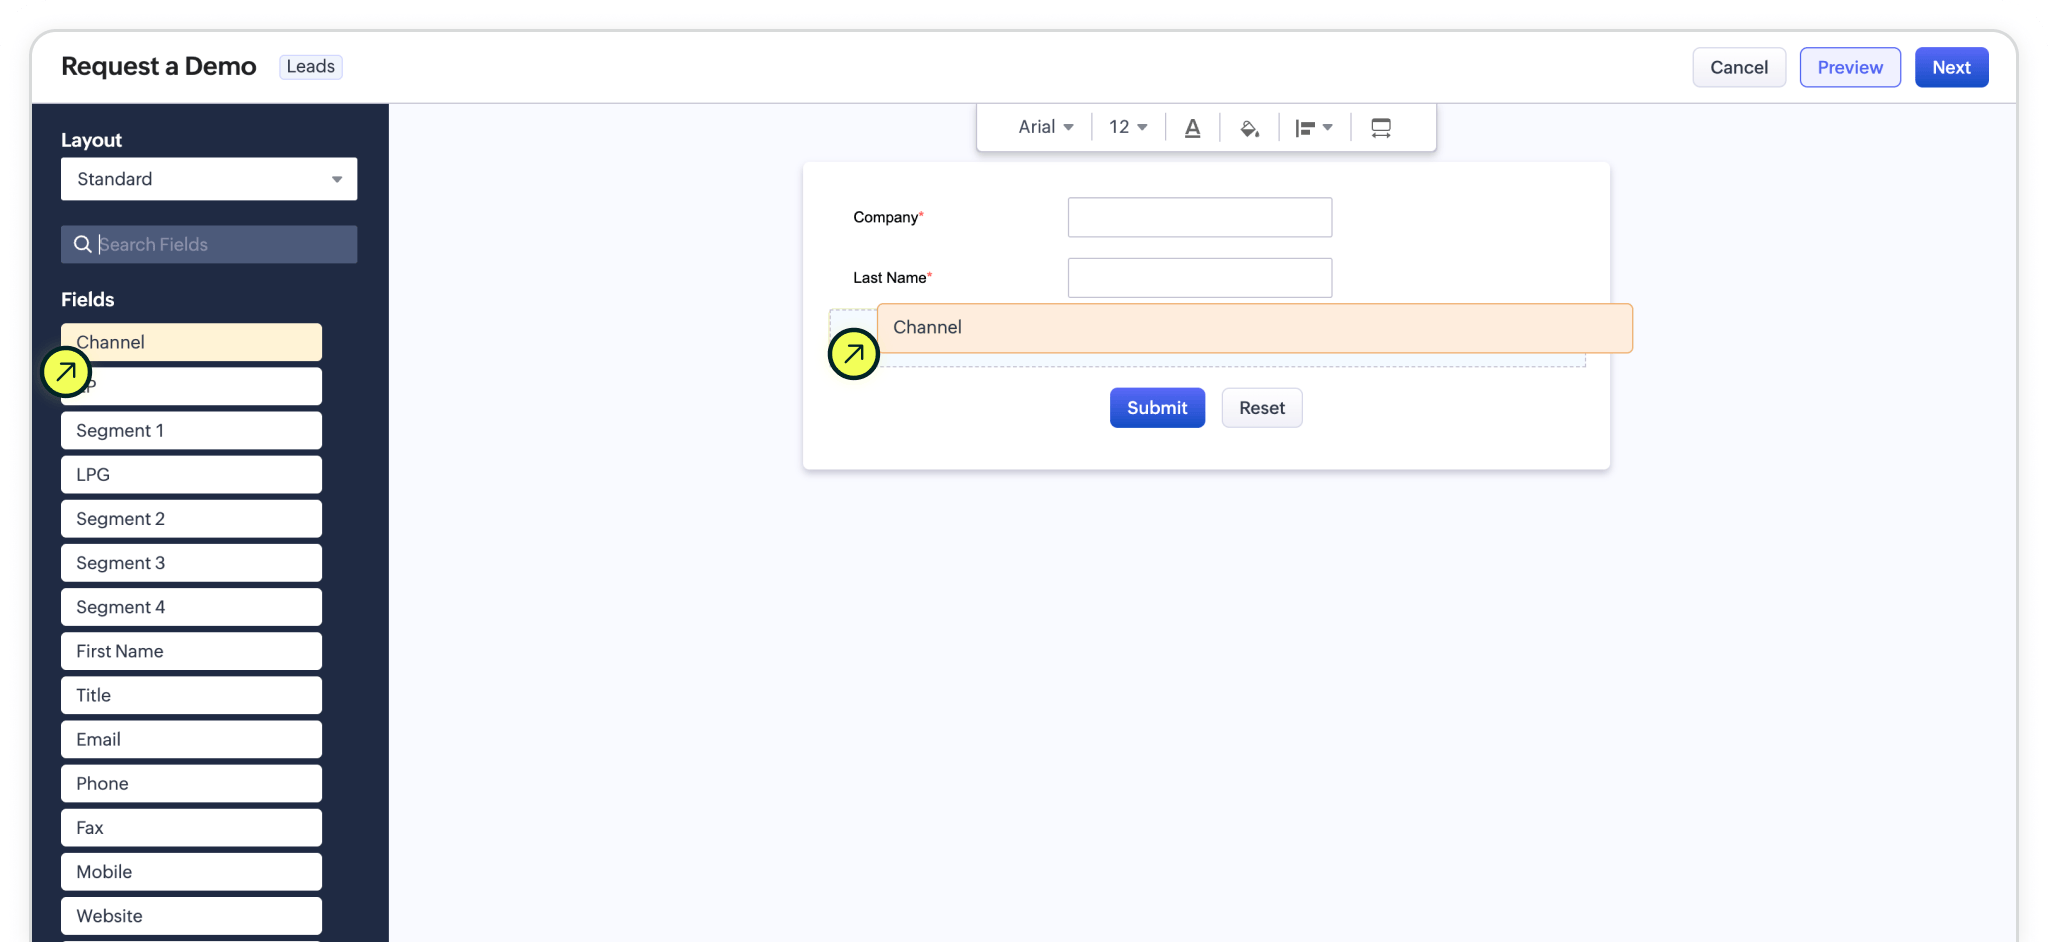
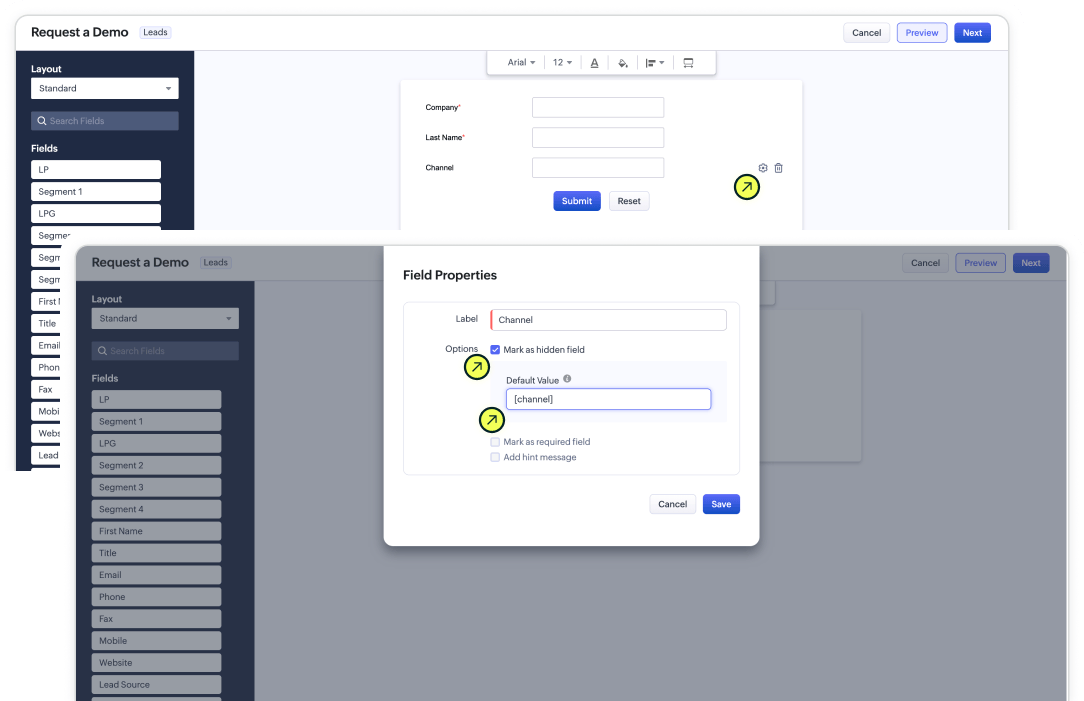
Once inside the form builder, you’ll see your available fields on the left and the form preview in the center. Add your standard fields like Name, Email, etc. just as you normally would. Then, locate the attribution fields you created in Step 1 and add the first one to your form: Channel. Open its settings and mark it as a hidden field, setting the 'Default value' to [channel].
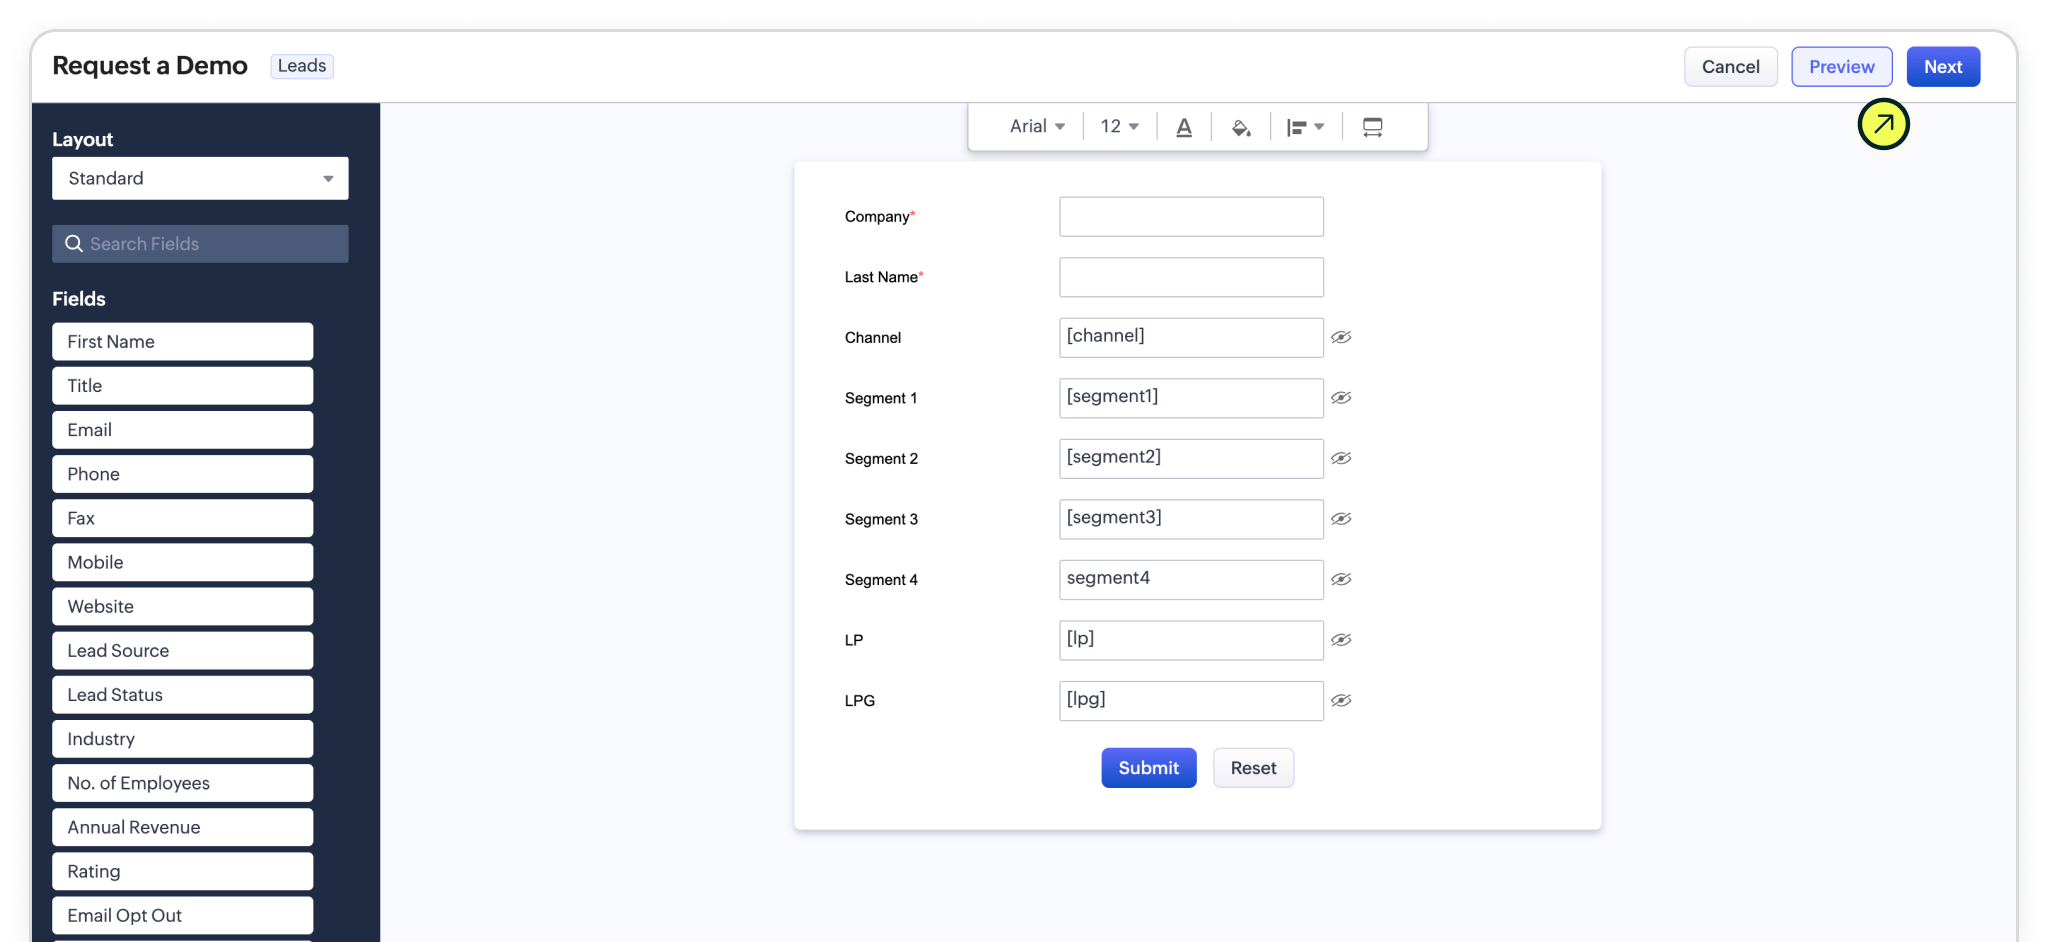
Repeat this process for the six additional Madlitics fields: [Segment 1], [Segment 2], [Segment 3], [Segment 4], [LP], [LPG].
Once these are in place, every Zoho CRM Webform entry will automatically include both your lead information and the attribution data from Madlitics. Configure additional Madlitics field value pairs for deeper customization and richer insights.
Channel, Segment 1, Segment 2, Segment 3, Segment 4, LP, LPG
[channel], [segment1], [segment2], [segment3], [segment4], [lp], [lpg]
Once your form is ready, it’s time to embed it so visitors can fill it out and Madlitics can capture attribution data. Click 'Next' to move into the final configuration and publishing steps.
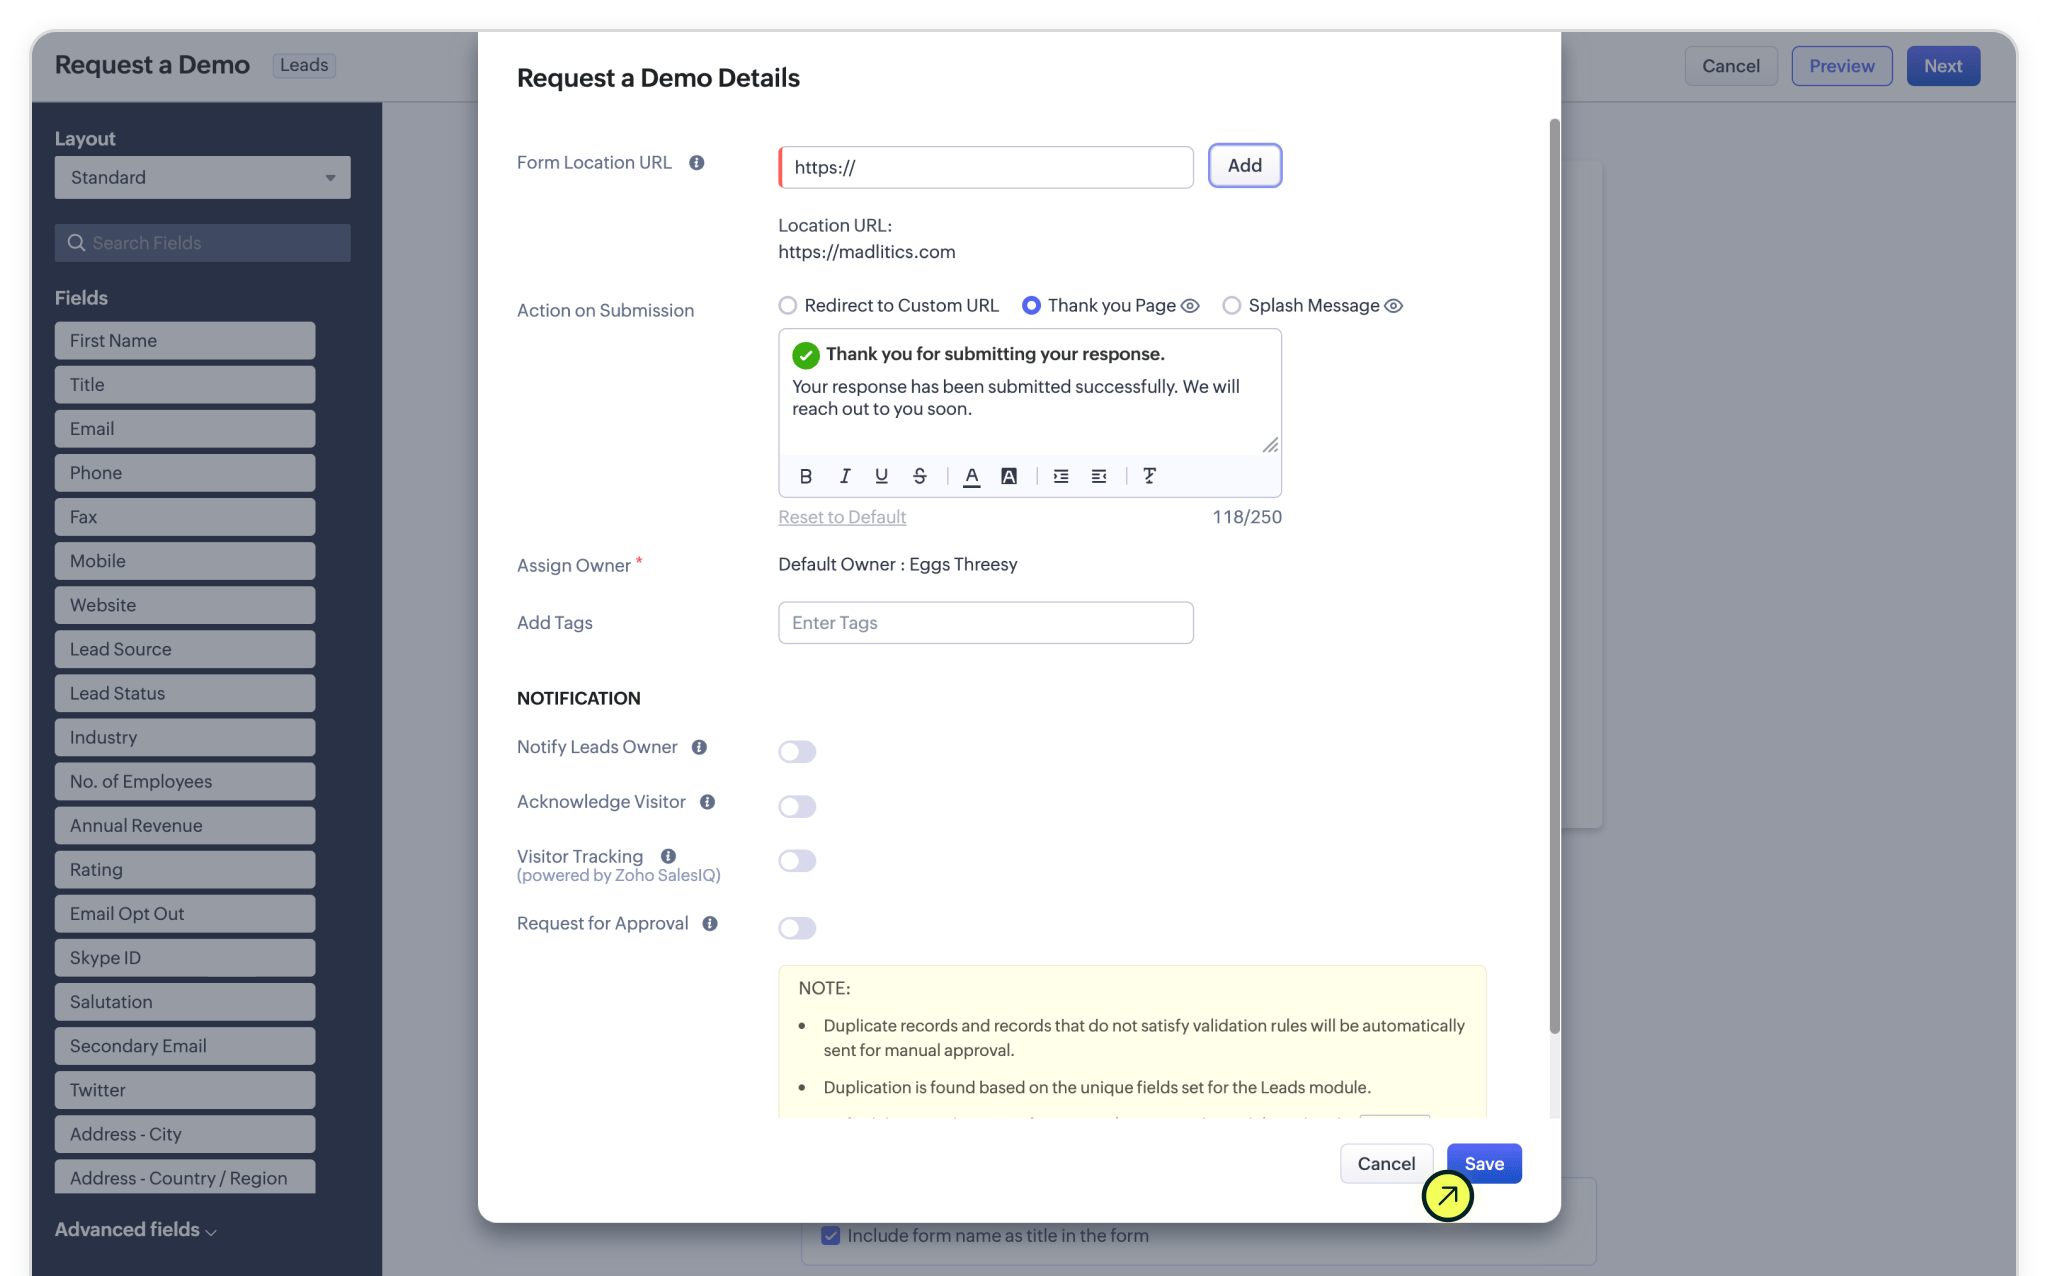
In the form settings, you can define where the form will live and what happens after submission. Add your Form Location URL, choose a confirmation option such as a thank you message or redirect, and click 'Save' to continue to the publishing options screen.
On the Publish Options screen, Zoho CRM will generate your form embed code. Select Source Code as the publishing format, then copy and paste the provided code snippet into your website where you want the form to appear. This is typically done within your page builder, CMS, or directly in your site’s HTML.
Once added, publish your page to make the form live. Your Zoho CRM Webform will now capture submissions and pass data directly into the module selected when creating the webform (ex. 'Leads').

Make sure Madlitics is installed on the domain where your Zoho CRM Webform is hosted. If Madlitics isn’t installed, the attribution fields in your form won’t receive any data.
Test your form by visiting your site, using a url with unique utm parameters. Captured attribution data will populate in your Zoho CRM Webforms entries page which can then be passed to intelligence tools, etc. for advanced reporting.


With Madlitics now active and your Zoho CRM Webforms configured to capture attribution data, every new lead will automatically carry its channel, campaign, and landing‑page context into the CRM. You can then use this data in Zoho CRM reports, dashboards, and workflows, or pass it into your email marketing, BI tools, and other systems for deeper, attribution‑driven reporting.
Answers to common questions about setting up Zoho CRM and Madlitics