Support

Installing Madlitics on Hubspot-hosted websites and landing pages

How to add a custom code to your HubSpot site’s <head> tag
Start capturing attribution →
Attribution is broken
Automation icon indicating hands-free marketing attribution and data flow.
Analytics report icon, indicating data insights and reporting.
Impact measurement icon, symbolizing marketing effectiveness.
Personalization icon, representing customization features.

HubSpot’s hosted websites and landing pages are a powerful way to run campaigns and capture leads without leaving your HubSpot environment. With HubSpot, you can build and launch polished pages directly inside the platform, and when you need to add custom scripts HubSpot gives you straightforward controls to include them site‑wide.

In this guide, we’ll walk through two parts: first, creating your Madlitics account and grabbing your installation snippet, and then adding that snippet into the head code of your HubSpot‑hosted site using HubSpot’s settings. Once installed and published, this snippet will load on all HubSpot‑hosted pages so Madlitics can capture clean, accurate attribution data from every visitor, whether they come from a landing page, blog post, or any other HubSpot‑hosted URL.

Register for a Madlitics Account

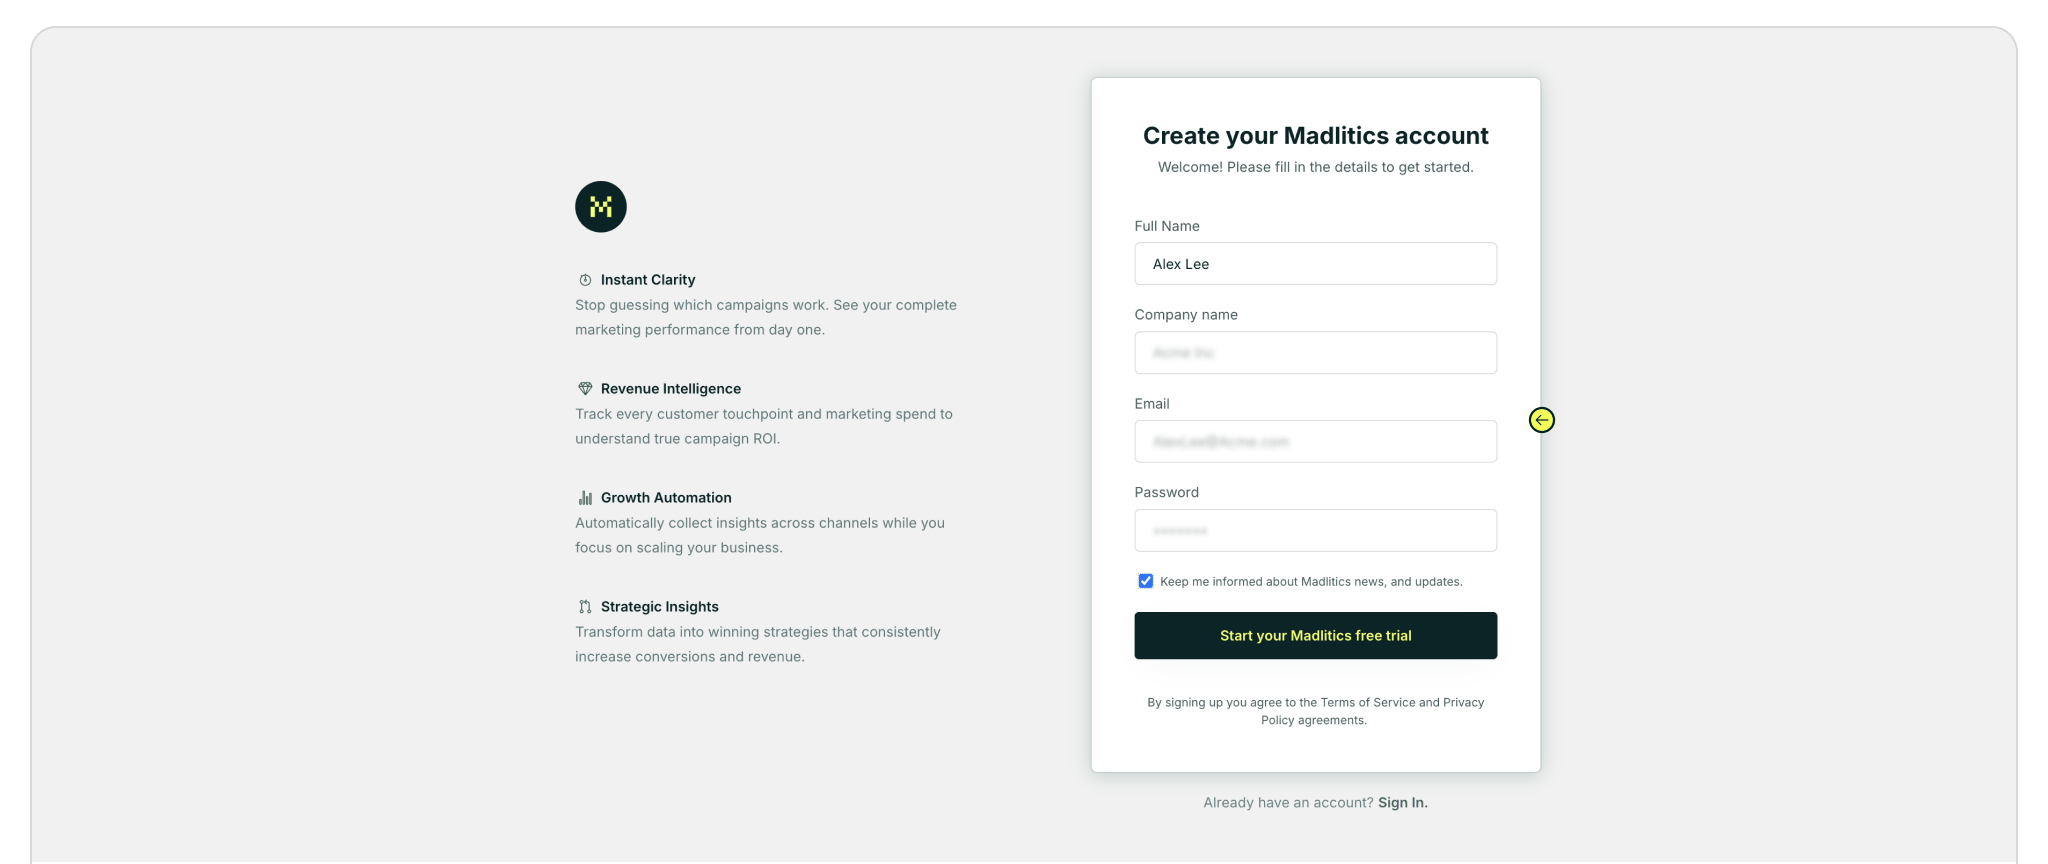
Prerequisite: Before you can install Madlitics, you’ll need to create a Madlitics account. Registration unlocks your dashboard, and copy the code snippet that powers attribution. This step only takes a minute and ensures you have everything ready before moving on to the platform-specific setup.

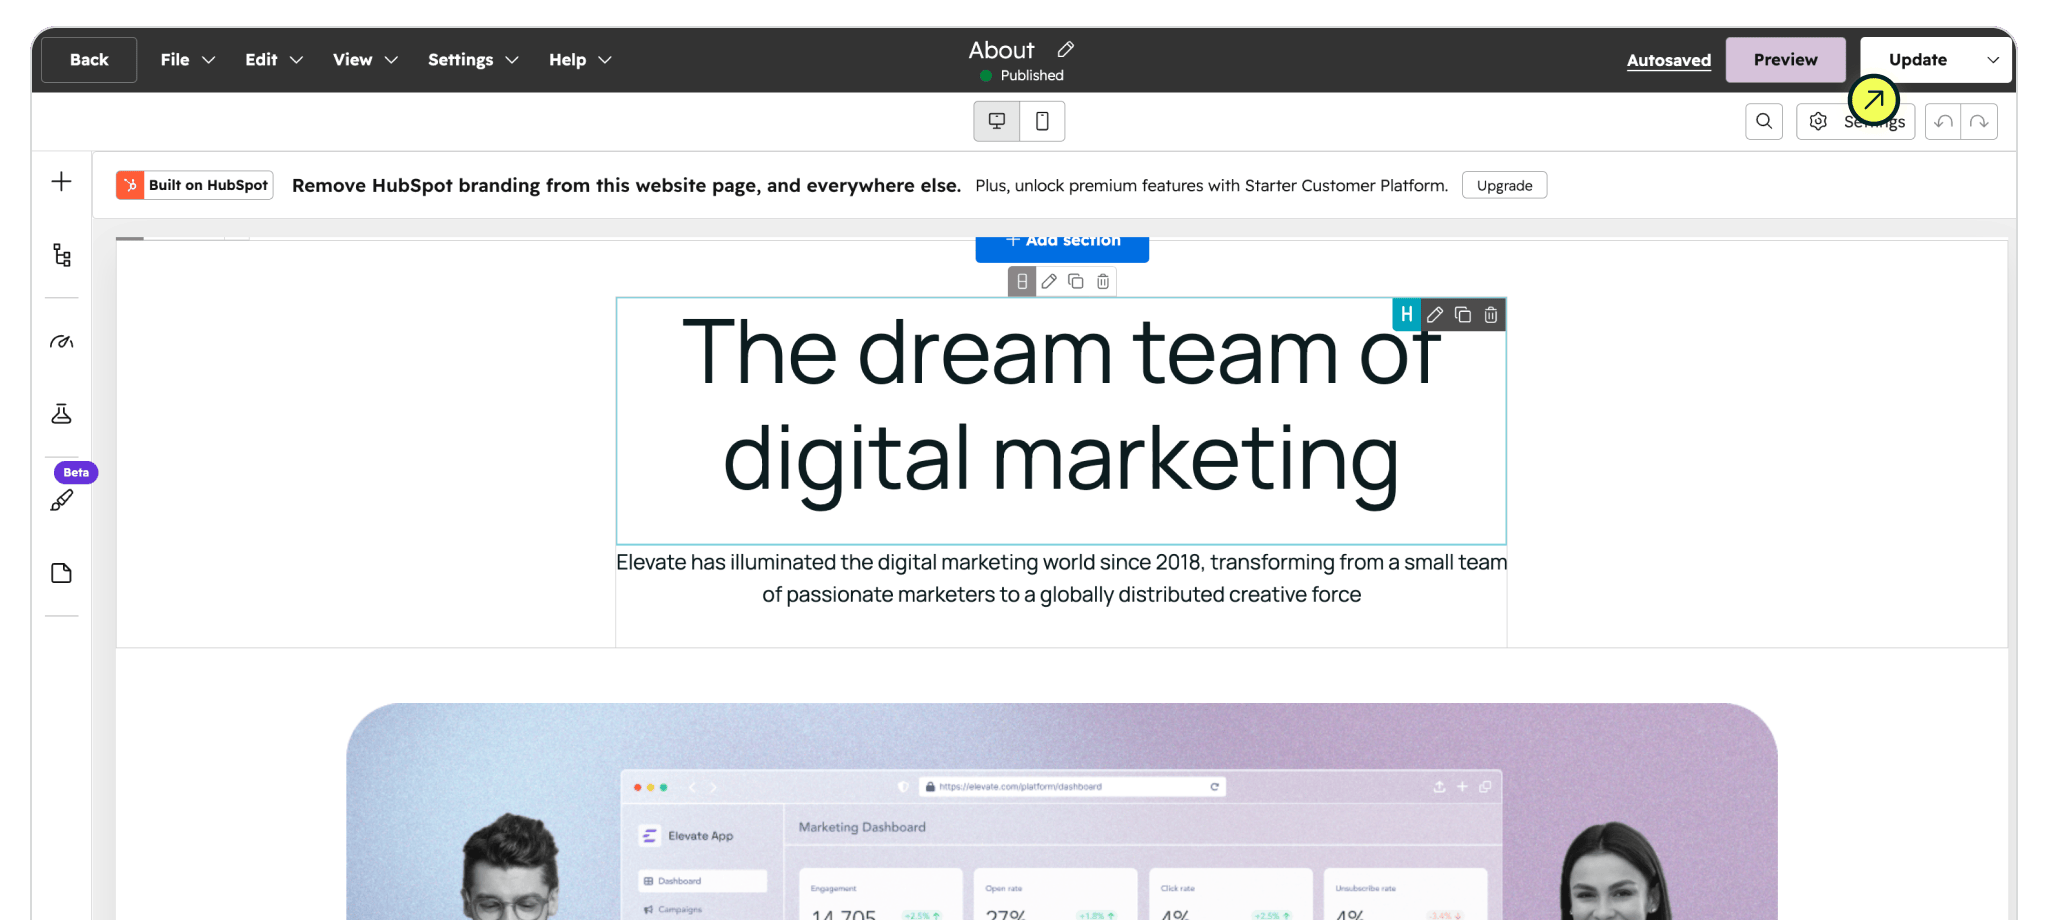
Step 1: Create your Madlitics account
Sign up for a free trial
on the Madlitics website to get started. Creating an account unlocks your dashboard, where you’ll manage your sites, access setup guides, site preferences, and access the code snippet you’ll need to install Madlitics

Start by signing up for a FREE Madlitics trial to begin capturing attribution data.

Fill out the registration form to create your account and unlock your dashboard

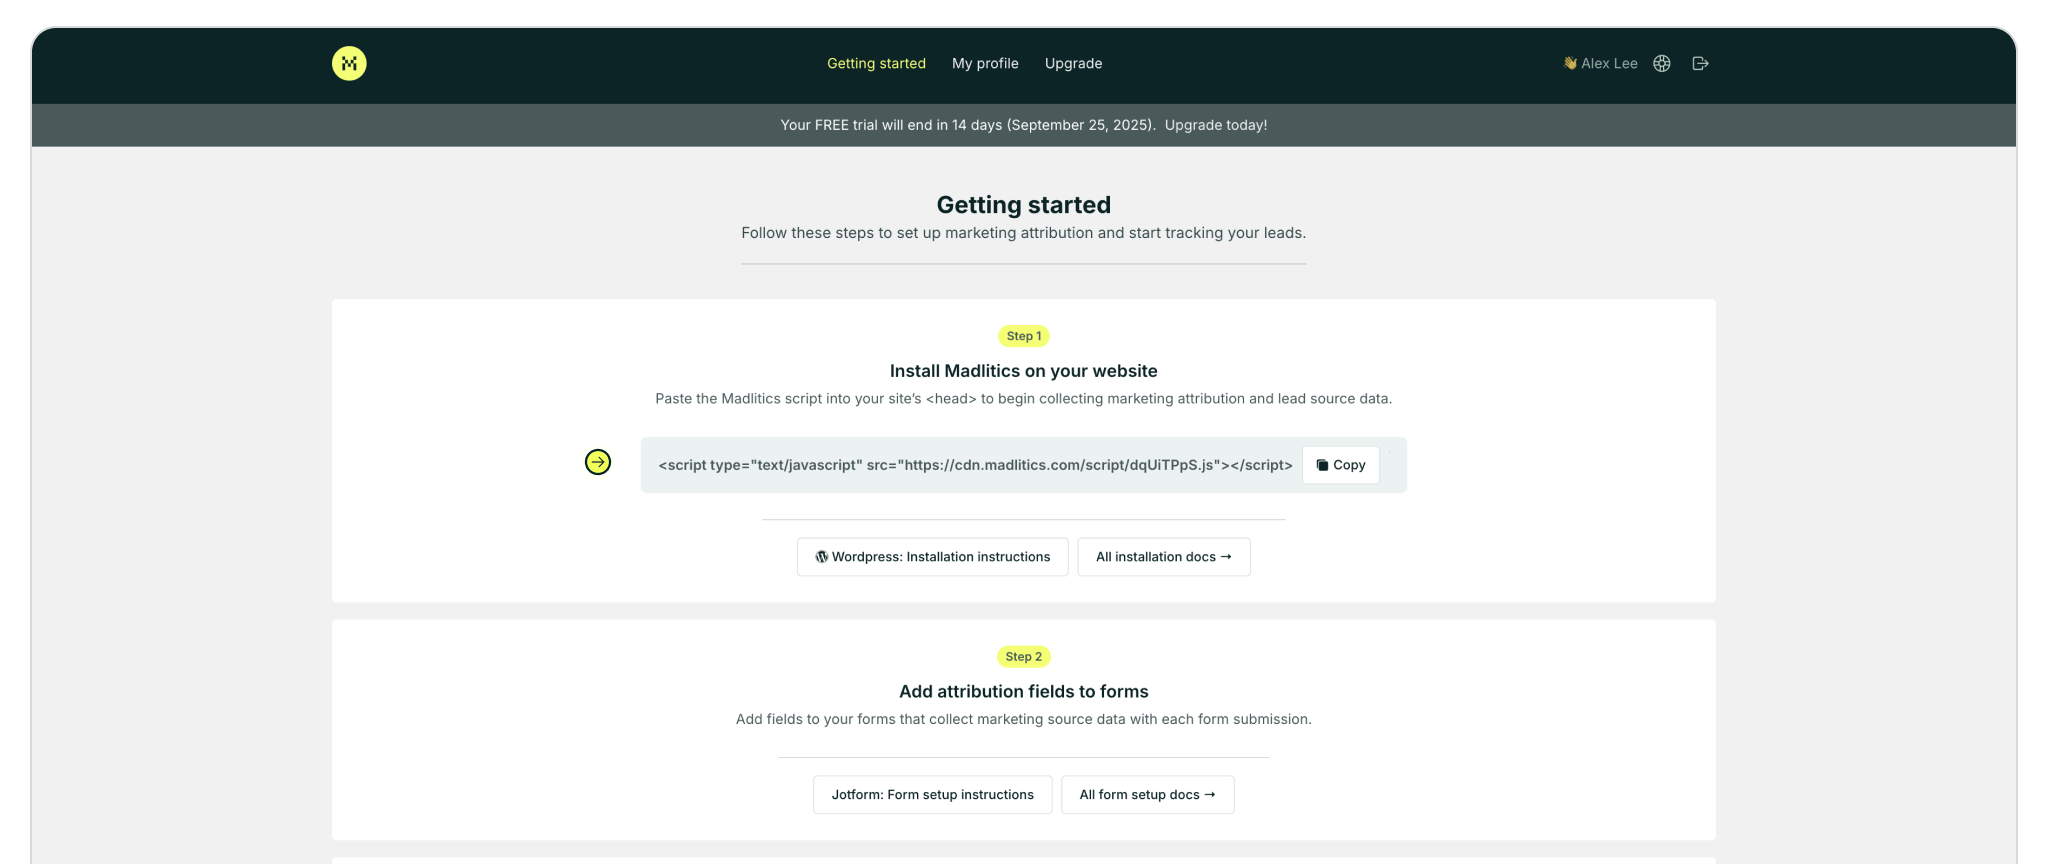
Step 2: Access your installation snippet
Once you’ve registered and logged in, you’ll land in your dashboard’s 'Get Started' section. Here, you’ll find your unique Madlitics installation snippet, which is required to enable tracking on your site.

Locate your unique installation snippet in the dashboard under Get Started → Step 1 → Copy Code Snippet.
Madlitics multi-channel attribution visualization, showing marketing platforms like TikTok, Instagram, Google, and Facebook. The graphic highlights how different sources contribute to high-performing marketing channels.
Screenshot of a form builder interface with a highlighted 'Hidden Input' field. Accompanied by text explaining how to install and set up Madlitics by adding hidden fields to capture marketing attribution data.
CRM interface showing a detailed view of captured attribution data, including marketing channels, segments, and landing pages. A business profile of a lead is displayed, highlighting how Madlitics enriches lead data for sales and marketing teams.
Graph showing new customer growth from TikTok, Instagram, Snapchat, and Google over time, with social media icons surrounding the chart and a callout for social revenue impact.

Access HubSpot settings

With your Madlitics snippet copied, the next step is getting it into HubSpot so attribution runs across all of your hosted pages. HubSpot lets you add scripts globally using the site header HTML, enabling the Madlitics snippet to run across your HubSpot‑hosted website and landing page once published.

Step 3: Navigate to HubSpot settings
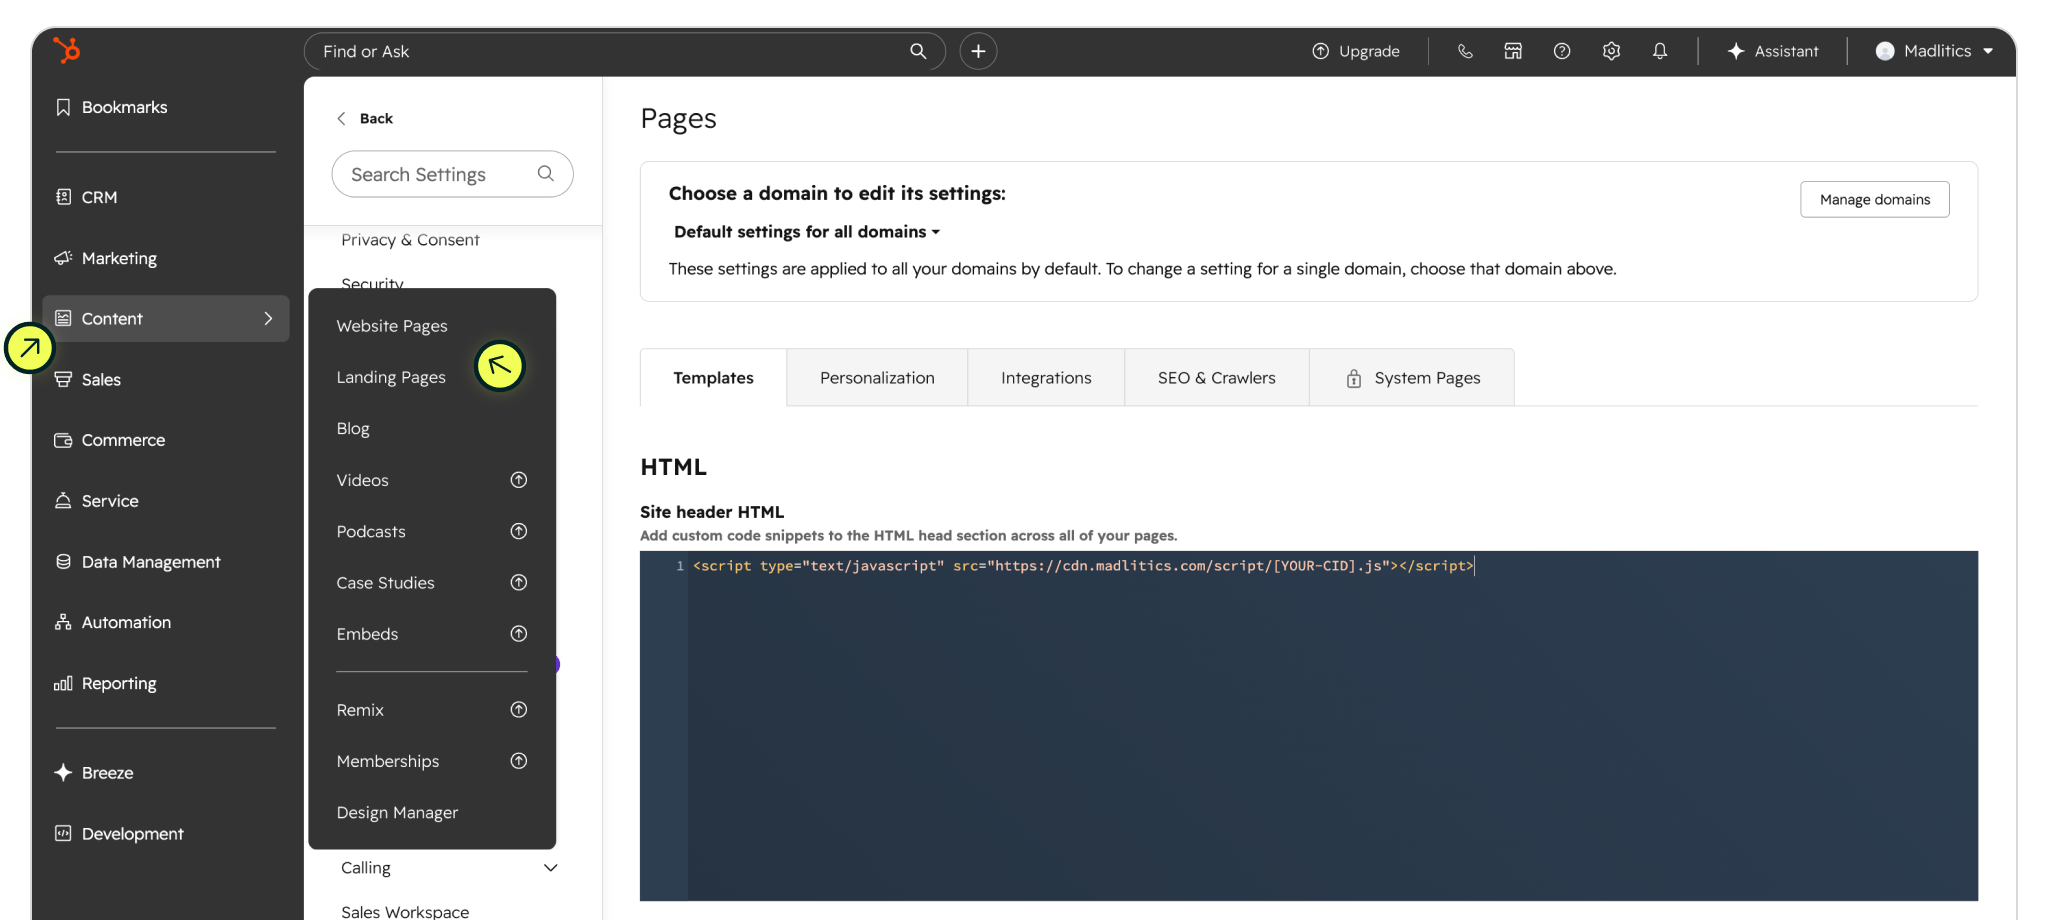
Start by opening your HubSpot dashboard and clicking the Settings icon in the top navigation.

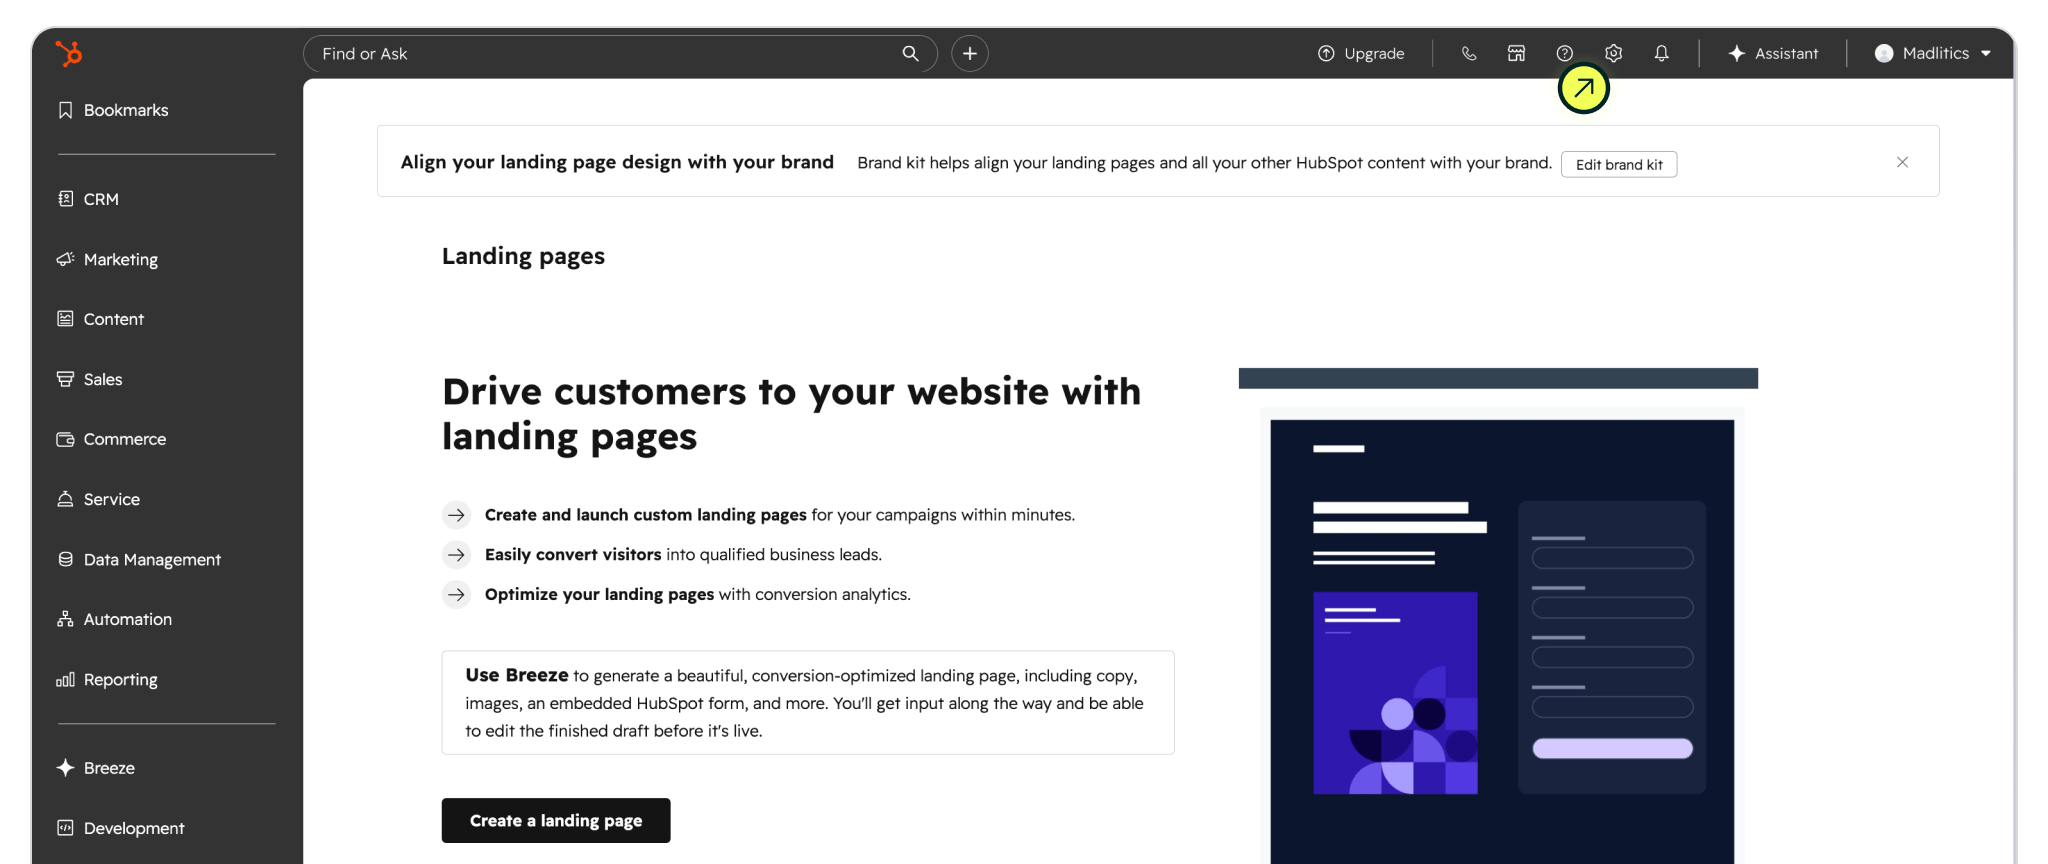
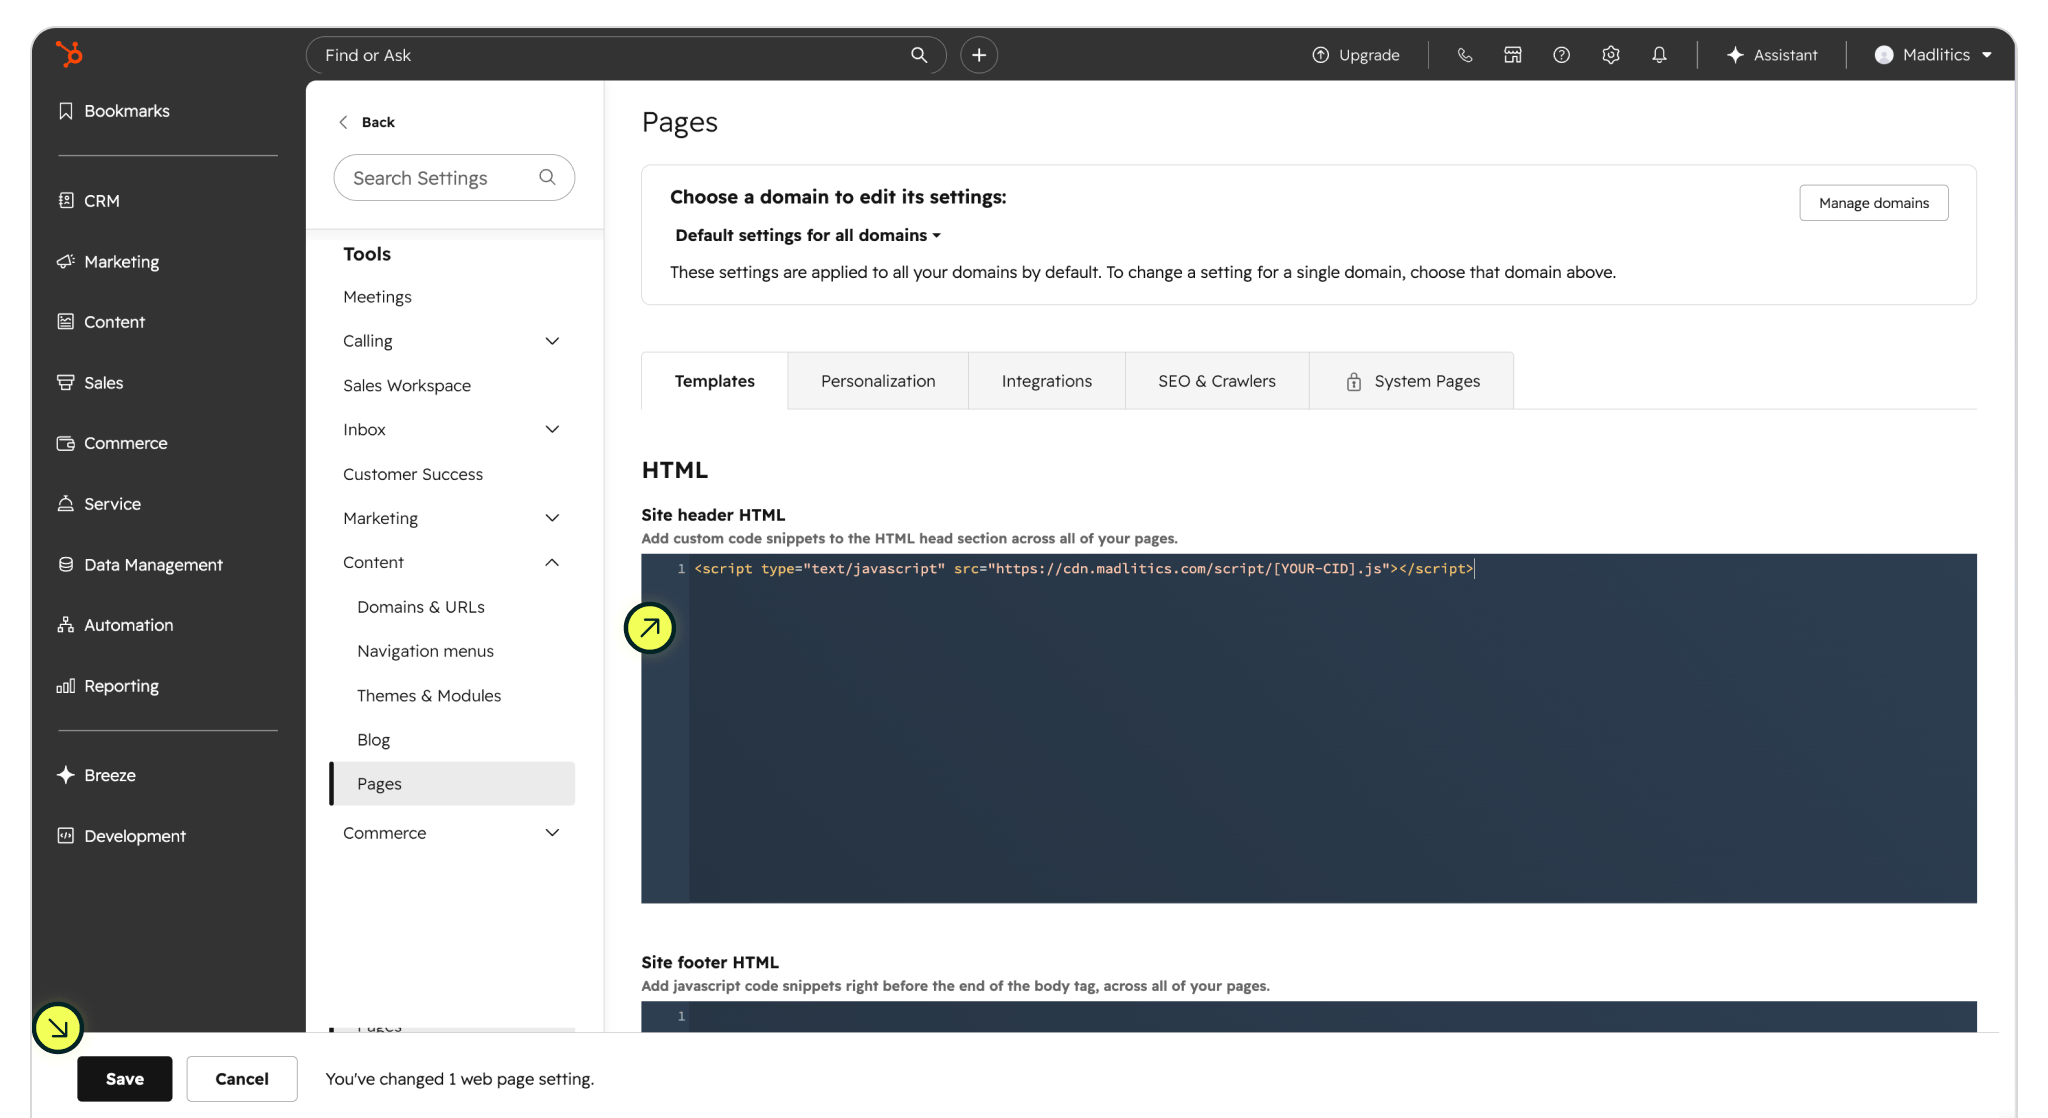
From the left-hand sidebar, navigate to Tools → Content → Pages. This is where you can manage global page settings, including custom code.

Click the Gear icon in the upper right to access the HubSpot settings

Scroll to the bottom of the settings options Tools → Content → Pages

Adding a customer script to HubSpot

Inside the HubSpot settings, locate the Pages settings, via the Tools section, inside the Content dropdown. You’ll see an option for Site header HTML, which controls scripts added to the <head> of pages.

Step 4: Paste the Madlitics snippet into this field, enabling Madlitics to load on every HubSpot-hosted page, including landing pages and website pages. Click Save to apply your changes.

Then, create a new or use an existing HubSpot‑hosted page and click Update or Publish. This pushes the script live and activates Madlitics across your site, so every visitor — including those who submit HubSpot‑hosted lead or embedded forms — can pass attribution data into your contact records.

For detailed instructions on setting up Madlitics with HubSpot-hosted forms and lead submission flows:
HubSpot-hosted setup guide: Setting up HubSpot-hosted pages and forms to collect marketing attribution.

Paste the Madlitics snippet into the Site Header HTML area, and click 'Save

Navigate to your HubSpot-hosted page, or create a new one, embed lead forms, etc.

Click 'Update' to push the script live and activate Madlitics across your site

Verifying Madlitics is installed

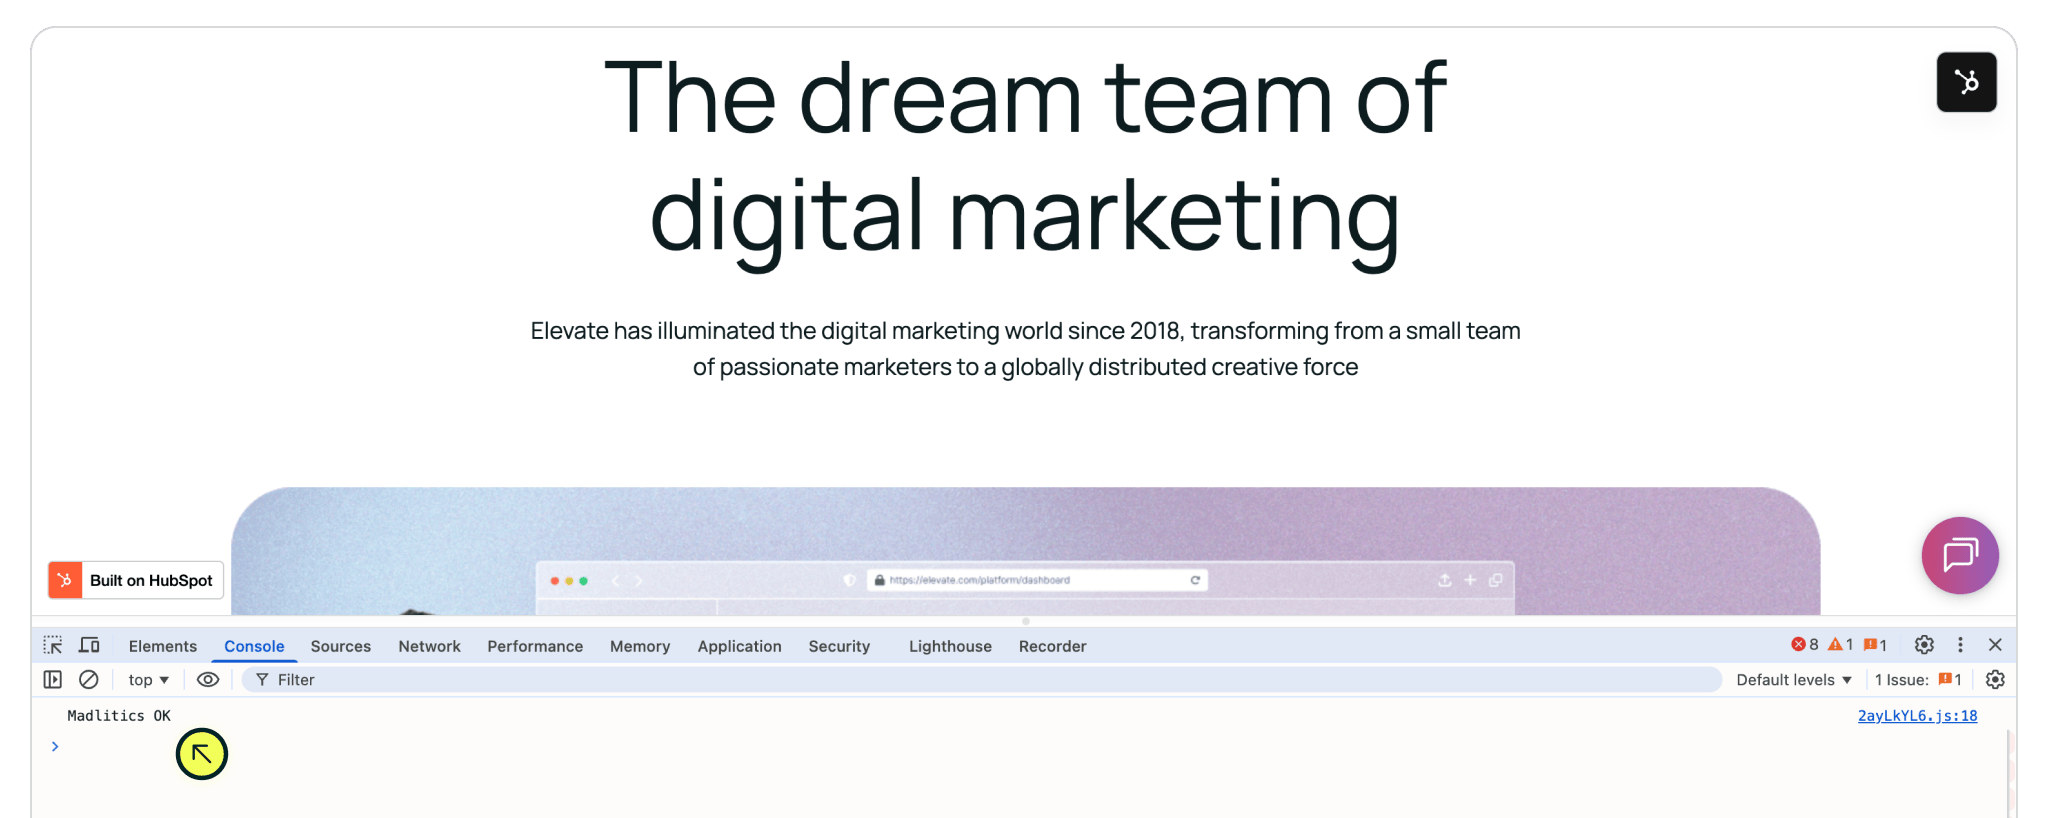
To confirm that the Madlitics snippet is working, open your live site in a browser and inspect the page source. Right-click anywhere on the site, select Inspect, and switch to the Console tab. Look inside the 'Madlitics OK' messaging. If you see it, Madlitics is installed and setup correctly.

Now you're ready to configure hubspot forms to collect attribution data, utm parameters, google ads, and more.

Madlitics OK indicates the script has been installed and is running correctly.

Troubleshooting: 
• If there is NO Madlitics messaging, the script may not have been published to the live site or you may be seeing a caching issue.
• If there is a different message from Madlitics, there may be an issue with the account, plan tier, domain, etc. Feel free to reach out to the team, we're here to help.

Next: Configuring your forms to capture marketing attribution:

• Configure Hubspot forms for hosted-pages and sites

Stacked bar chart showing lead generation by marketing channel over time, comparing sources like Paid Search, Paid Social, Organic Search, Direct, and Email. Helps visualize which channels drive the most traffic.
Stacked bar chart illustrating lead volume across different marketing campaigns, including Black Friday, Retargeted, Spring Promo, Referral, and SEO. Highlights trends in campaign effectiveness.
Line chart displaying lead-to-customer conversion rates by channel, comparing Google Ads, Facebook Ads, LinkedIn Ads, Organic Search, and Email. Shows how different sources drive qualified leads over time.
Line chart showing revenue performance by marketing campaign, comparing Google Ads, Facebook Ads, and LinkedIn Ads. Helps identify top-performing and underperforming campaigns.

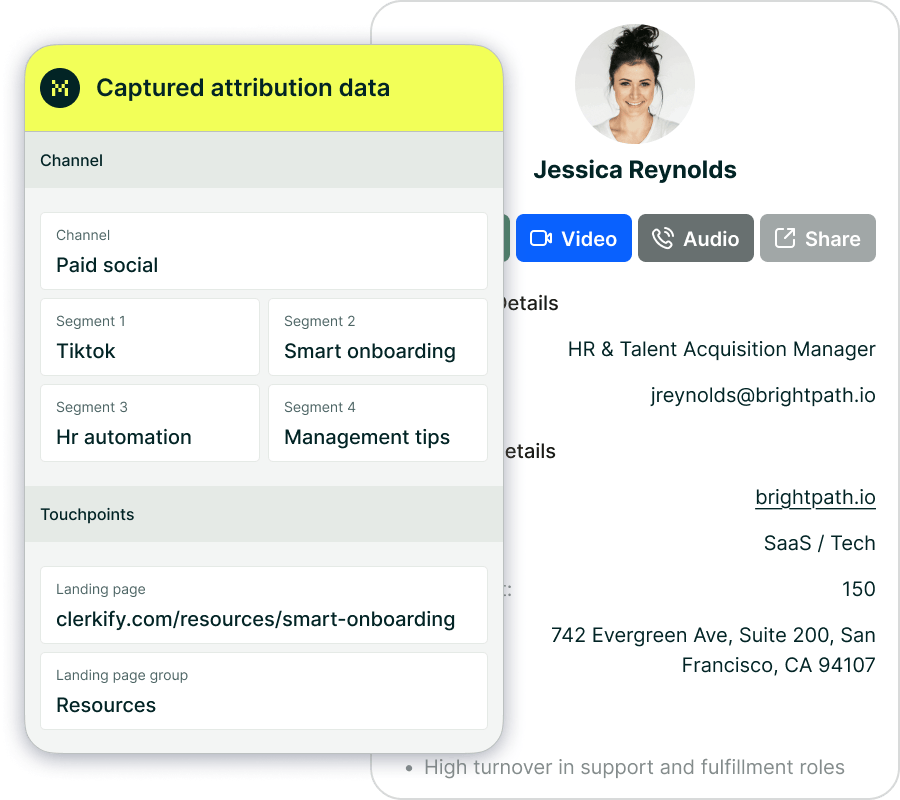
HubSpot’s hosted websites and landing pages give you the flexibility to design and launch polished campaigns without leaving your CRM — while still letting you add the scripts that power your marketing stack. Adding the Madlitics snippet to your HubSpot site header ensures every visitor interaction is captured as clean, first‑party attribution data, directly tied to your contacts and reports.

That means you’ll know exactly which channels, campaigns, and pages are driving leads and pipeline, with attribution flowing automatically into your HubSpot contact records, reports, and dashboards.

If you’d like a hand getting started, our team’s here to help. We’ll walk you through the setup so you can focus on building, while Madlitics takes care of the attribution.

Related articles to get you started with Madlitics

Frequently asked questions

Answers to your top questions about our UTM parameters
Everything you need for reliable lead attribution
Accurate, persistent, and automated tracking — so your campaigns perform at their best.
Performance icon symbolizing marketing campaign effectiveness and results tracking.
Outperforms basic UTM tracking
Madlitics captures, categorizes, and persists attribution data across sessions, giving you a complete, structured view of what’s working in your marketing. Say goodbye to losing attribution when users navigate your site, struggling with formatting inconsistencies, and ingored non-UTM traffic.
Capture icon indicating data collection from various marketing channels and sources.
Capture all traffic
Madlitics categorizes all inbound leads — whether they have UTM parameters or not — so every conversion is accounted for, and you won't miss out on Organic Search, Organic Social, and Referral traffic.
Routing icon representing the flow of marketing data and attribution pathways.
Attribution across pages and sessions
A LinkedIn ad click should be attributed correctly—even if the visitor signs up on a different page later. If someone clicks an ad, browses multiple pages, then submits a form later, Madlitics persists attribution data across sessions, ensuring your reports reflect true performance.
List icon representing structured marketing data, reports, or campaign breakdowns.
Cleaner, more reliable data
Duplicate UTMs and inconsistent formatting break reports and mislead teams. Madlitics cleans and organizes attribution data before sending it to your CRM, giving you accurate insights.
Target icon symbolizing precise audience targeting and marketing campaign focus
See which content converts
Attribution isn’t just about where visitors came from—it’s about what convinced them to convert. By capturing landing page data alongside UTM parameters, Madlitics shows you which blog posts, case studies, or pricing pages drive the most revenue, helping you scale content that works.
Action icon representing campaign execution, optimization, and engagement.
Transform form submissions into actionable insights
Madlitics connects marketing touchpoints to lead generation, ensuring every form submission is fully attributed — optimize ad spend by identifying high-ROI channels, refine messaging based on what content drives engagement, make data-driven decisions with clean, structured reports, and more.