Support
Setting up WSForms for Marketing Attribution and capture UTM parameters
Step-by-step setup to add Madlitics fields to WSForms so every response includes channel, campaign, and landing page attribution.
Start capturing attribution →
WSForms is a popular WordPress form builder that makes it easy to create everything from simple contact forms to advanced lead capture and registration flows. With its drag-and-drop interface, you can quickly build and publish forms, customize fields to match your workflow, and connect submissions to the tools your team already uses.
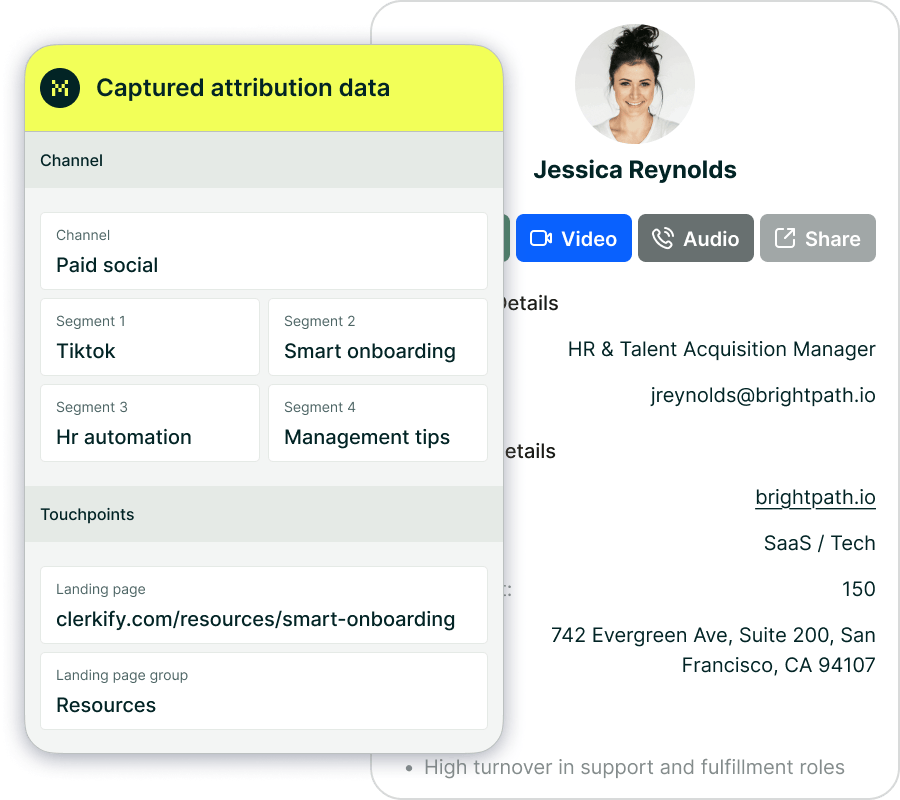
When paired with Madlitics, each submission is automatically enriched with marketing context — including the channel, campaign, and landing page that brought the visitor to your site. This gives you clear visibility into where every lead comes from, without adding friction for users or relying on perfect UTM tagging.
In this guide, we’ll walk through creating or editing a form in WSForms, adding the required Madlitics fields, and publishing your form so you can start capturing clean, first-party marketing data right away.
💆 Heads-up: Make sure Madlitics is installed on the site/domain where this WSForms form lives (ie. Wordpress). The form alone won’t capture attribution data — Madlitics needs to be running on the page to pass lead data into your submissions.
If you haven't already you'll need to Install Madlitics on Wordpress.
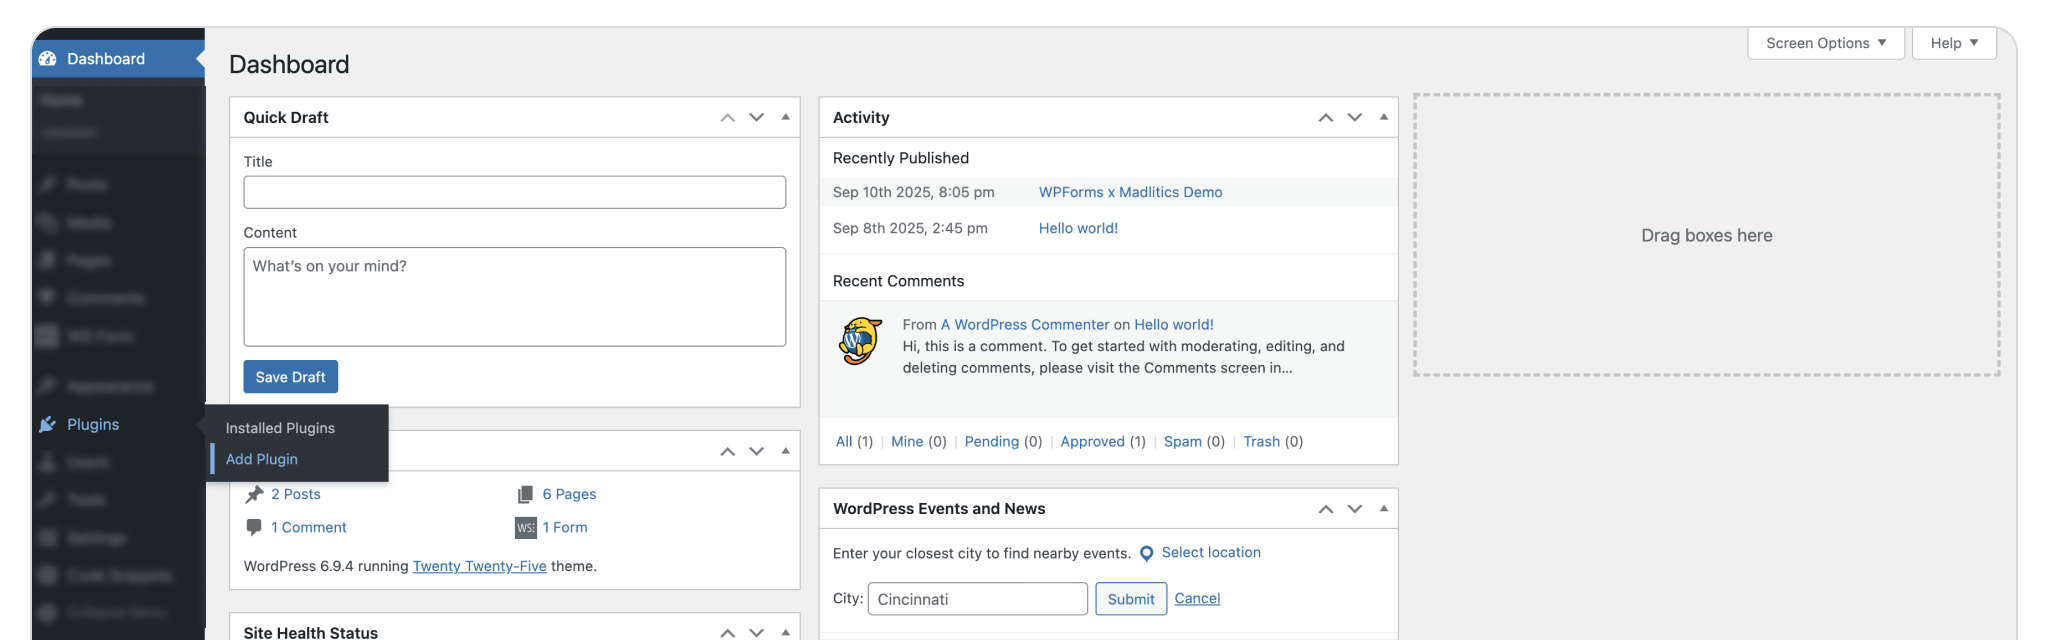
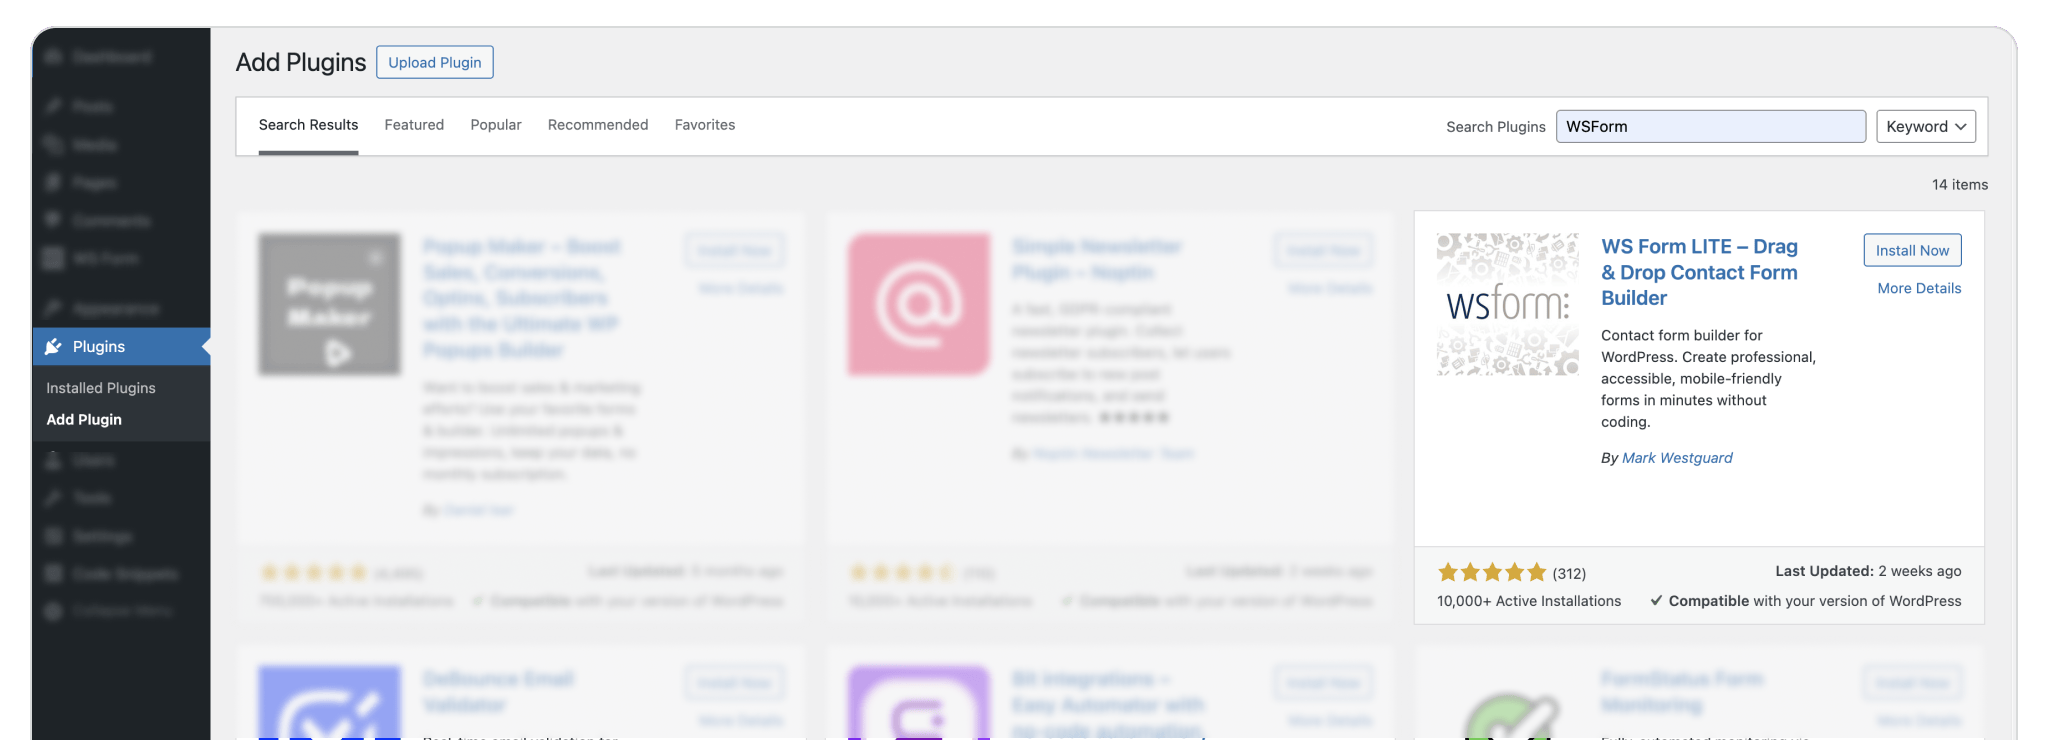
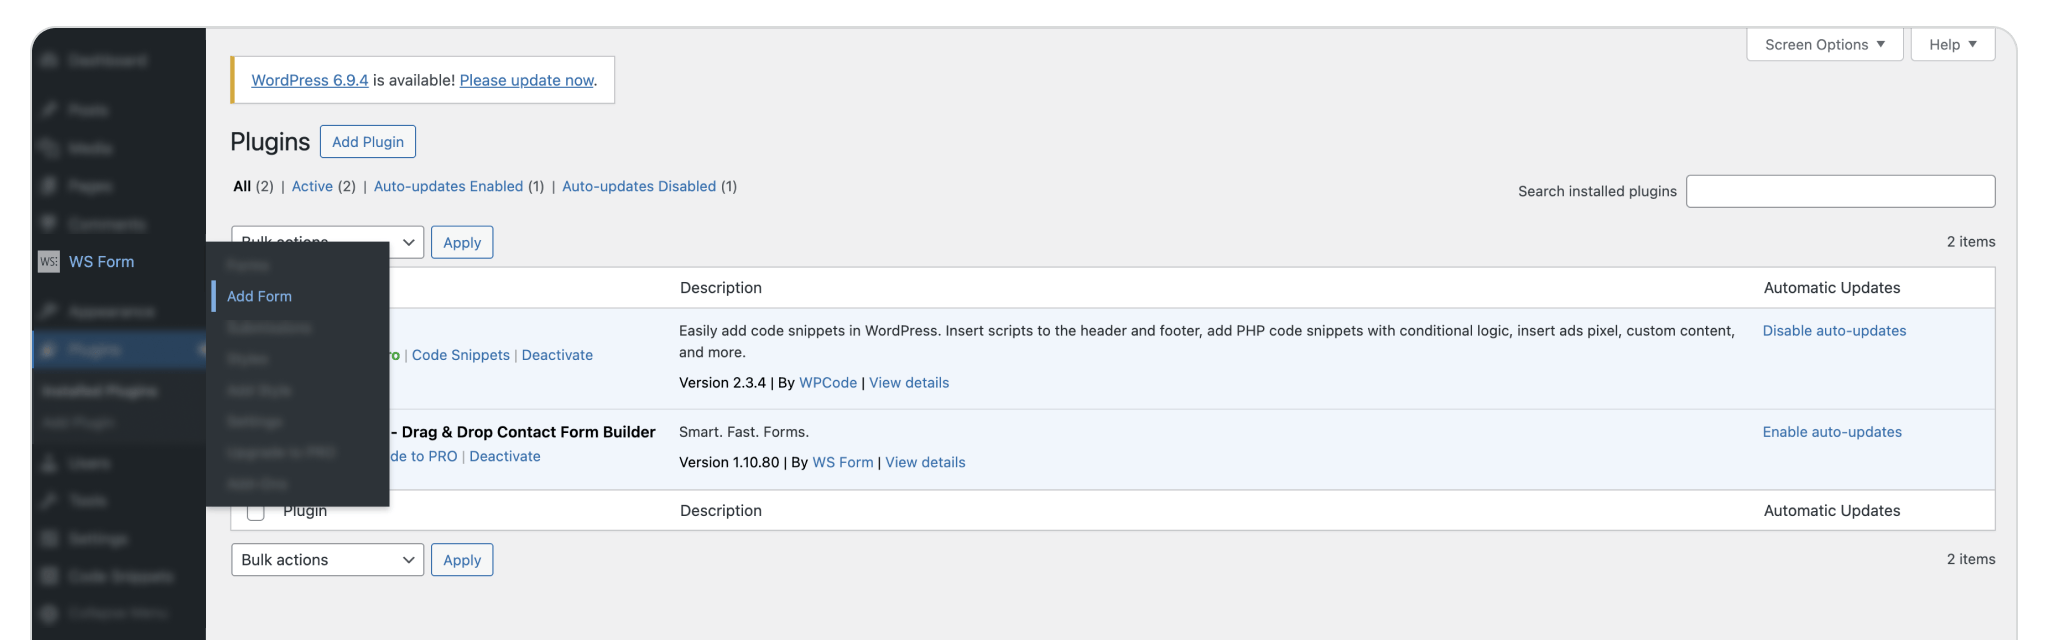
WSForm is available right in the WordPress Plugin Directory, so setup takes only a minute. From your WordPress dashboard, go to Plugins → Add New, then search for WSForm. When it appears in the results, click Install Now. Once the installation completes, select Activate to enable the plugin.
You’ll know it’s ready when a new WSForm menu shows up in your WordPress sidebar — that’s where you’ll build and manage all your forms going forward.
Plugins → Add New → Install → Activate


With WSForm active, you’re ready to create a form that collects both your lead details and Madlitics attribution data. From your Wordpress dashboard, open the WSForm menu and select Add Form to start building.
You can begin with a Blank Form for full customization or choose a Template to get up and running faster — either option will integrate smoothly with Madlitics once you add the hidden attribution fields in the next step.
Already have a form you’d like to use? Simply open it from your Forms list and click Edit to prepare it for Madlitics tracking.
Path: WSForm → Add Form → Blank Form or Template

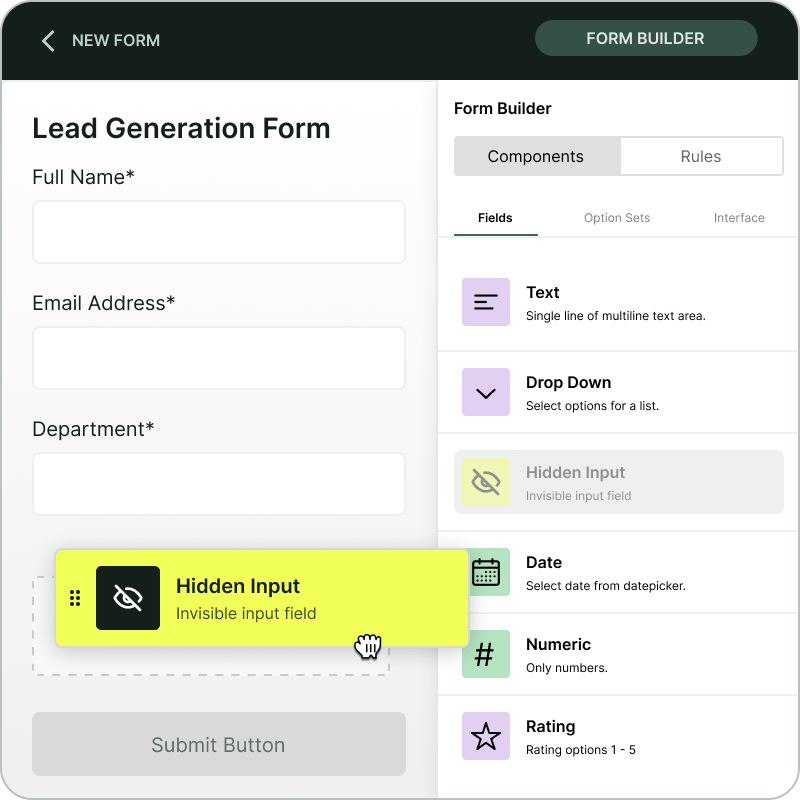
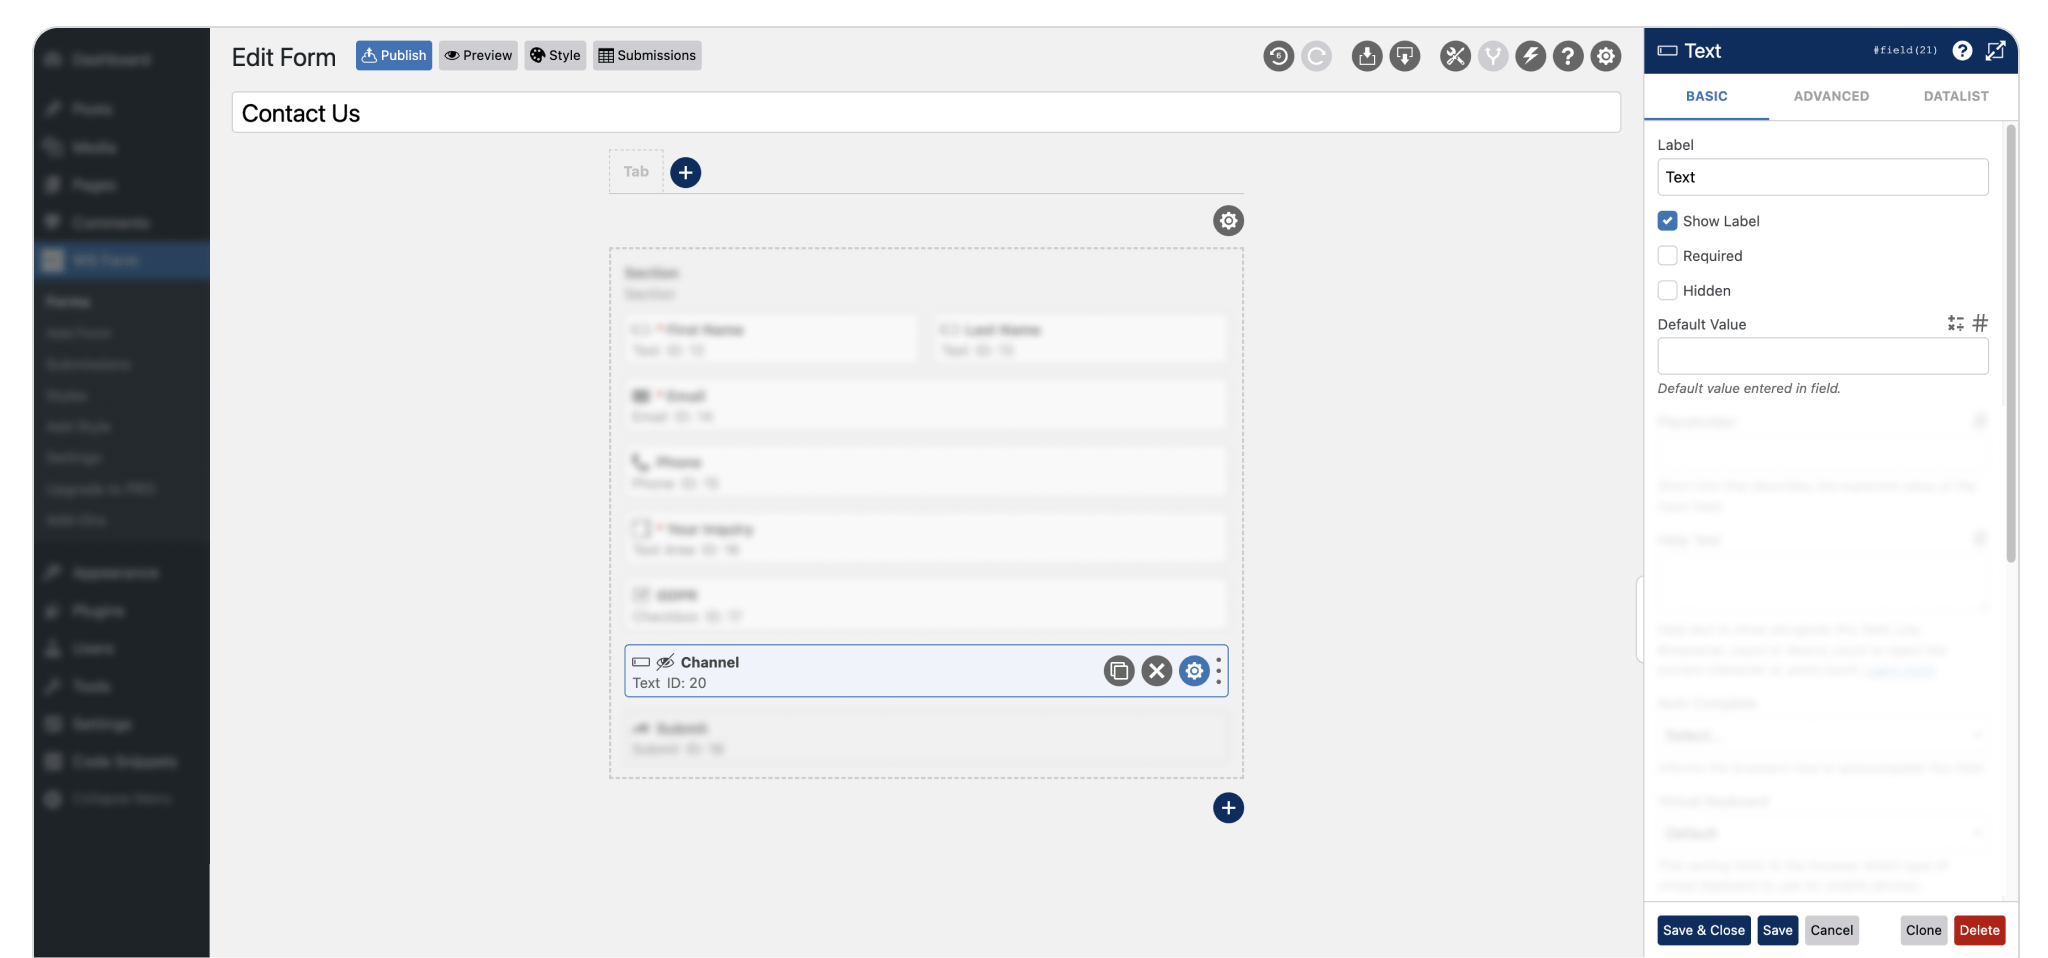
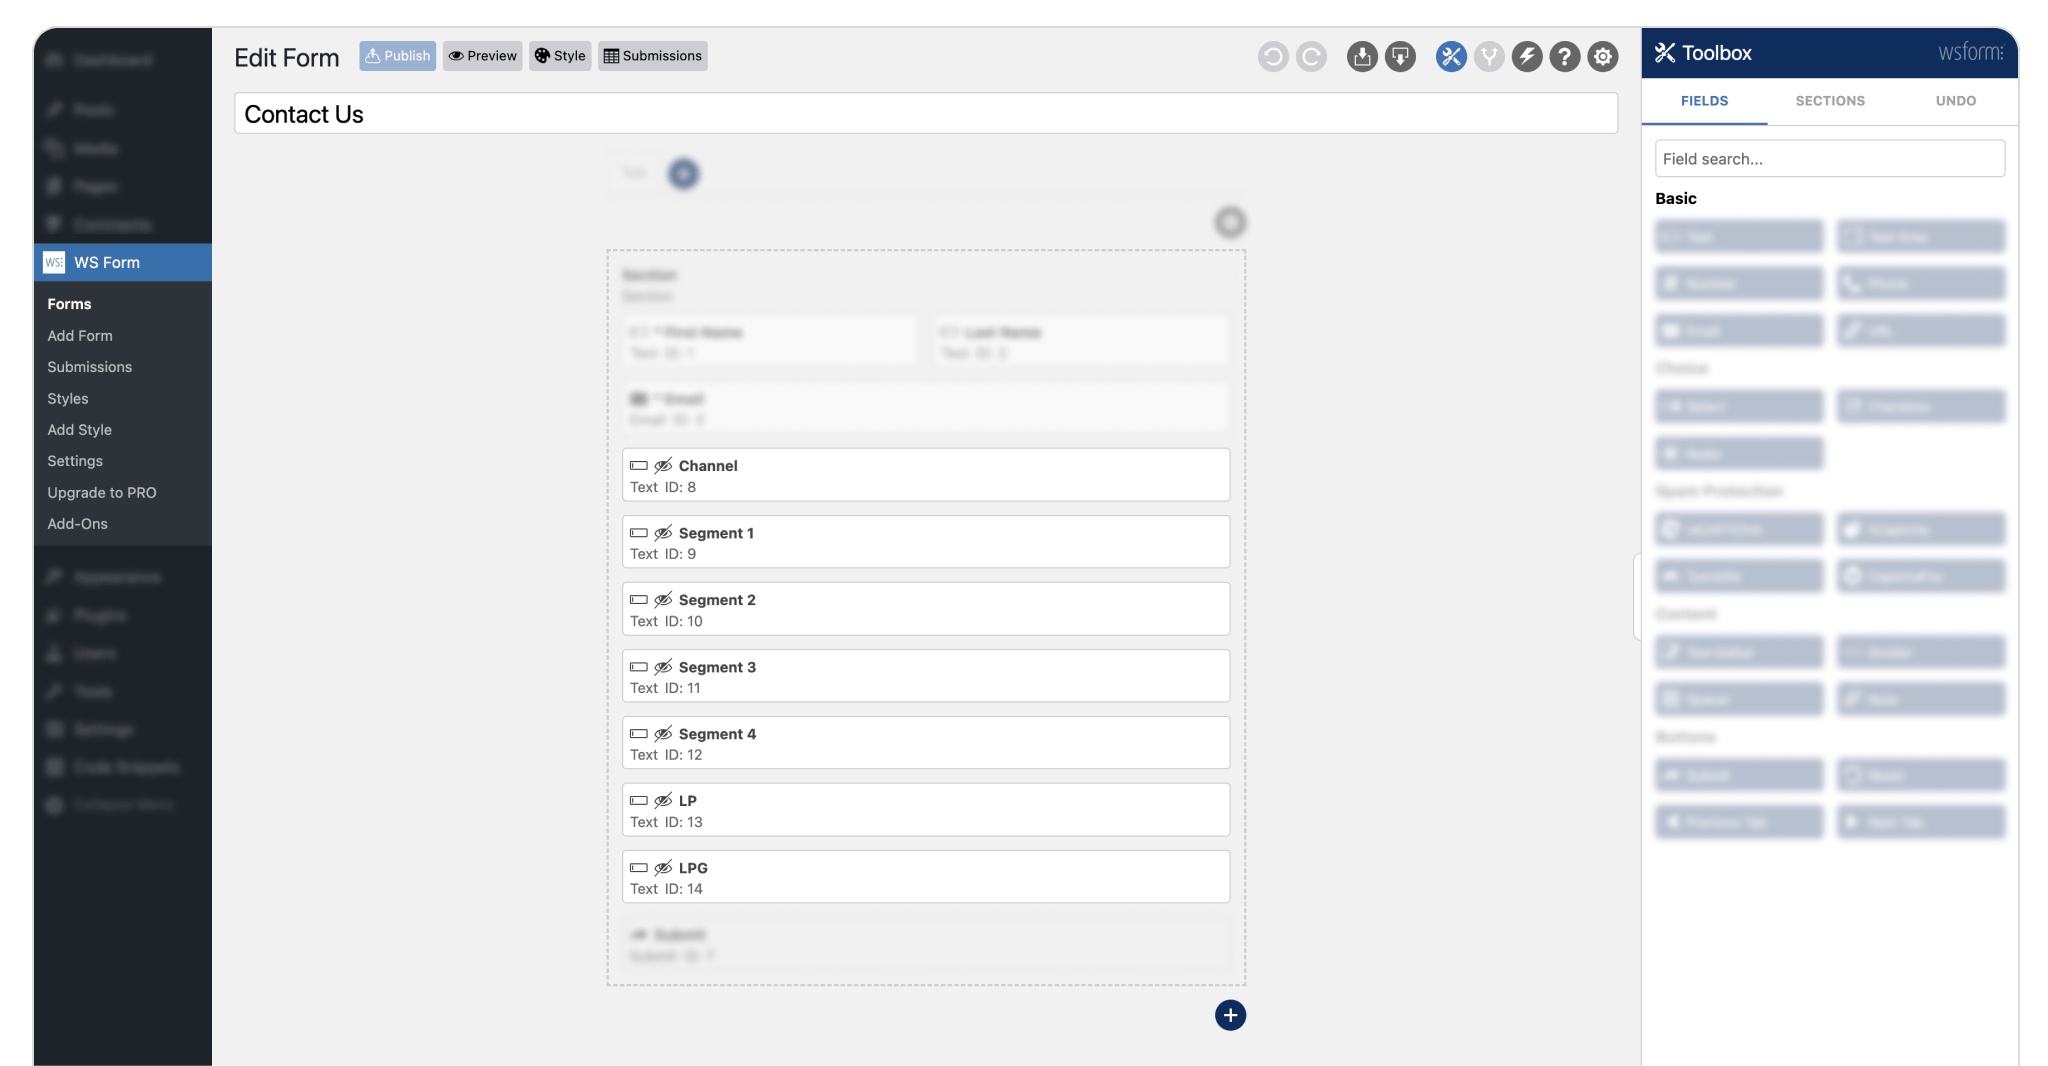
You can build your form however you like — whether that’s a simple contact form or something more advanced. To ensure attribution data is captured with every submission, you’ll need to add seven (7) Madlitics fields. These fields work automatically in the background, collecting key details such as channel, campaign, and landing page without adding extra form inputs for your visitors.
From the WSForm Toolbox, drag a Text field into your form. Then open the field’s Settings and update its Label, Default Value, and Hidden option to match the correct Madlitics field. For example, to configure the first field, set the Label to Channel, the Default value to [channel], and make sure the Hidden option is enabled so this field doesn’t show on the live form but still submits its value.
Repeat this process for each Madlitics field value. Once all seven are added and configured, click Publish. Your form is now ready to automatically capture rich attribution data alongside your lead details.
For deeper customization and a full list of supported field/value pairs, see Madlitics field value pairs.


Marketing Channel Category
Categorizes the visit’s marketing channel based on multiple signals, including traffic type, referring domain, and known platforms.
Field label: channel
Default value: [channel]
Hidden: enabled
Segment 1
Captures the source of the traffic, identifying the specific platform, publisher, or partner that sent the visitor to your site; for paid traffic, this field records the utm_source, for organic traffic the platform, for referrals the referring domain, and for direct traffic no value is captured.
Field label: segment1
Default value: [segment1]
Hidden: enabled
Segment 2
Captures the campaign-level details associated with the visit, identifying which campaign, promotion, or initiative led the visitor to your site; for paid traffic, this field records the utm_campaign, for organic traffic the referring domain, and for direct traffic no value is captured.
Field label: segment2
Default value: [segment2]
Hidden: enabled
Segment 3
Captures the keyword, creative variation, or content-level detail that influenced the visit, such as a paid search term, specific ad, post type, or format; for paid traffic, this field records the utm_term, for organic traffic the full referring URL when available, and for direct traffic no value is captured.
Field label: segment3
Default value: [segment3]
Hidden: enabled
Segment 4
Captures the audience, ad group, or offer associated with the visit, showing how the traffic was segmented within a campaign; for paid traffic, this field records the utm_content, and for organic and direct traffic no value is captured.
Field label: segment4
Default value: [segment4]
Hidden: enabled
Landing Page
Captures the exact page where the visitor first entered your site, recording the original entry point of the session.
Field label: lp
Default value: [lp]
Hidden: enabled
Landing Page Group
Captures the category or logical grouping of the landing page, allowing multiple related entry points to be analyzed under a shared identifier.
Field label: lpg
Default value: [lpg]
Hidden: enabled
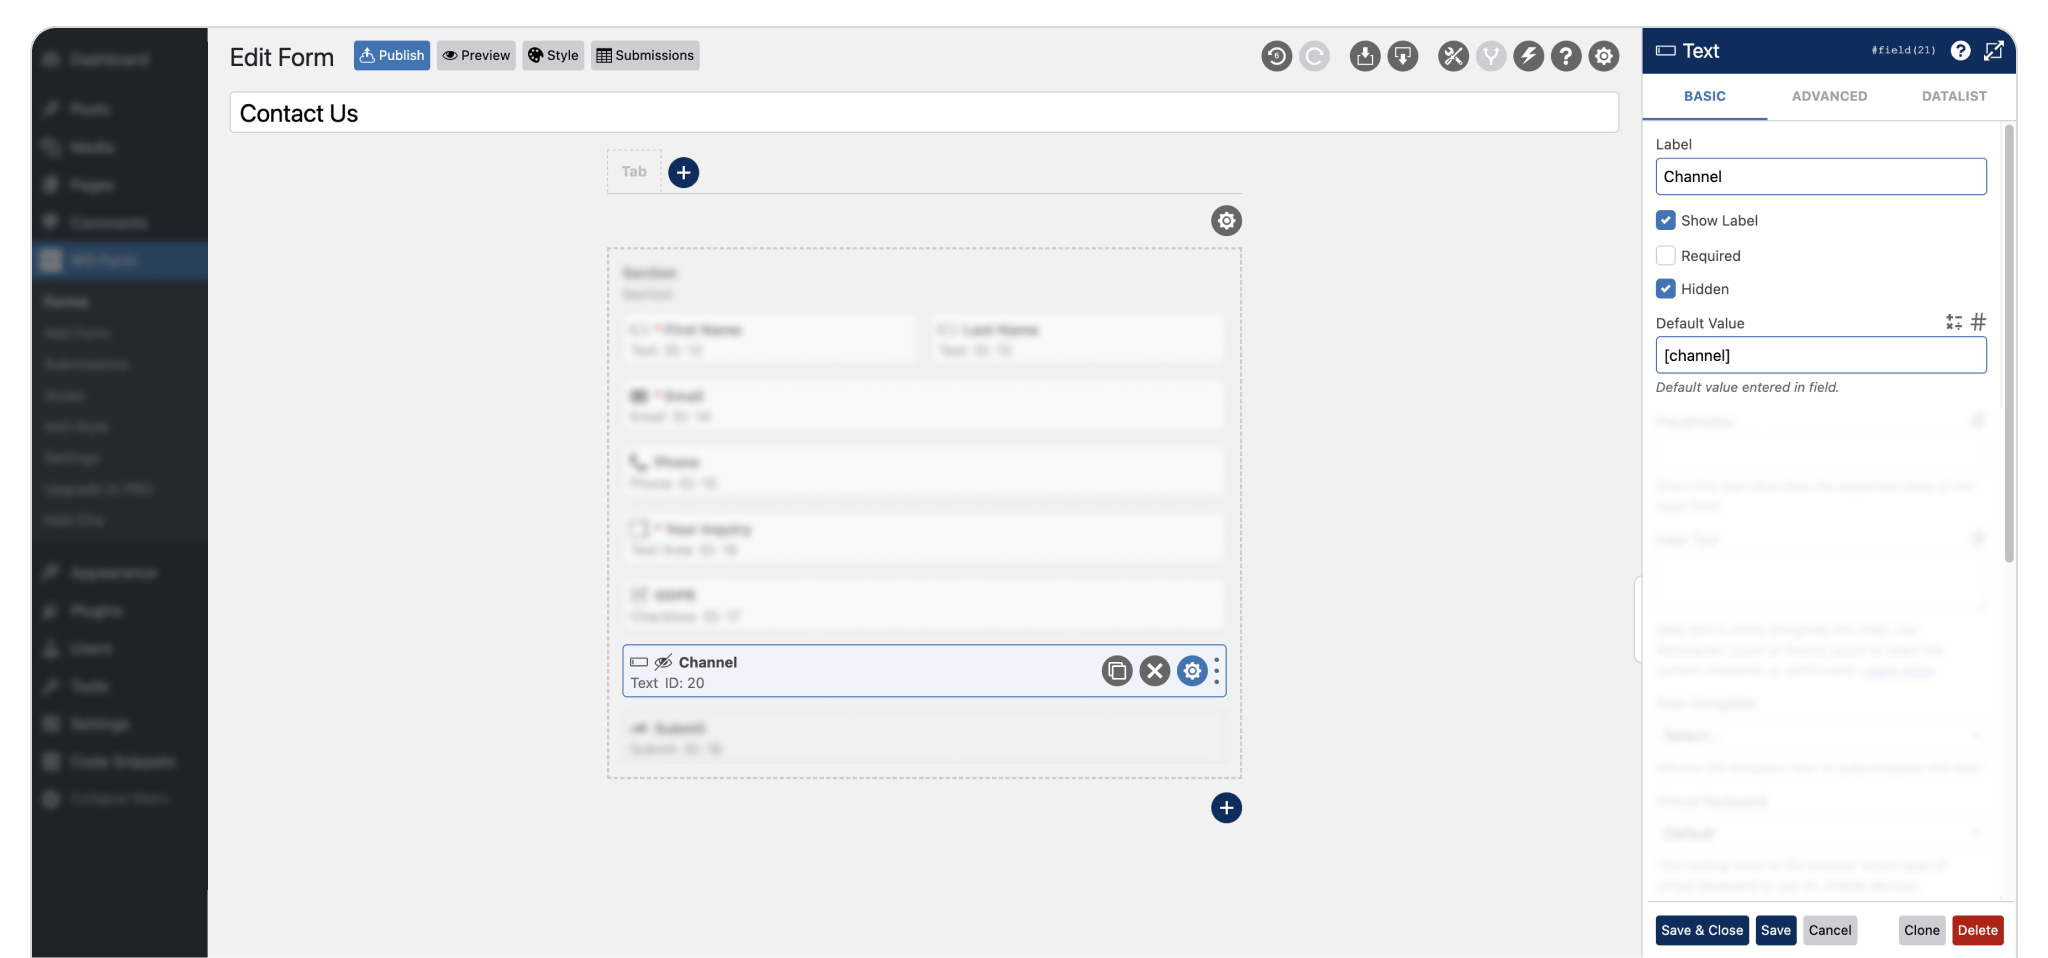
Channel, the Default value to [channel], and make sure the Hidden option is enabled
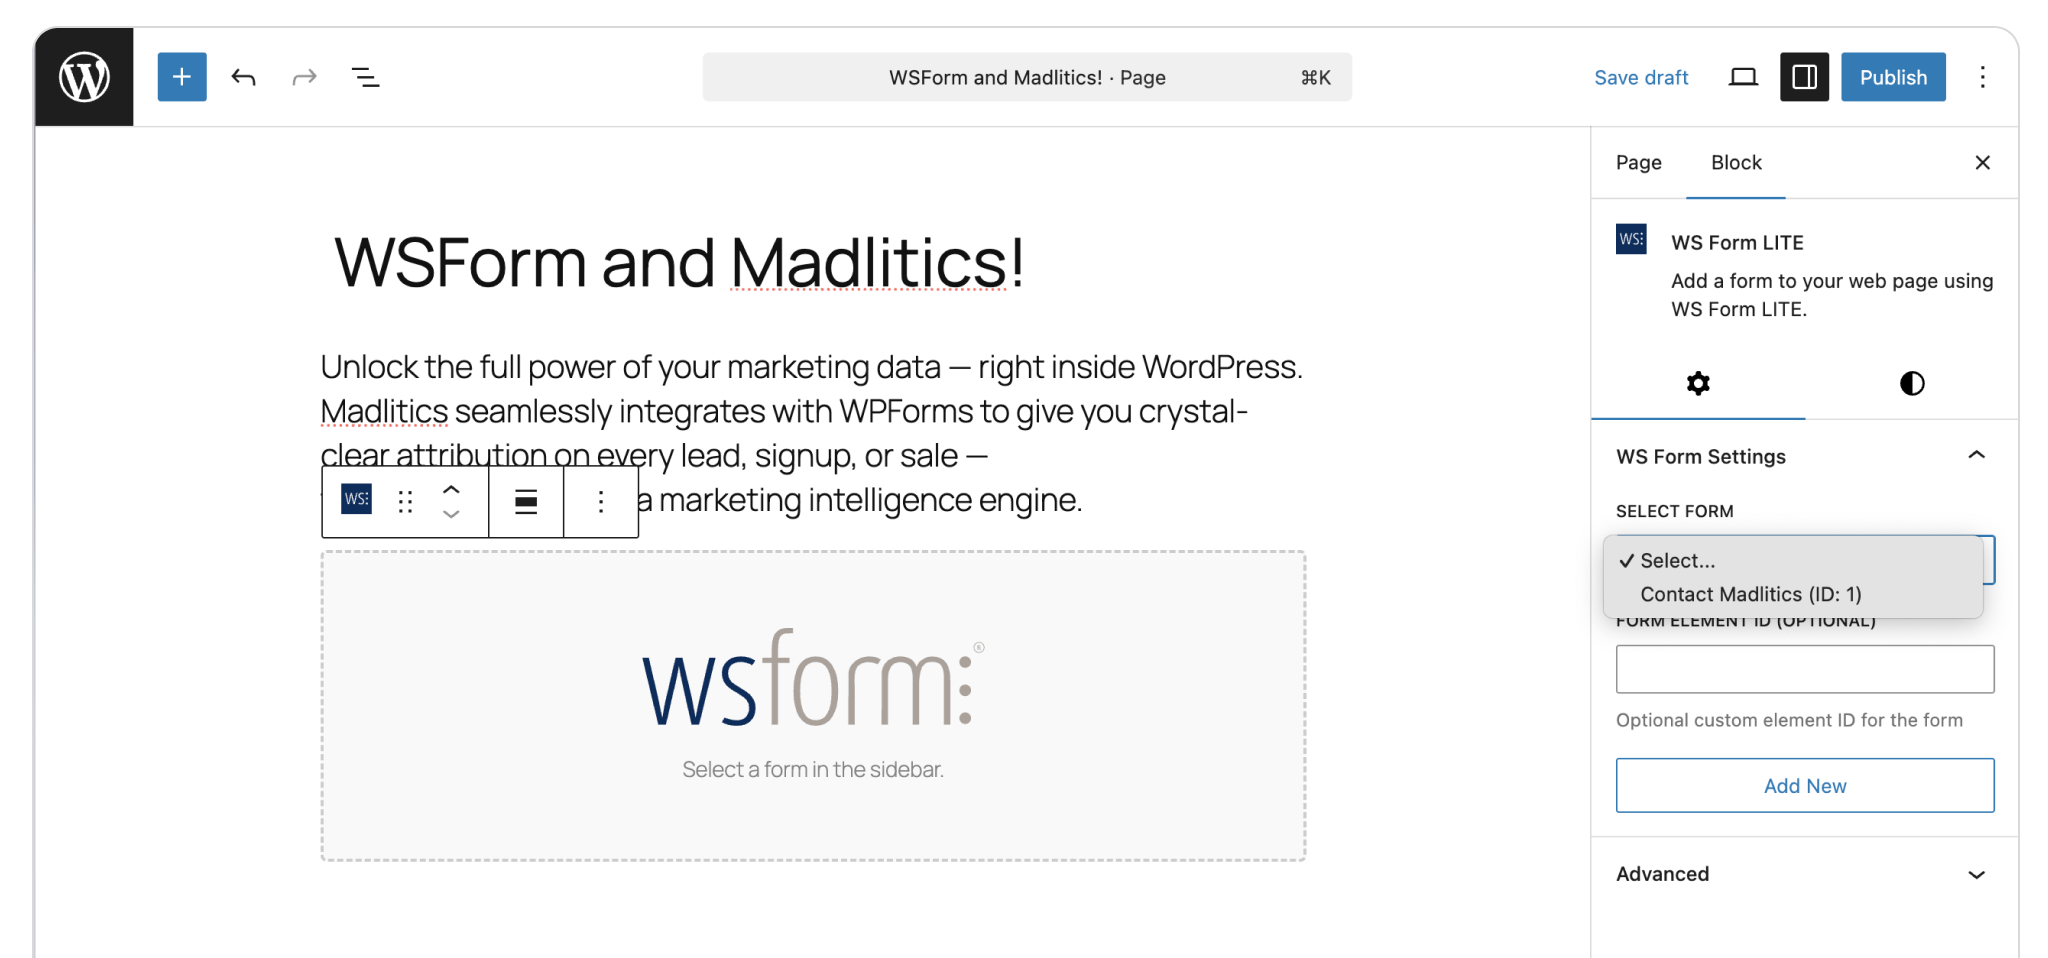
Choose the page or post where you want to start capturing marketing attribution data with your WSForm. In the WordPress editor, click Add Block, search for WSForm, then select the WSForm block. From the block settings, use the Form dropdown to choose the form you just configured with Madlitics fields, and it will be embedded directly on the page.
You can repeat this process on as many pages or posts as you like so that Madlitics attribution data is captured wherever your forms appear.
Add Block → Search “WSForm” → Select WSForm → Select form from sidepanel
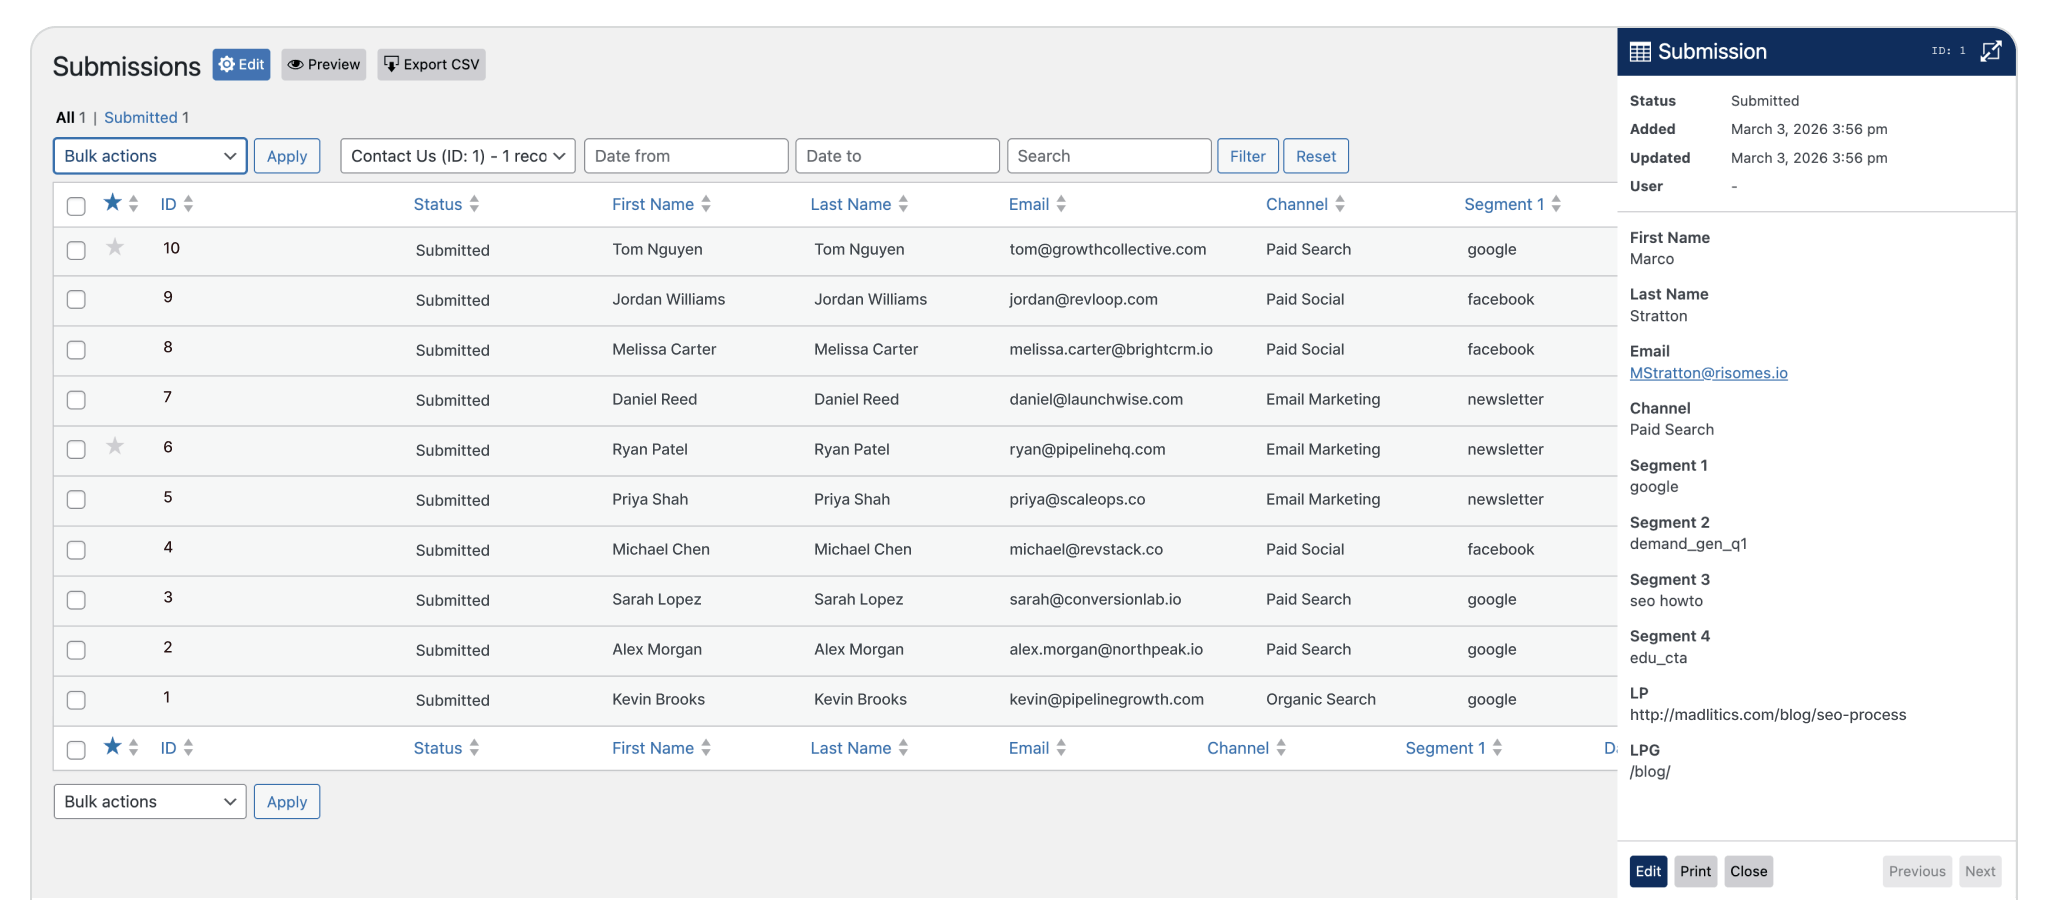
Before you go live, run a quick test to confirm Madlitics is capturing attribution correctly. Visit the page with your WSForm using a URL that includes unique UTM parameters (for example, ?utm_source=google&utm_medium=cpc&utm_campaign=test-wsform).
Submit the form, then check that the hidden Madlitics fields are receiving values by reviewing the submission entry inside WSForm’s submissions area. You should see attribution details like channel, campaign, and landing page populated in the corresponding Madlitics fields (for example, value="Paid Search").
Once everything looks good, you’re ready to publish your site and start using this form across your live pages, sending Madlitics-powered attribution data into your CRM, analytics, or reporting stack.


With Madlitics connected and your WSForm setup live, every form submission now carries rich, source-level attribution data you can actually act on. That means you can follow each lead from first touch to closed‑won, and feed precise marketing insights into your CRM, email platform, and BI tools for truly advanced revenue reporting and optimization.