Setting up Elementor for Marketing Attribution and UTM Tracking


Elementor is one of the most popular WordPress builders, giving you a drag-and-drop interface to design custom sites without writing a single line of code. With the Form widget — available in higher-tier plans like Advanced, Expert, or Agency—you can create powerful lead-capture forms that connect seamlessly with Madlitics. By adding the Madlitics fields, every submission will include attribution data such as channel, campaign, and landing page, giving you the visibility you need to understand what’s driving results.
In this guide, we’ll walk you through installing Elementor, activating your license, and preparing your forms to capture Madlitics attribution data.
💆 Heads-up: Make sure Madlitics is installed on the site where this Elementor lives (ie. Wordpress). The form alone won’t capture attribution data — Madlitics needs to be running on the page to pass lead data into your submissions. Installing Madlitics on Wordpress ->
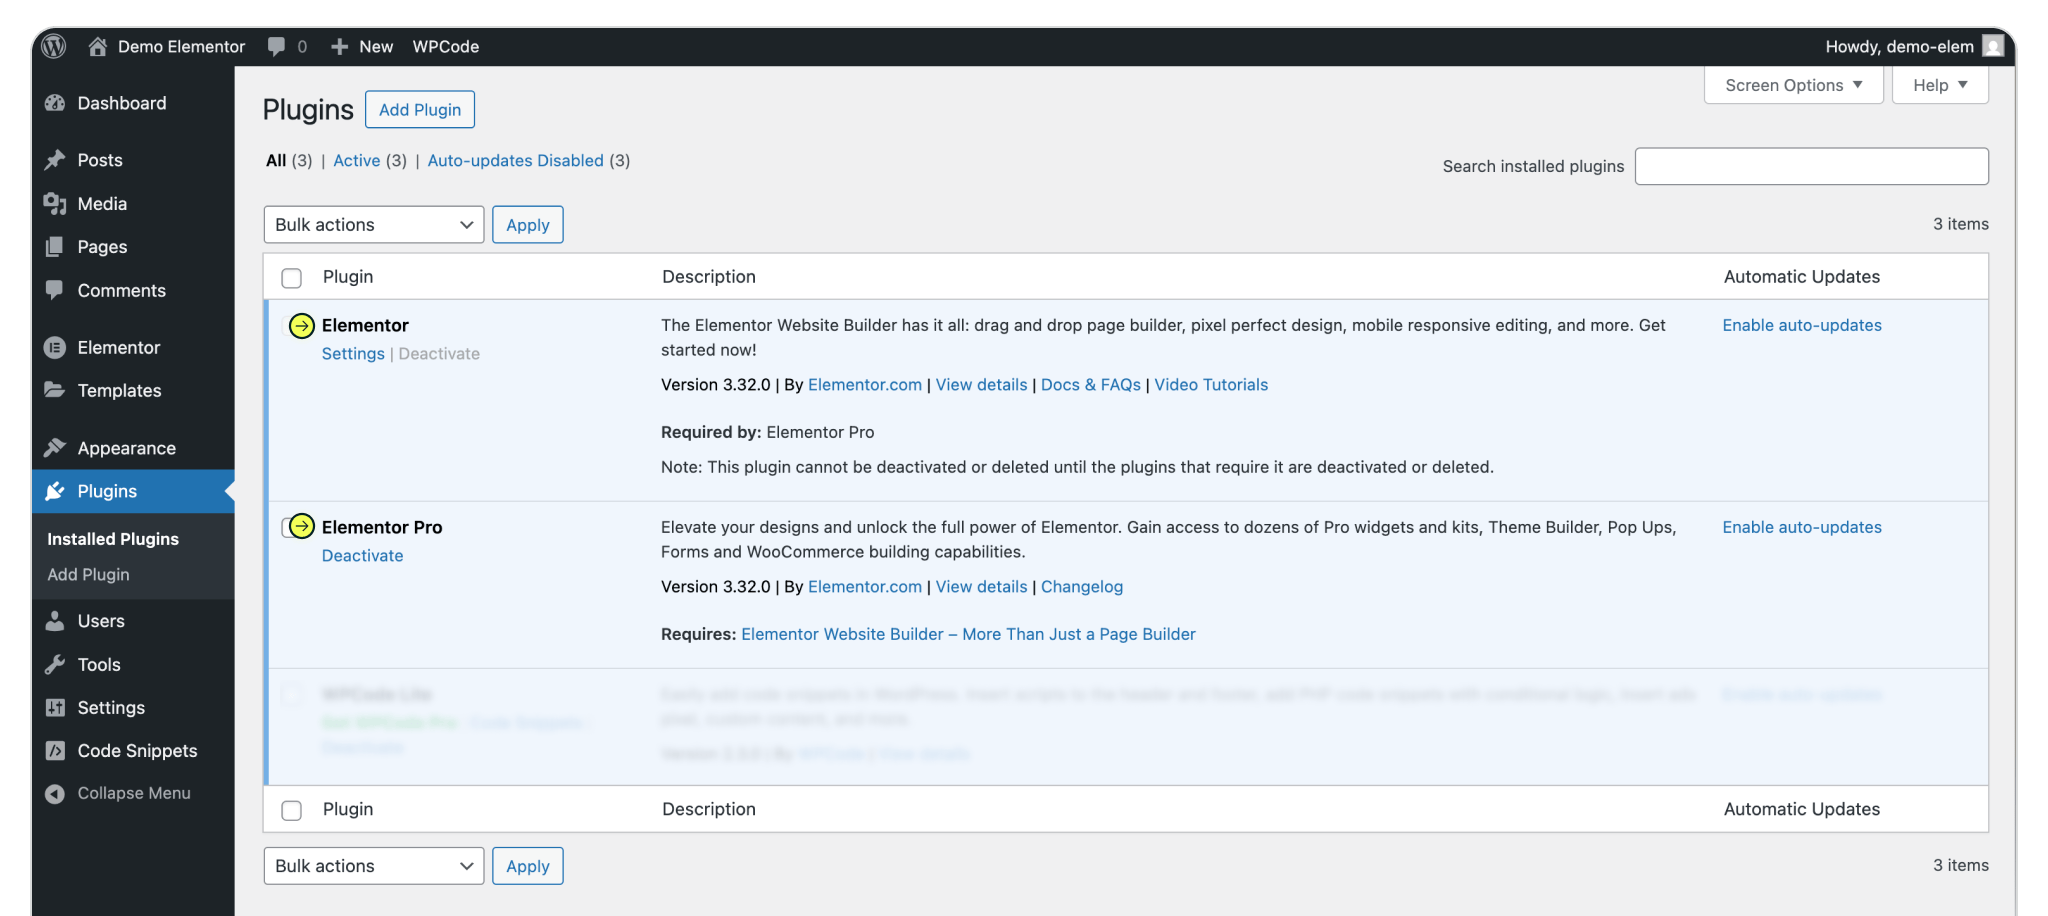
Elementor is a commercial WordPress site builder plugin that you must purchase from the Elementor website ↗. After buying a license, download the plugin (a ZIP file) and manually upload it to your WordPress site. In order for the Pro plugin to work, the Elementor Website Builder plugin will also need to be installed, and works in conjunction with the Pro license.
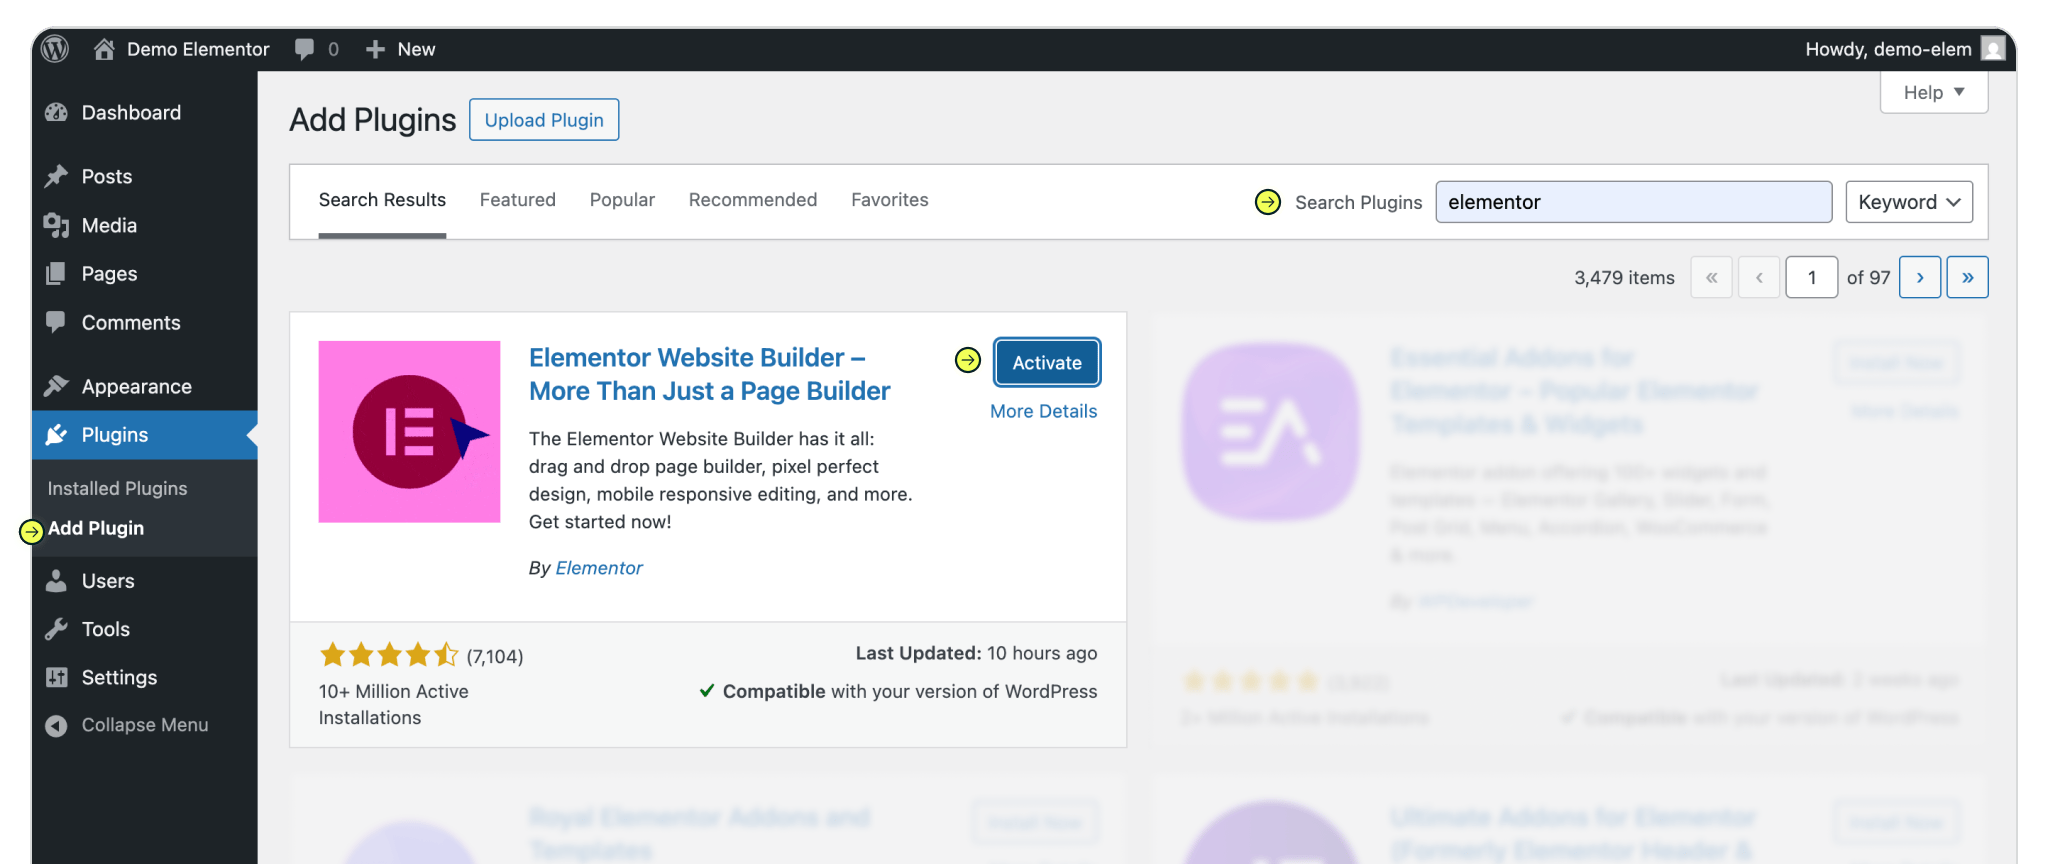
To begin select 'Plugins' from the sidebar menu and click the 'Add Plugin' button from the page or select the 'Add plugin' dropdown menu item. A. Search for 'Elementor' via the Search Plugins textfield input. Once the plugin has been found, install it. Once installed the plugin must be activated by clicking the 'Activate' button. B. Upload the Pro Elementor plugin, by clicking "Upload Plugin", choose your Elementor Pro Zip file (Elementor > Account Settings > Subscriptions), click 'Install Now'.
Once the Elementor Pro plugin is installed, Activate the plugin and Elementor License. To enable the plugin, click 'Activate'. To activate the license, click "Connect & Activate" and follow the Elementor instructions.
Plugins > Add Plugin > Upload plugin > Activate


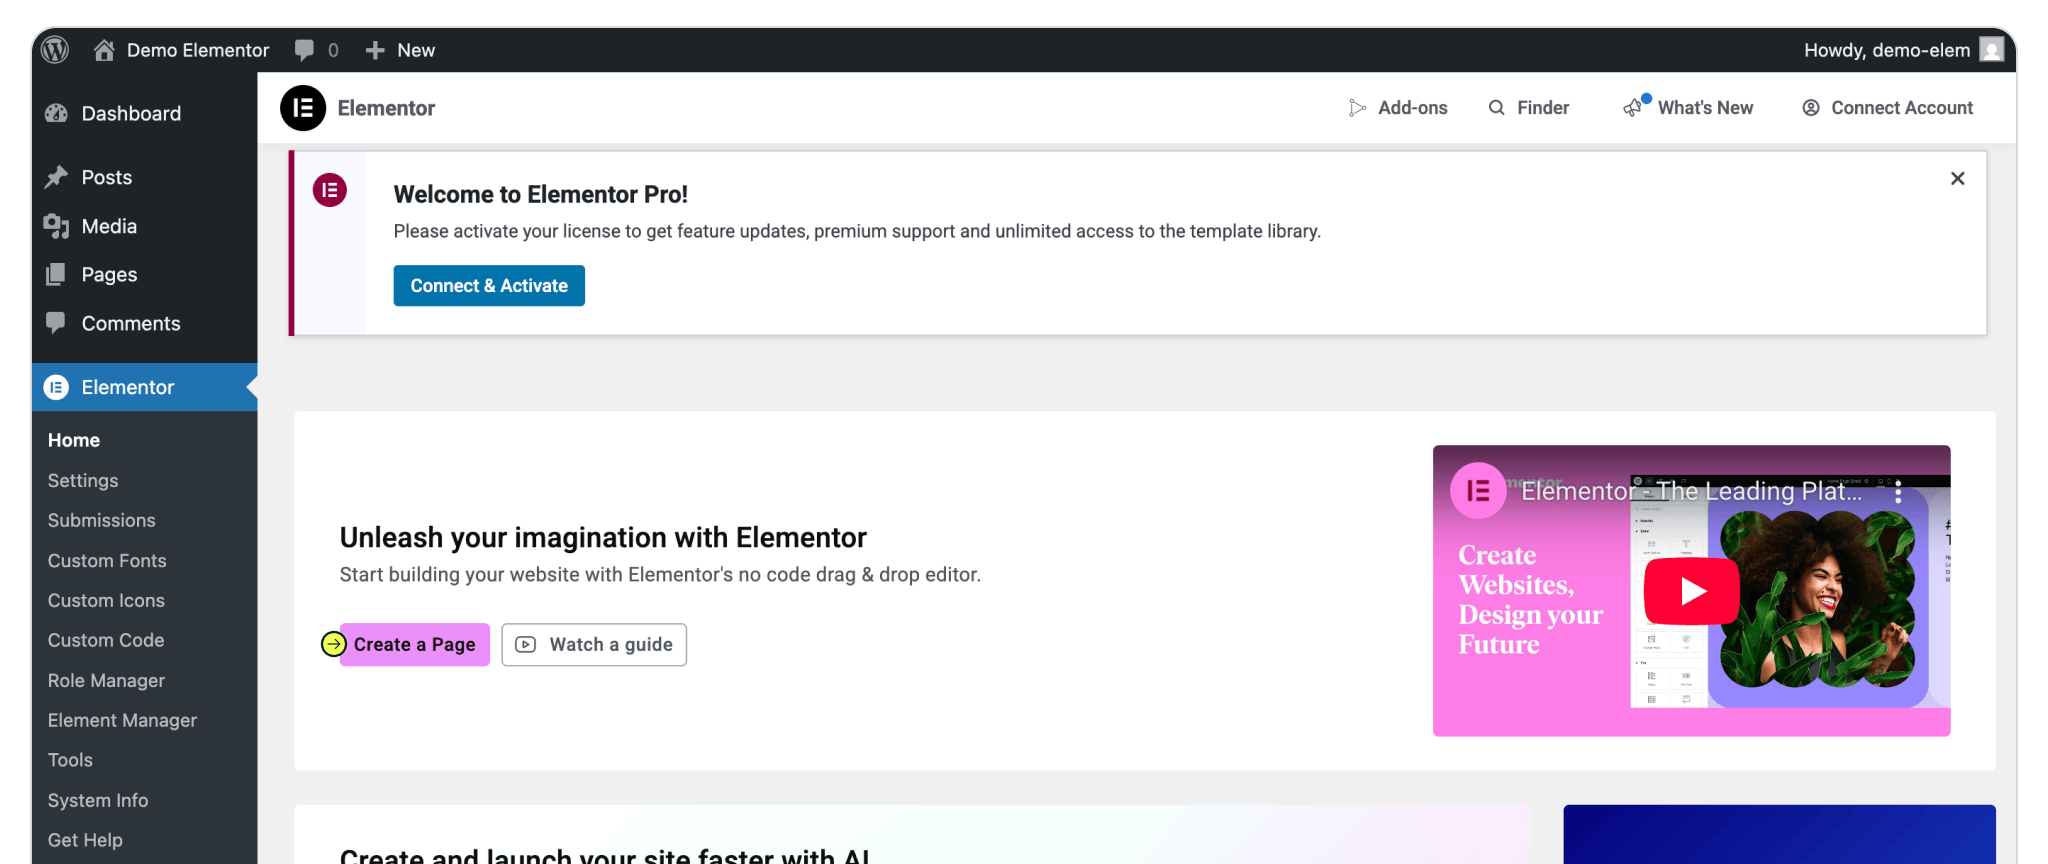
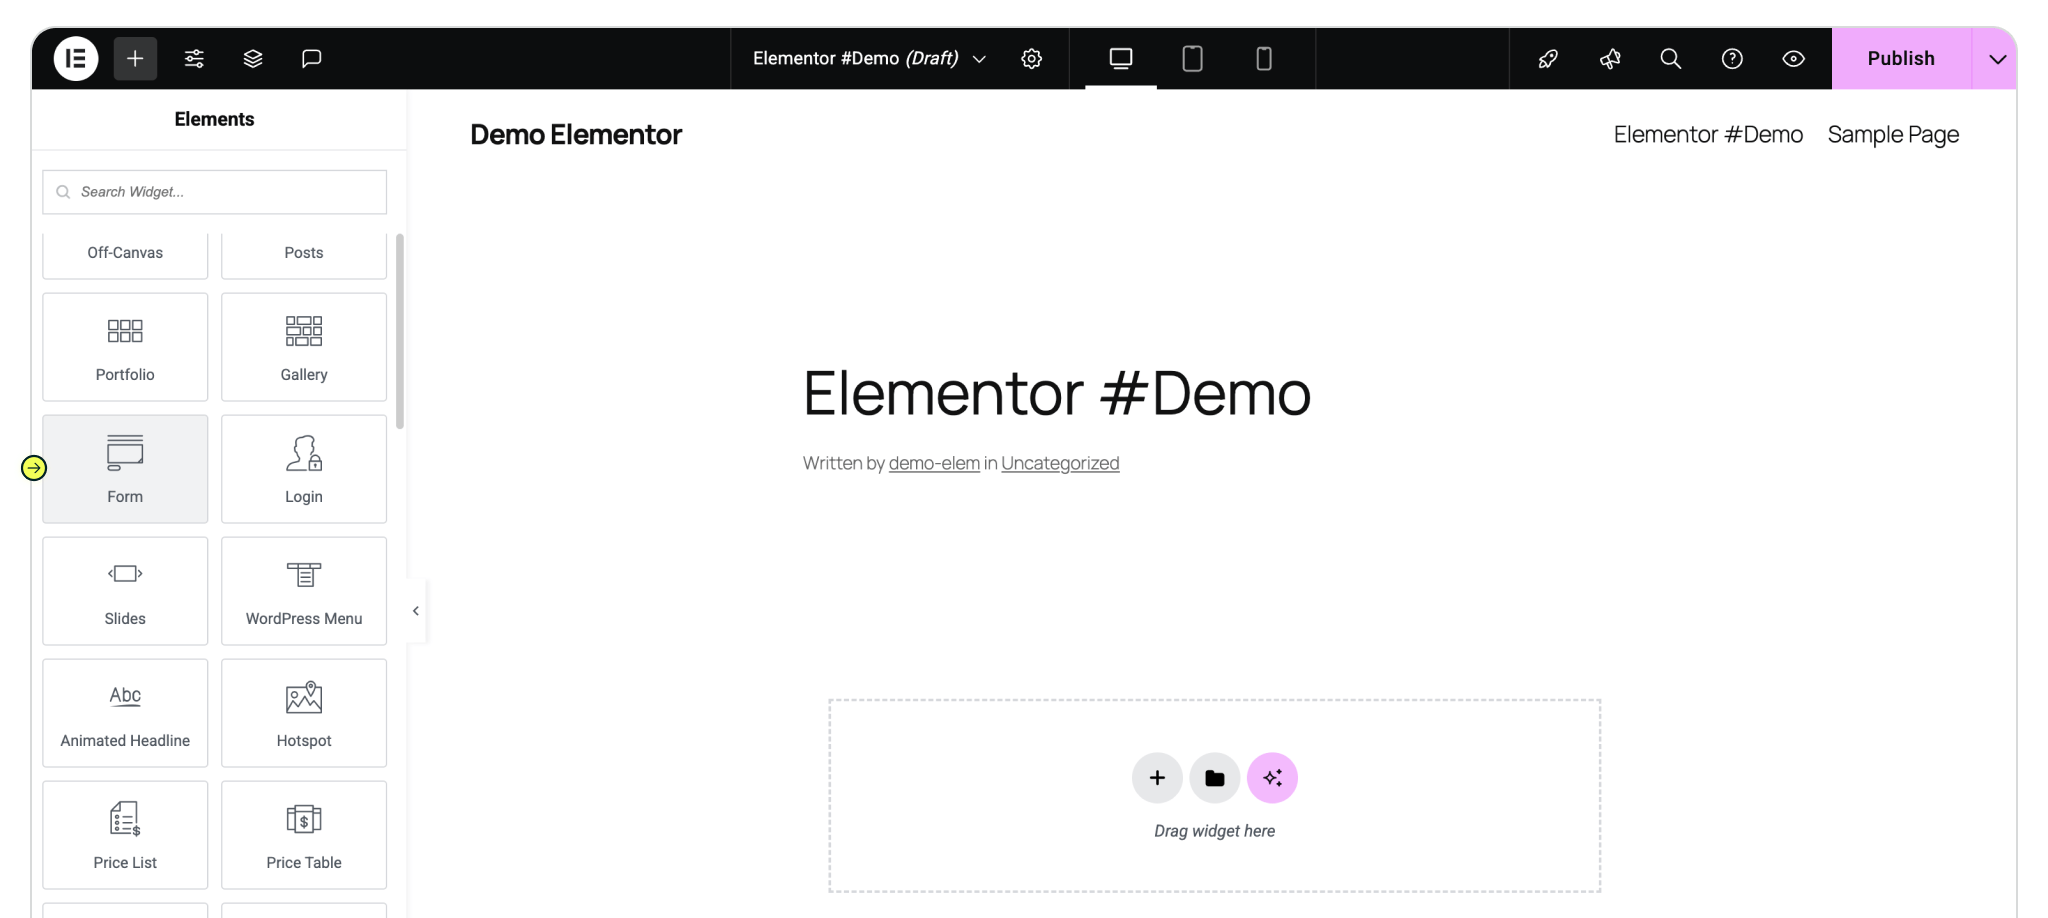
With Elementor Pro installed, you’re ready to build a form that will capture both your lead details and Madlitics attribution data. Navigate to the Elementor menu item in the Wordpress sidebar. Create a new page click the 'Create a Page' button, and add a Form widget the page. Select the form widget from the page to access the form editor panel.
Working with a previously created form? Select an already created form, then click 'Edit' to open the editor and select 'Edit with Elementor' to access the Elementor editor.
To begin capturing data, we're going to add seven (7) Madlitics fields to our form, label them, and give them default values...
Within the Content tab of the form editor, under Form Fields, click "+ Add Item" to add a new field, we'll use this for Madlitics Field 1. Within the new item, select the Type (of field) and choose "Hidden. Input 'Channel' as the Label value (matching our label value for Madlitics Field 1). Change to the 'Advanced' tab and input [channel] as the Default Value (matching our default value for Madlitics Field 1).
To collect all our attribution data, repeat this process of adding a new item, and updating the values based on the Madlitics Fields 1-7, for the six (6) remaining Madlitics fields, and save the form to begin collecting customer lead data. Configure additional Madlitics field value pairs for deeper customization and richer insights.
Madlitics field: Marketing channel
Categorizes site visits into marketing channels
Field label: channel
Default value: [channel]
Madlitics field: Segment 1
Captures the utm_source parameter
Field label: segment1
Default value: [segment1]
Madlitics field: Segment 2
Captures the utm_campaign parameter
Field label: segment2
Default value: [segment2]
Madlitics field: Segment 3
Captures the utm_term parameter
Field label: segment3
Default value: [segment3]
Madlitics field: Segment 4
Captures the utm_campaign parameter
Field label: segment4
Default value: [segment4]
Madlitics field: Landing Page
Captures the landing page url a visitor first arrived on
Field label: lp
Default value: [lp]
Madlitics field: Landing Page Group
Captures the landing page group a visitor first arrived on
Field label: lpg
Default value: [lpg]
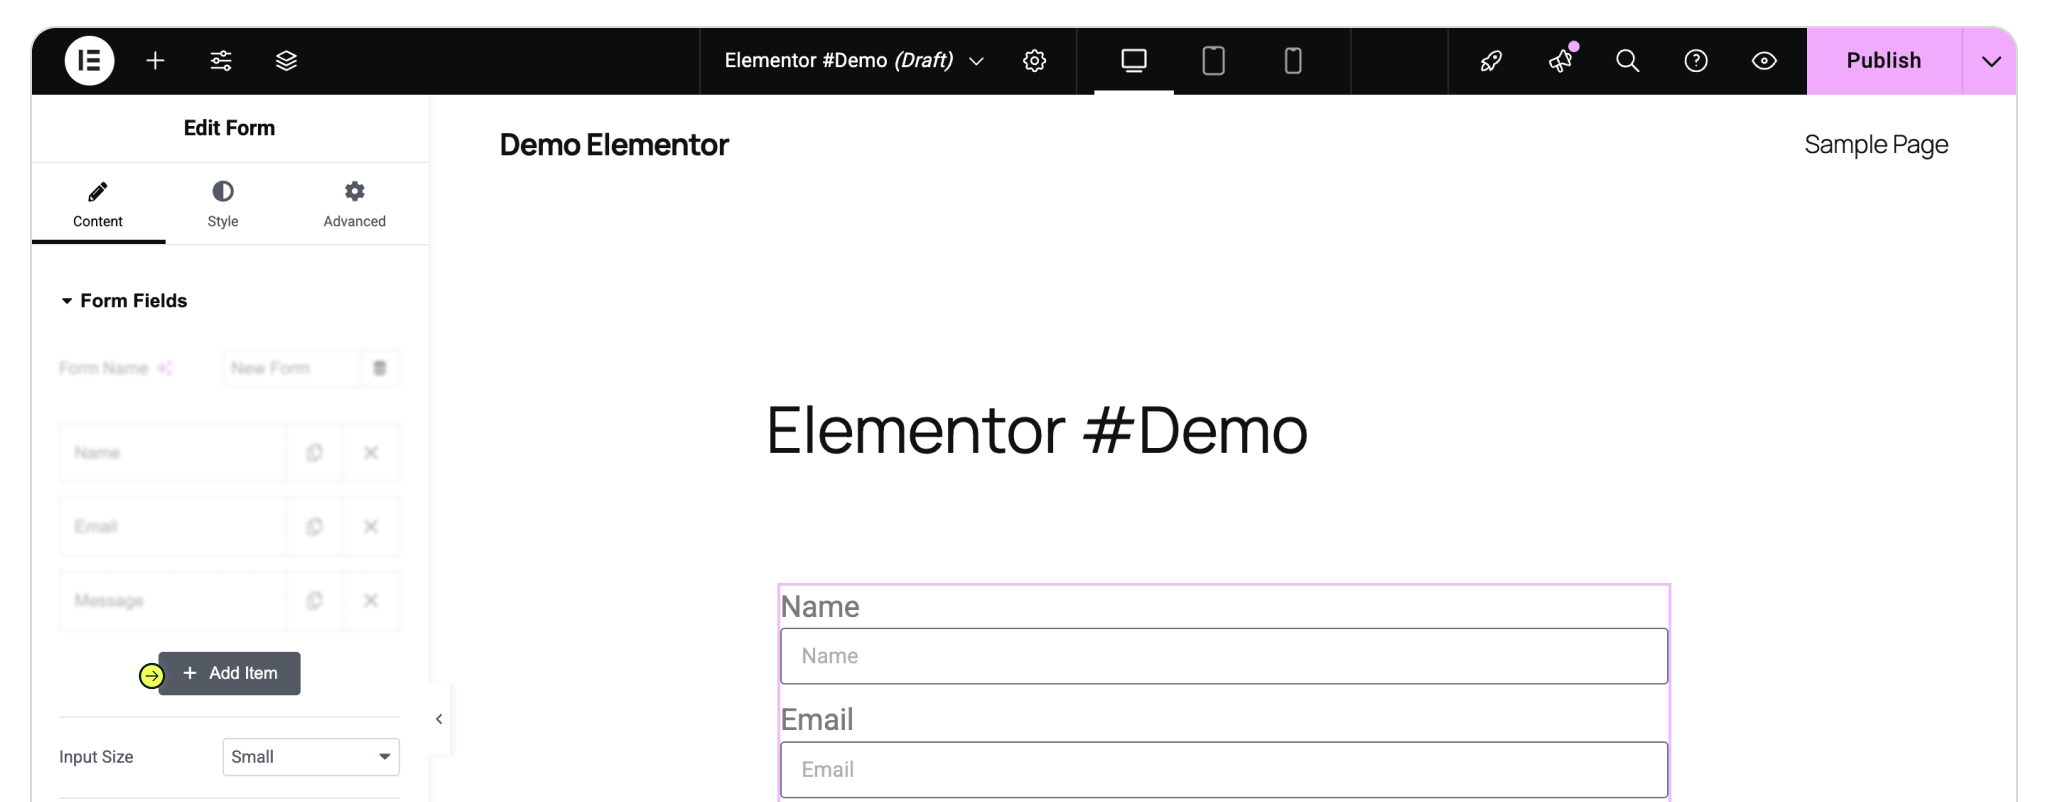
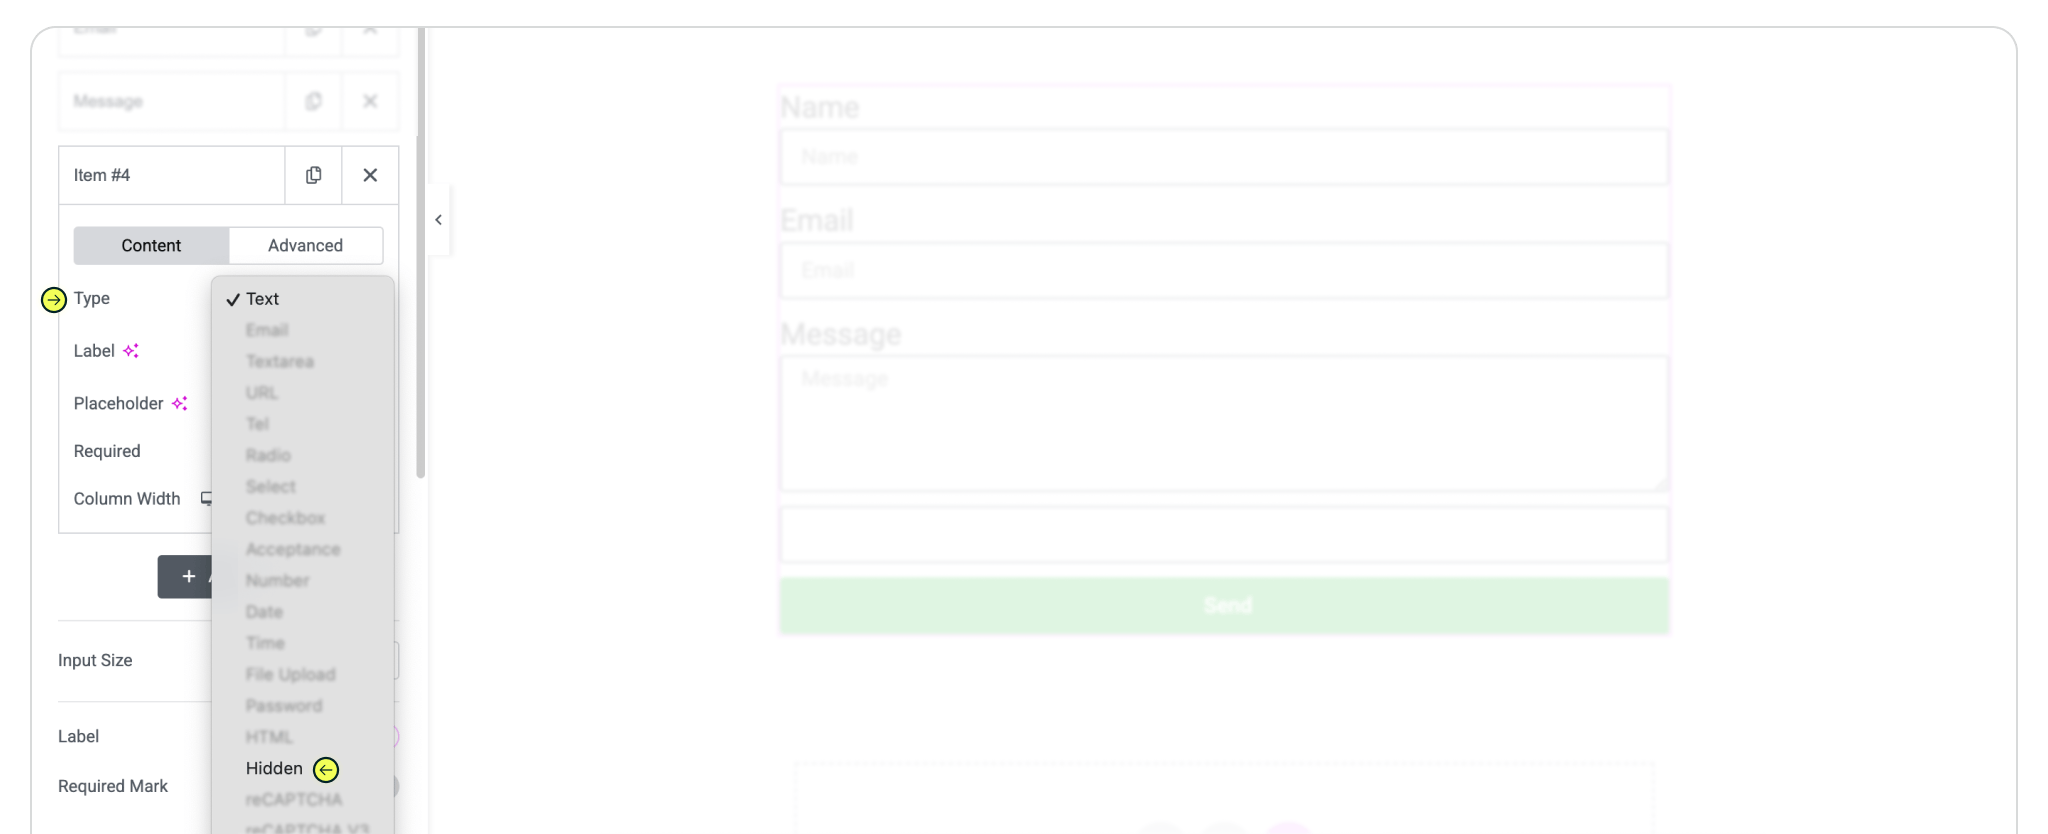

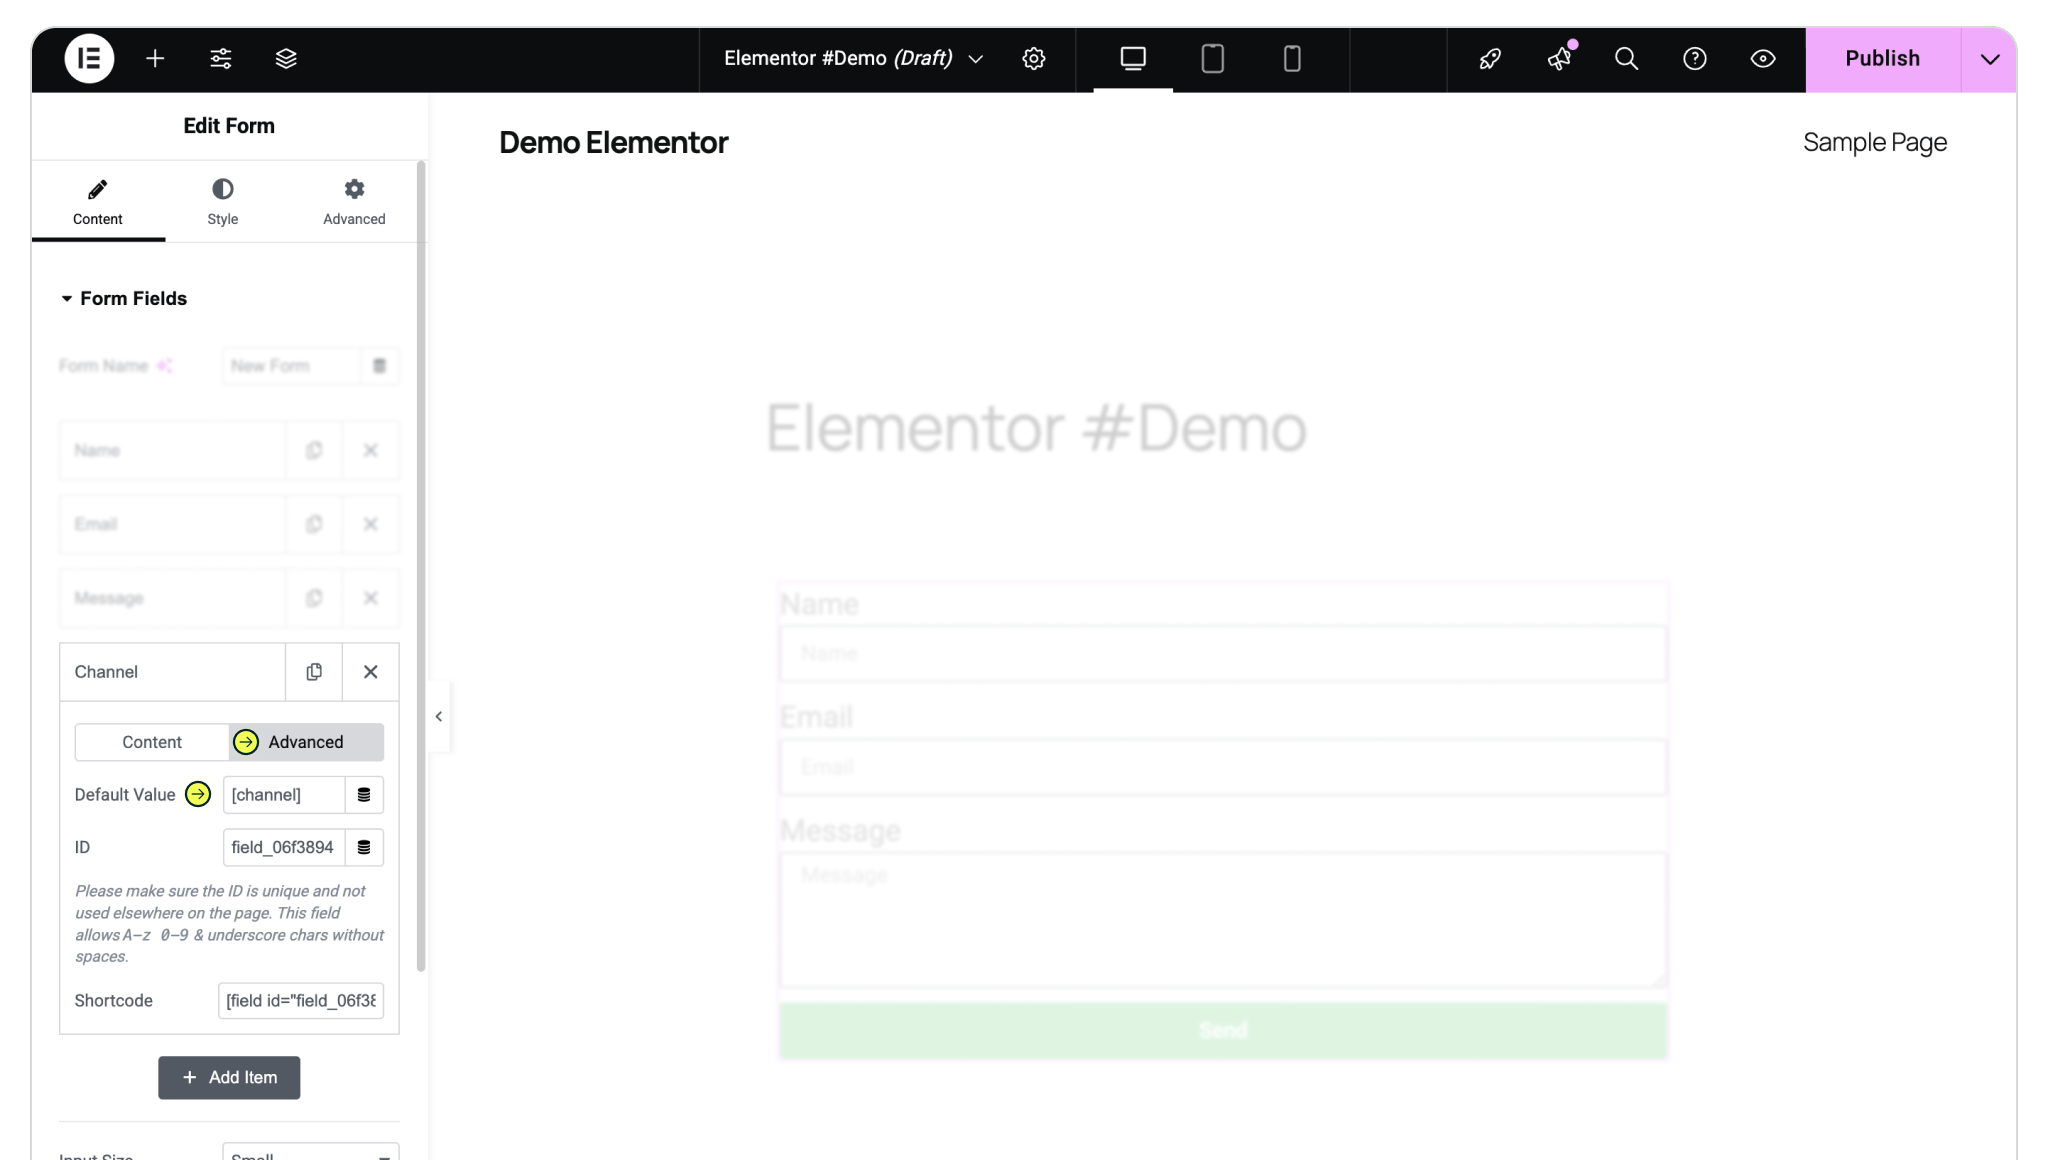
[channel] as the Default Value (default value of first Madlitics Field).
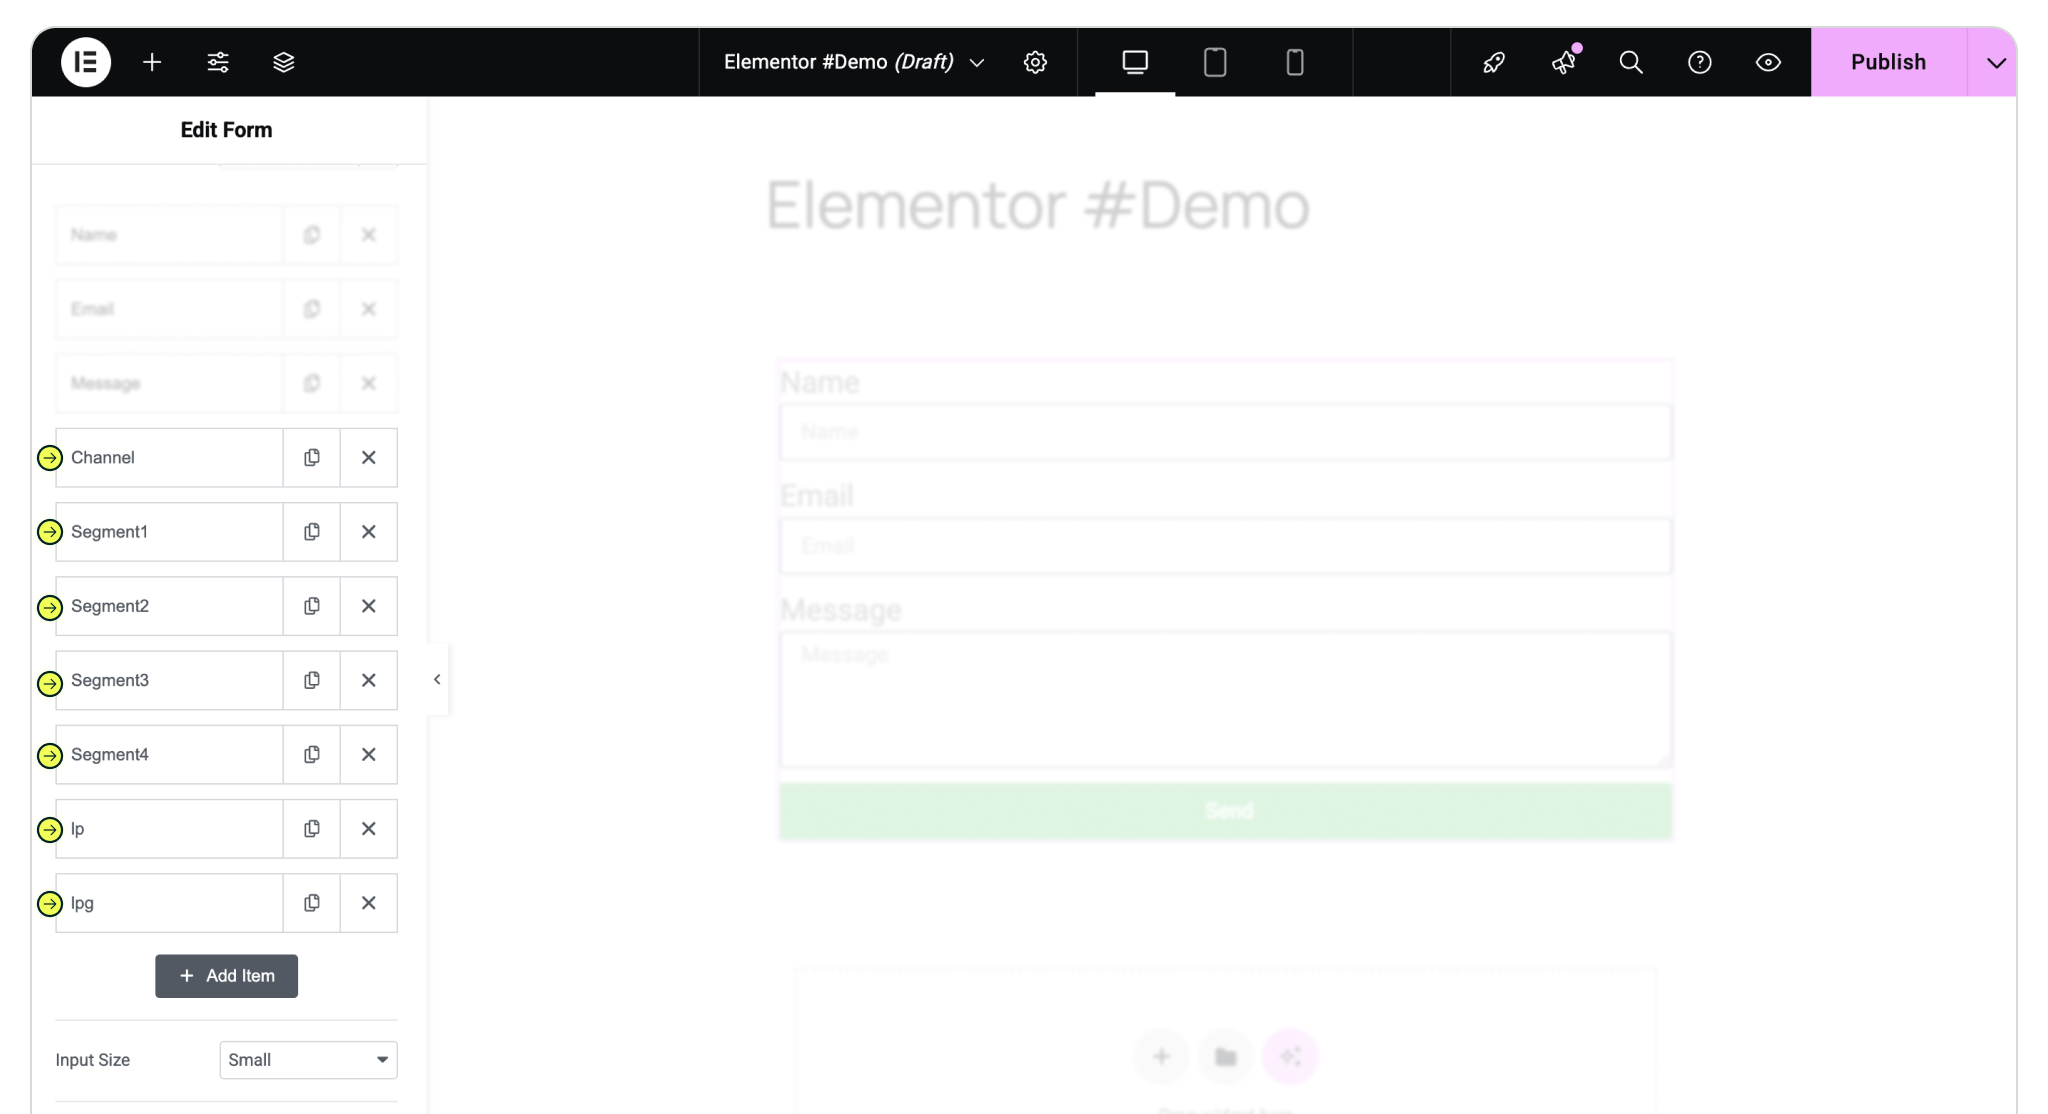
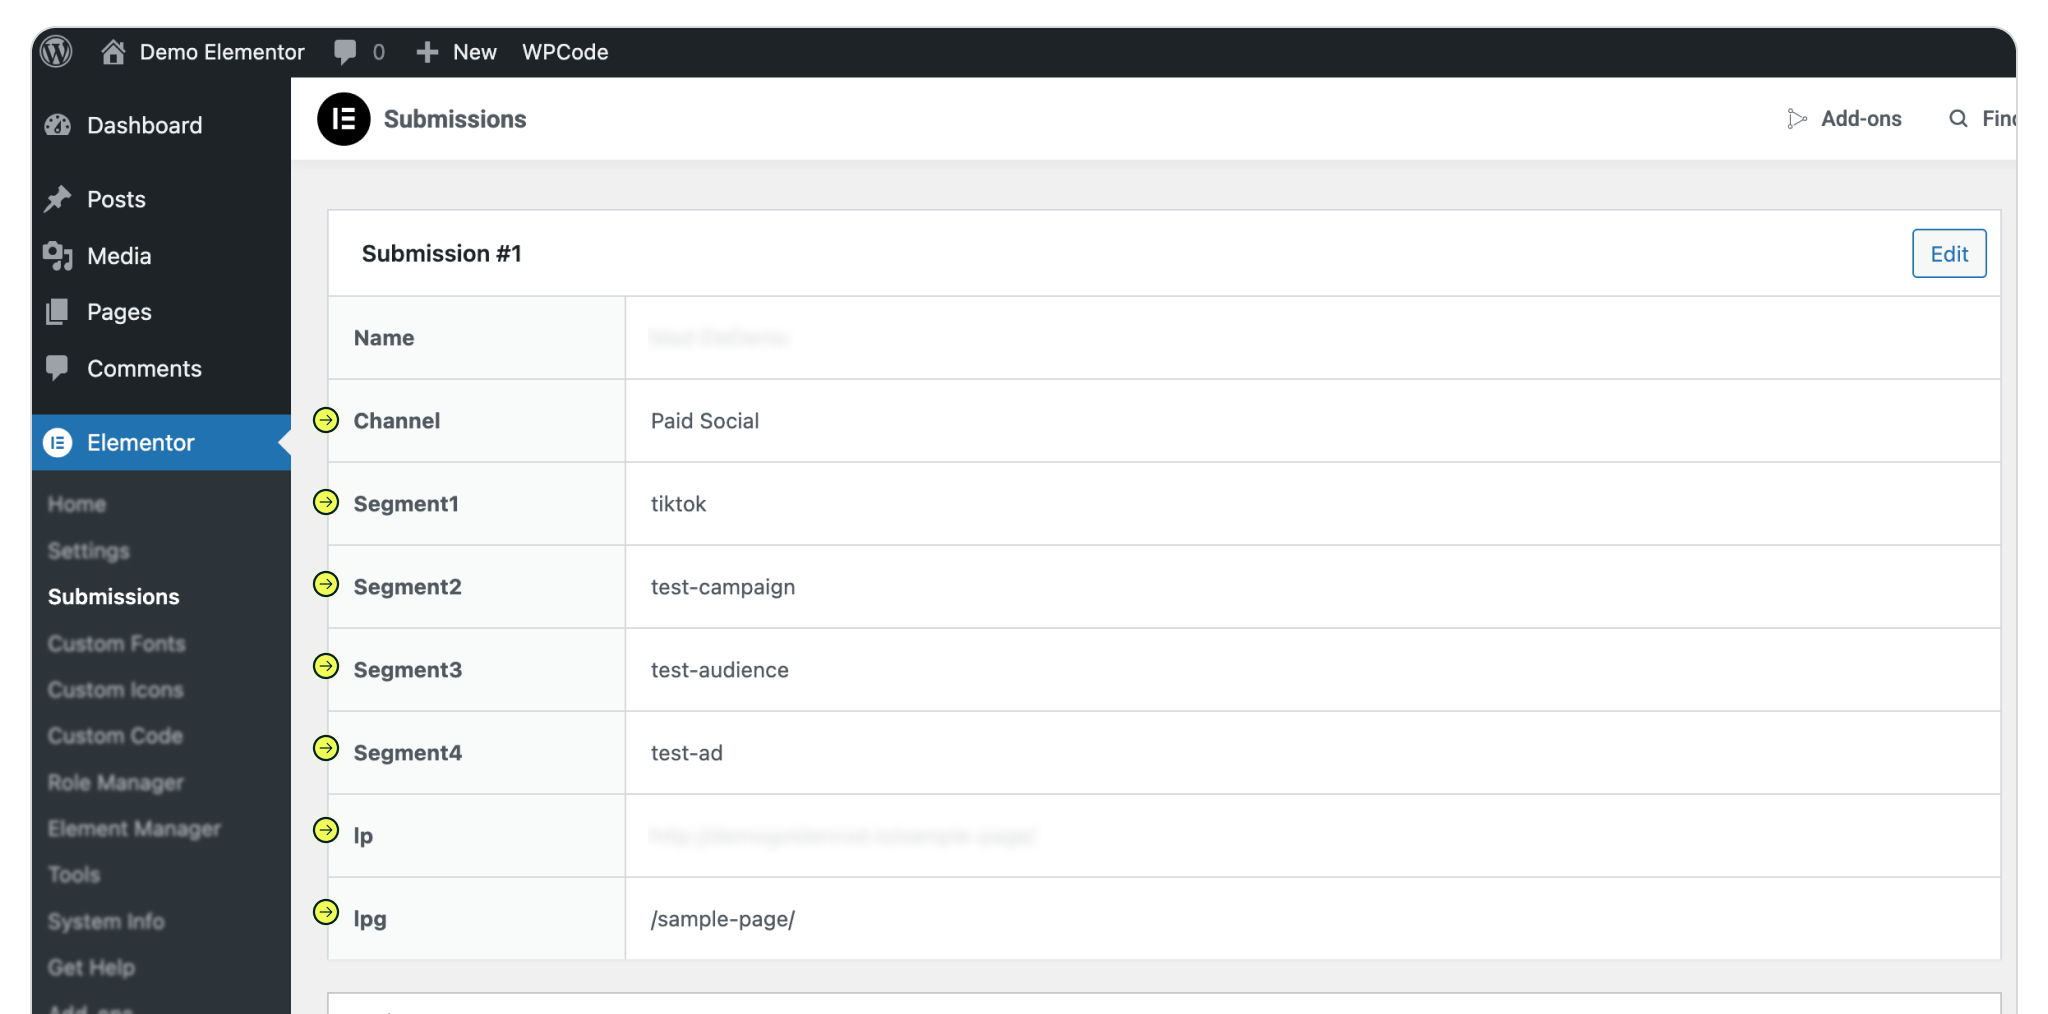
Test your form by visiting your site, using a url with unique utm parameters. Captured attribution data will populate in your Elementor submission page which can then be passed to CRMs, Intelligence tools, etc. for advanced reporting.

https://yoursite.com/?utm_source=linkedin&utm_medium=paidsocial&utm_campaign=q1_promo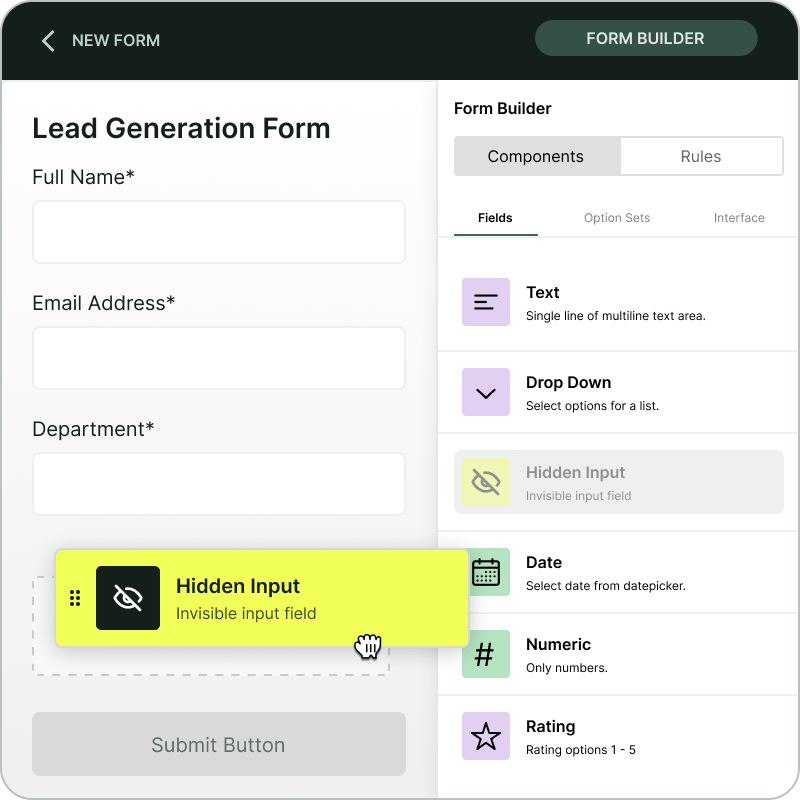
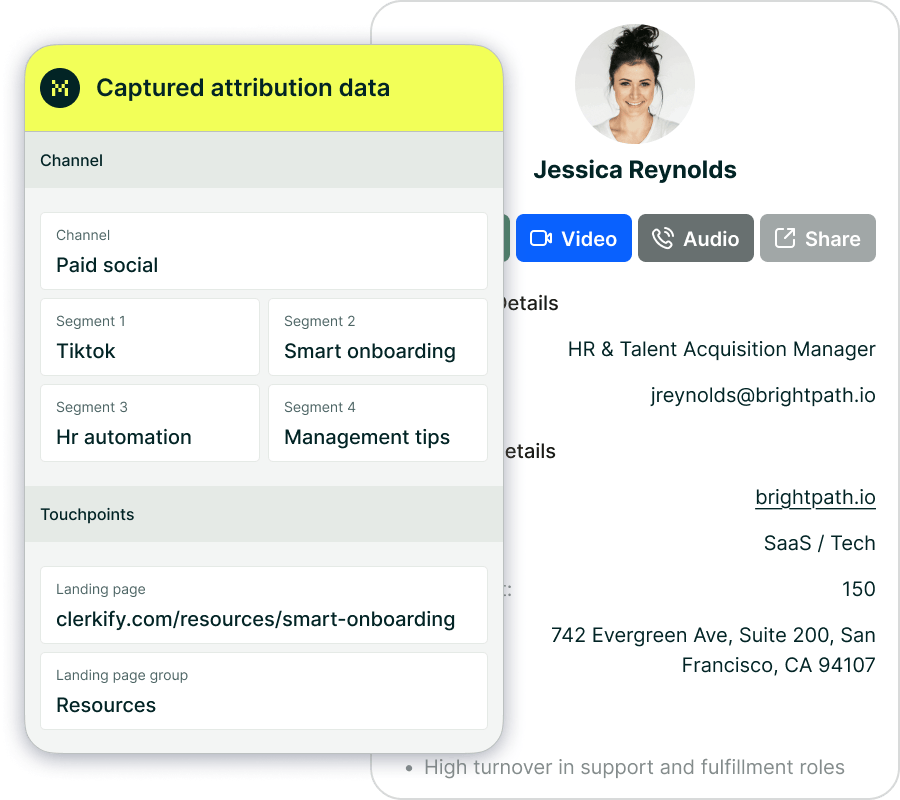
With Madlitics now activated and your forms ready to accept marketing attribution data, you can start tracking valuable insights immediately, and pass attribution data into your CRM, email marketing platform, business intelligence tool or more for advanced reporting.


