Support
Setting up Contact Form 7 for Marketing Attribution and UTM Tracking
Step-by-step setup to add Madlitics fields to Contact Form 7 so every response includes channel, campaign, and landing page attribution.
Start capturing attribution →
Contact Form 7 is one of the most popular and lightweight WordPress form plugins, trusted by marketers and website owners for its simplicity and flexibility. It’s an ideal solution for teams that want reliable lead capture without unnecessary complexity. With its straightforward form setup, you can create conversion-focused contact and lead forms that integrate seamlessly with Madlitics. By adding Madlitics fields, every submission is enriched with valuable attribution data such as channel, campaign, and landing page, so you can clearly see which marketing efforts are generating real results.
In this guide, we’ll show you how to install Madlitics, set up Contact Form 7, and configure your forms to capture and submit attribution data, including UTM parameters, alongside your lead and customer information.
💆 Heads-up: Make sure Madlitics is installed on the site where this Contact Form 7 lives (ie. Wordpress). The form alone won’t capture attribution data — Madlitics needs to be running on the page to pass lead data into your submissions.
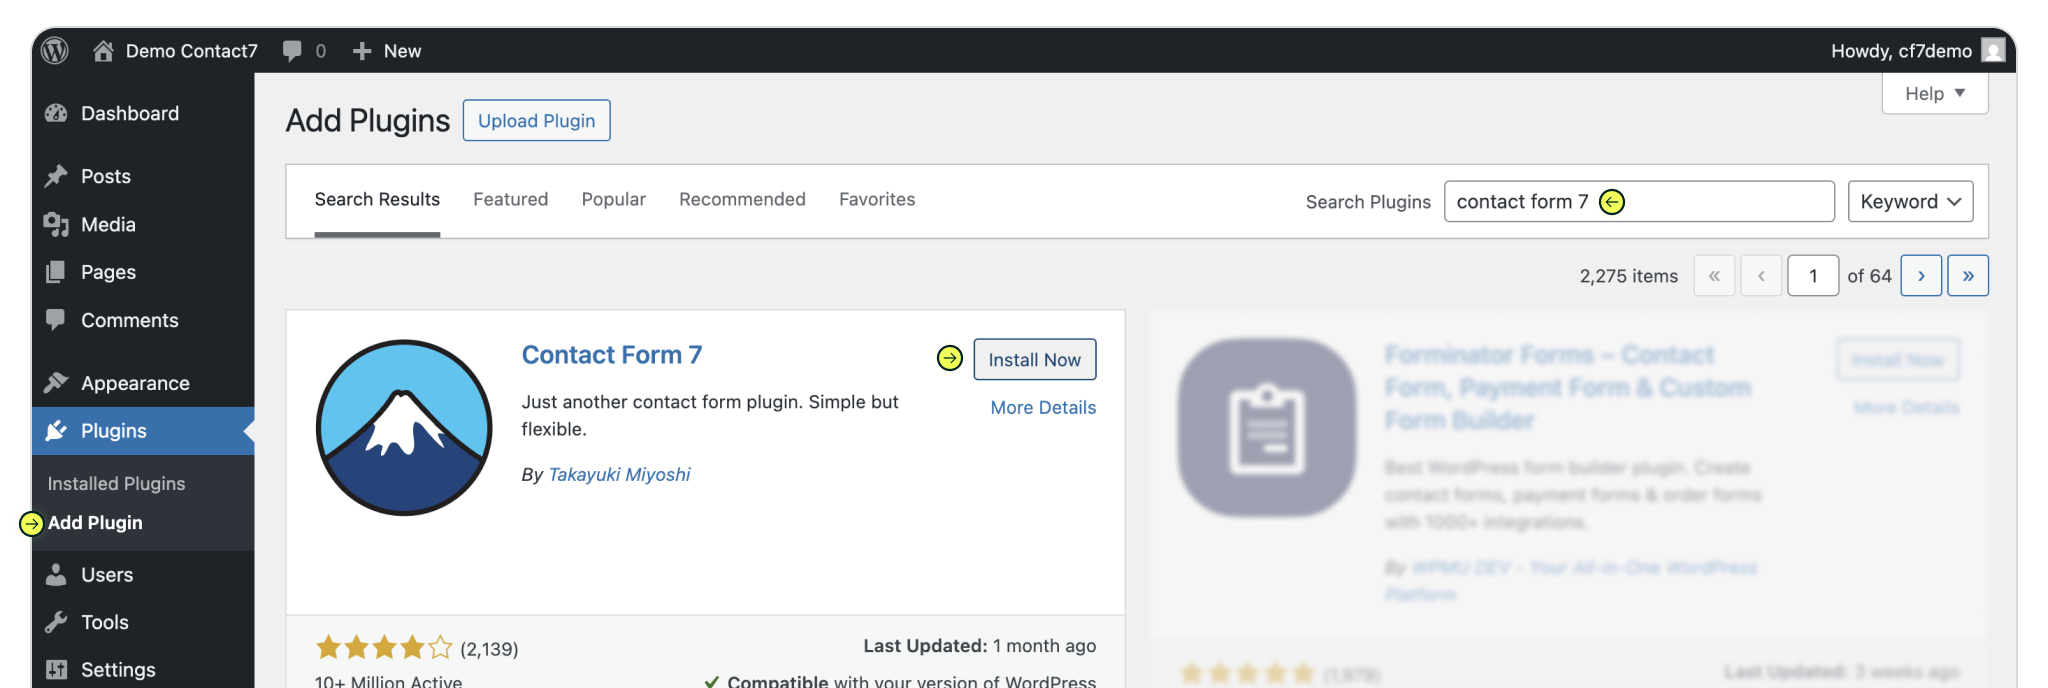
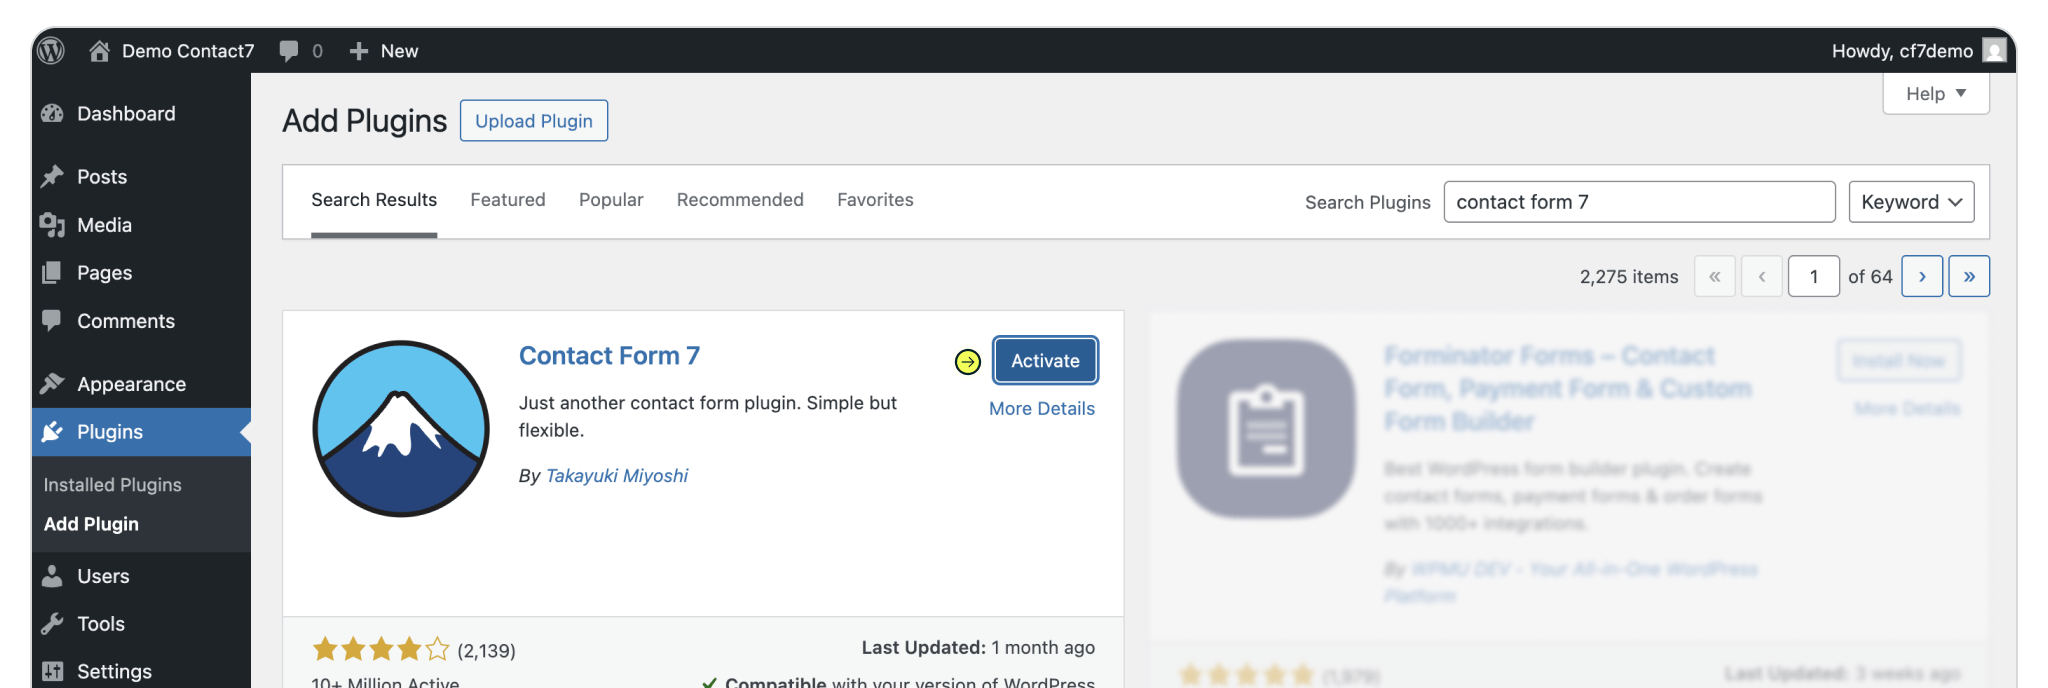
Get started by installing the NinjaForms plugin to your Wordpress environment. Select Plugins from the sidebar menu and either click the 'Add Plugin' button from the page or select the 'Add plugin' dropdown menu item. Search for 'NinjaForms' via the Search Plugins textfield input. Once the plugin has been found, install it. Once installed the plugin must be activated by clicking the 'Activate' button.
Plugins > Add Plugin > Search 'Contact Form 7' > Install > Activate
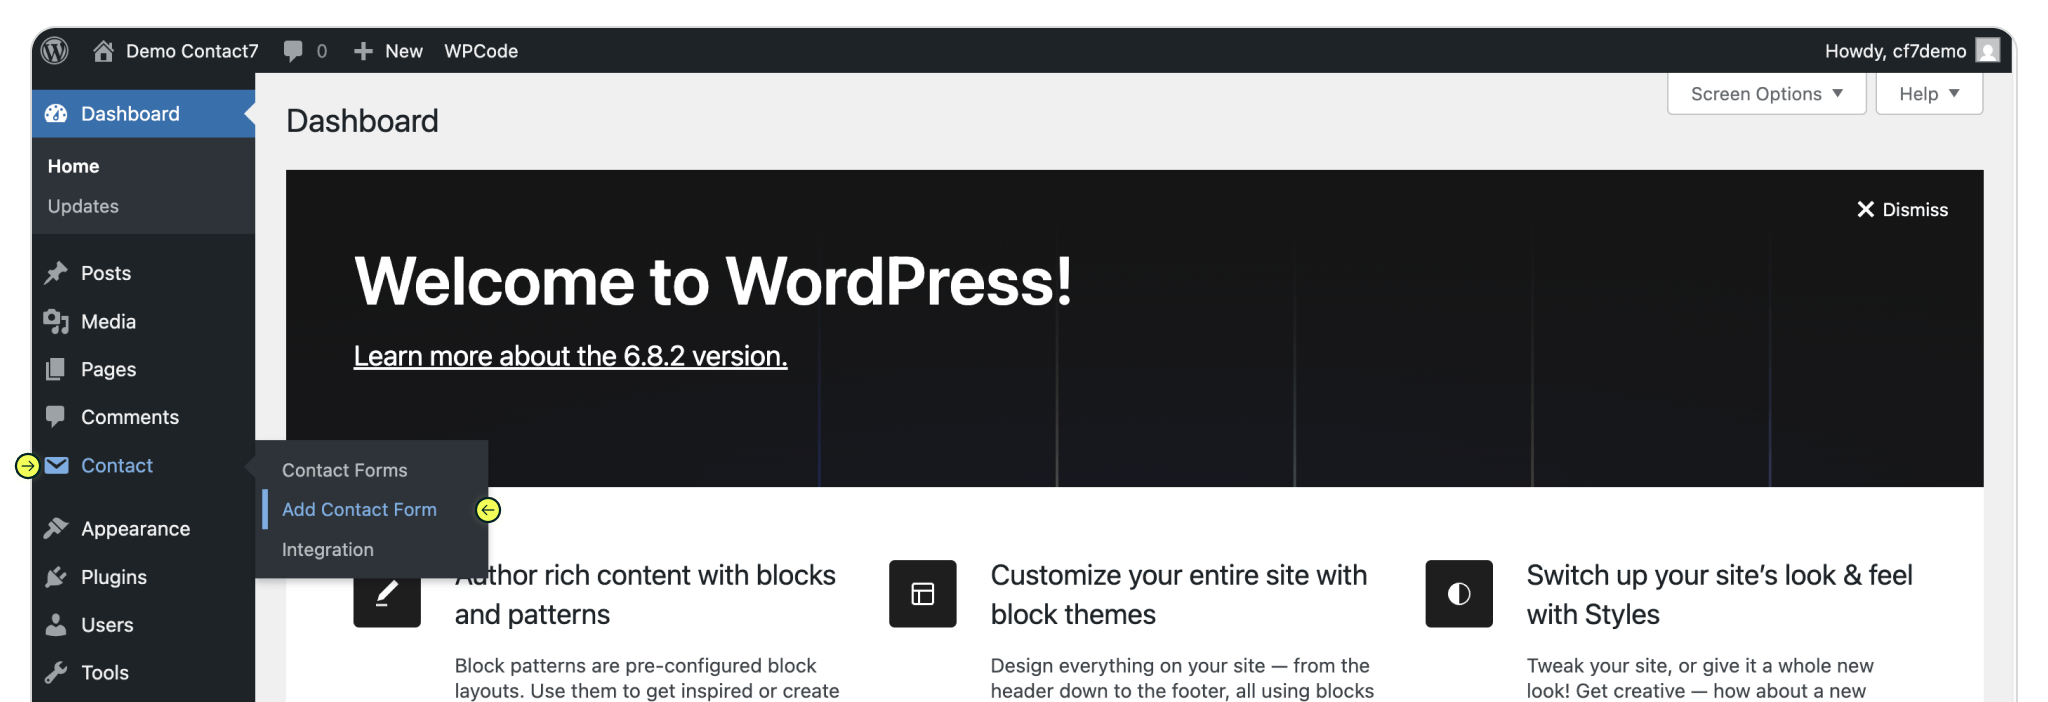
Navigate to Contact menu item (from the sidebar menu) in Wordpress. Create a new form by clicking the 'Add Contact Form' via the Contact Form 7 submenu (also accessible via the 'Add Contact Form' button on the Contact Form 7 main page).
Working with a previously created form? Navigate to your form and click 'Edit' to open the form editor.
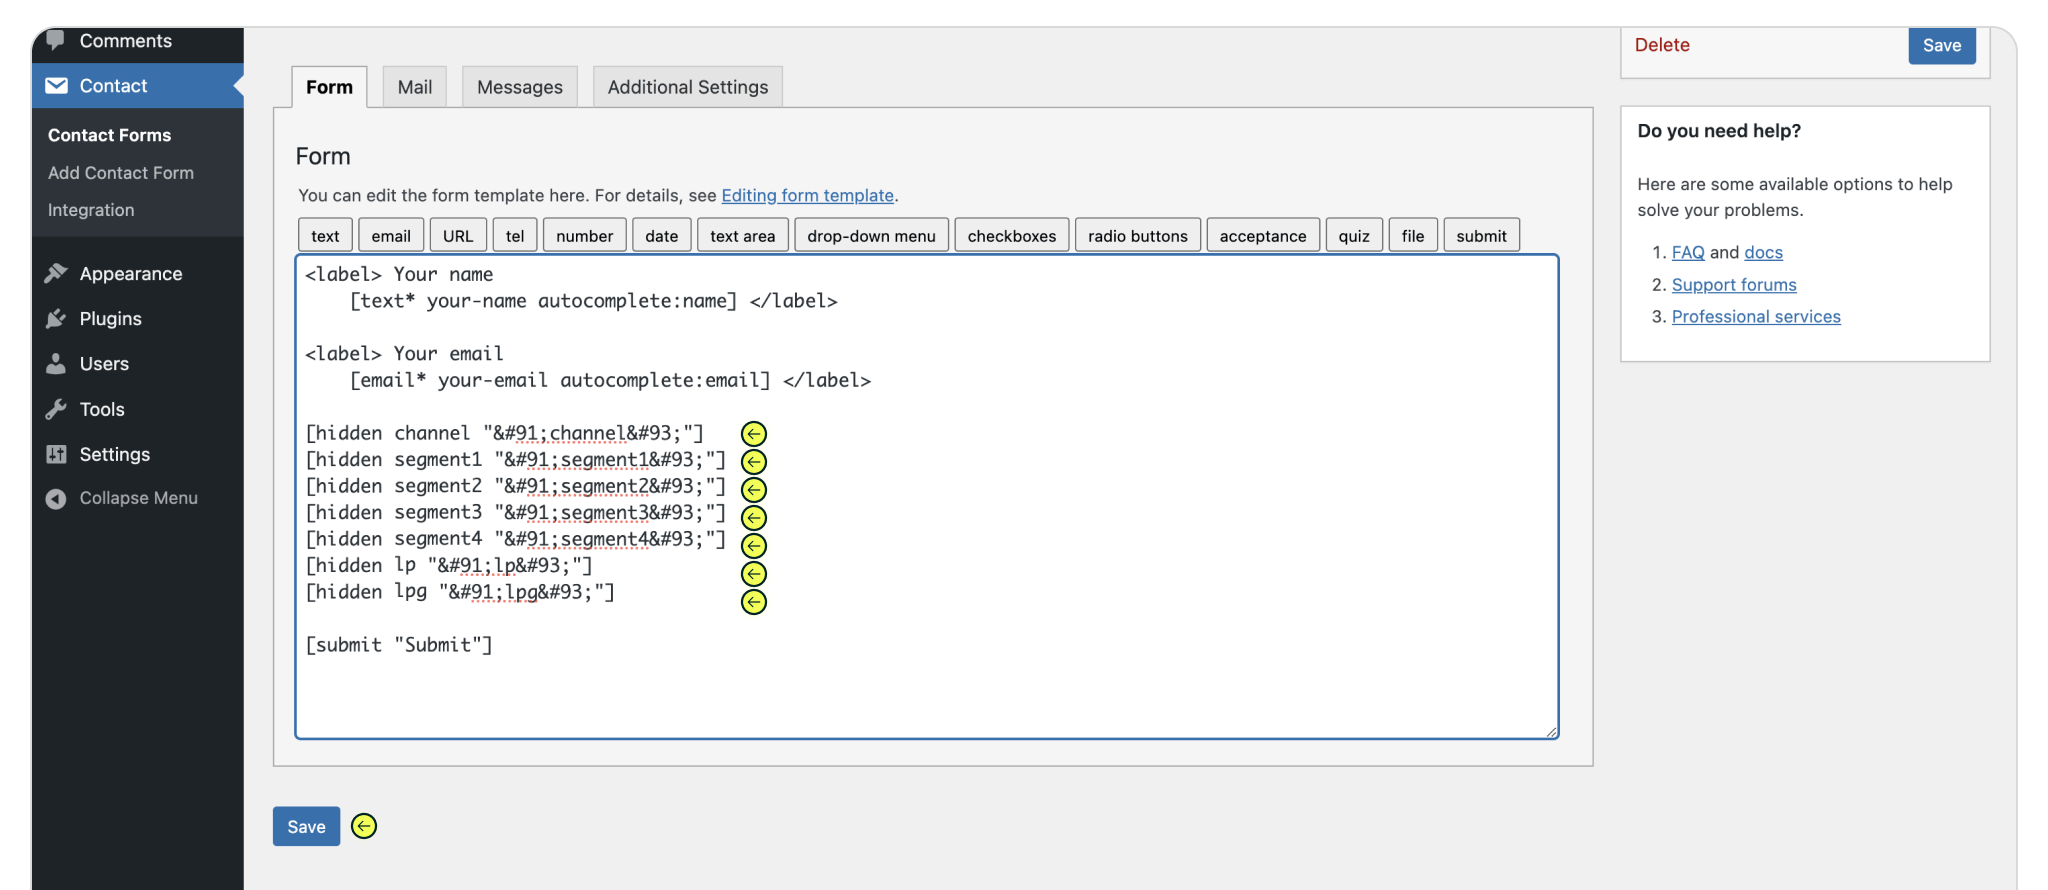
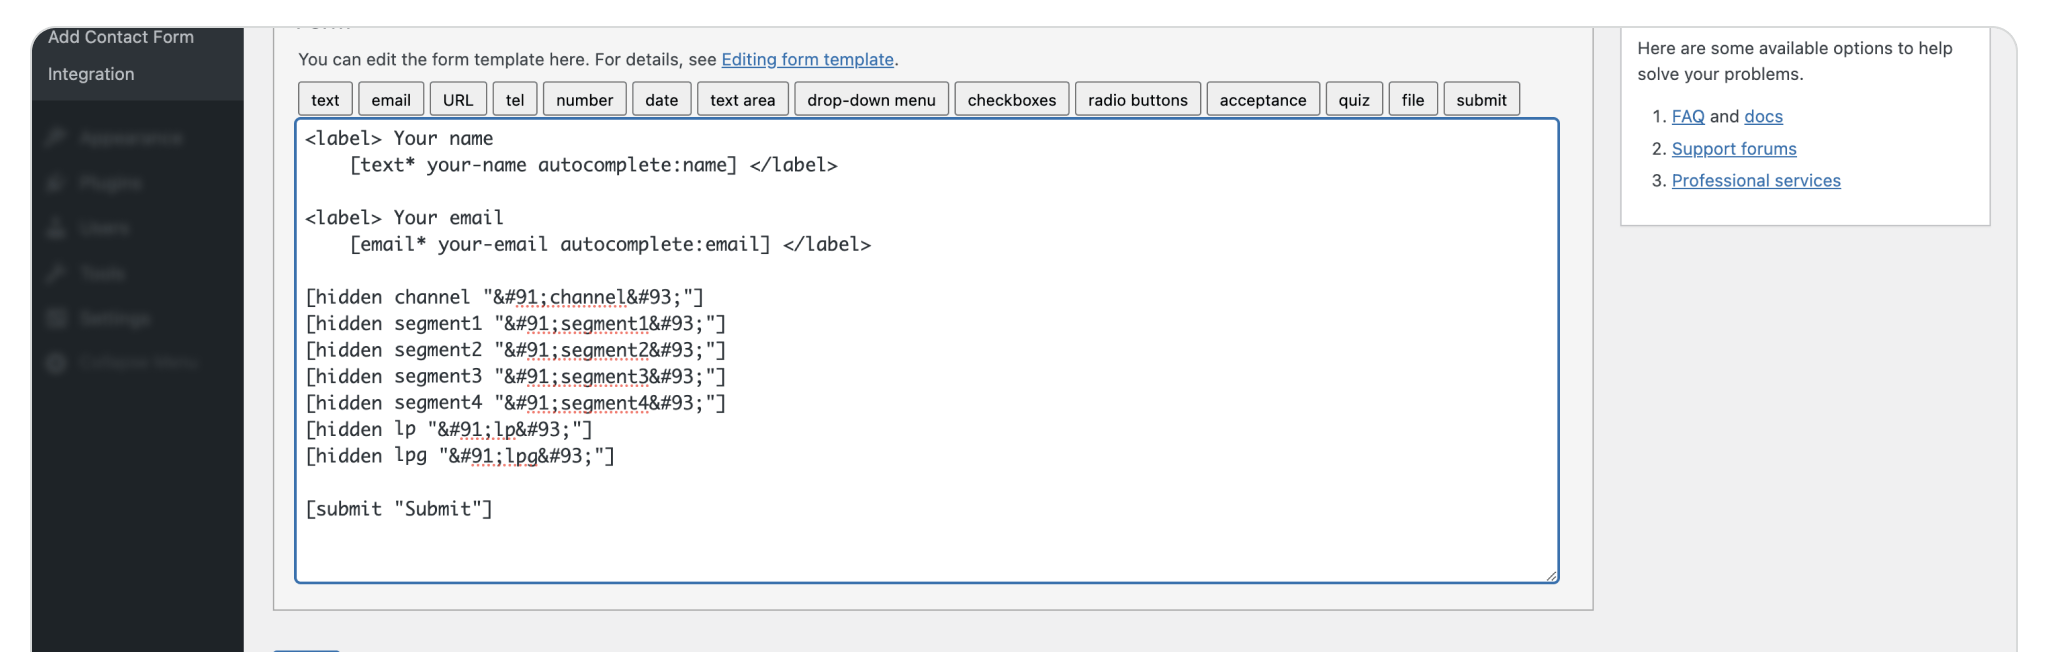
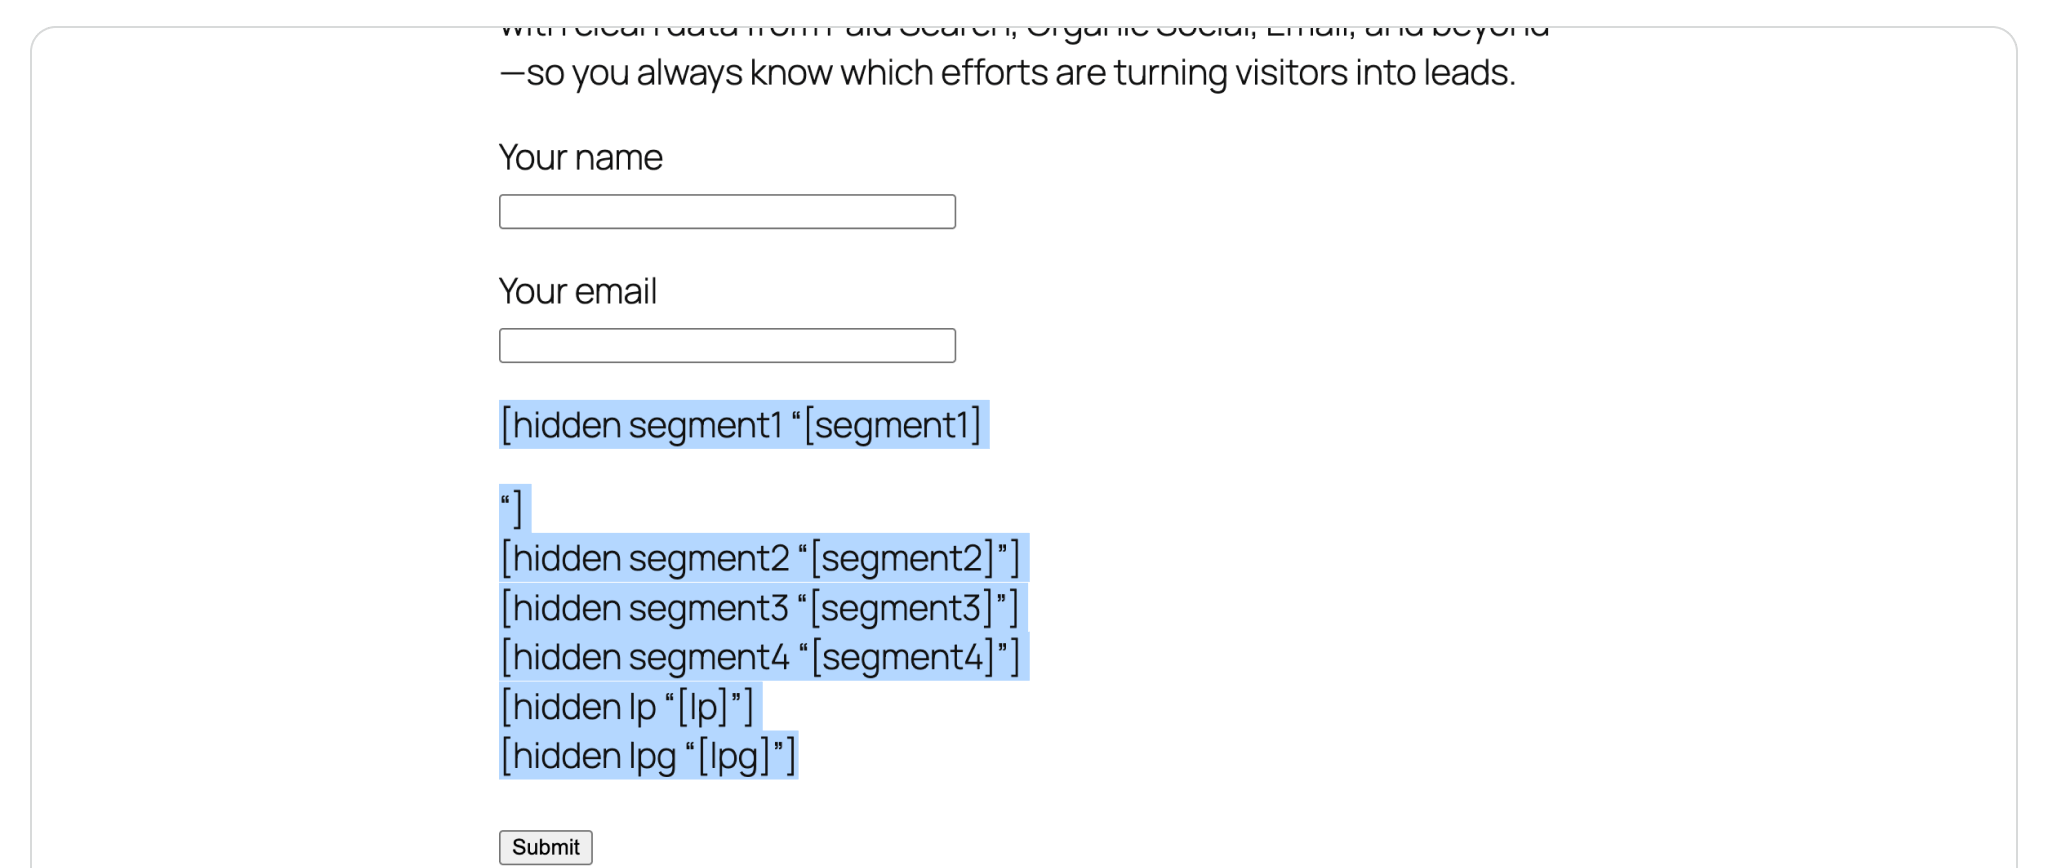
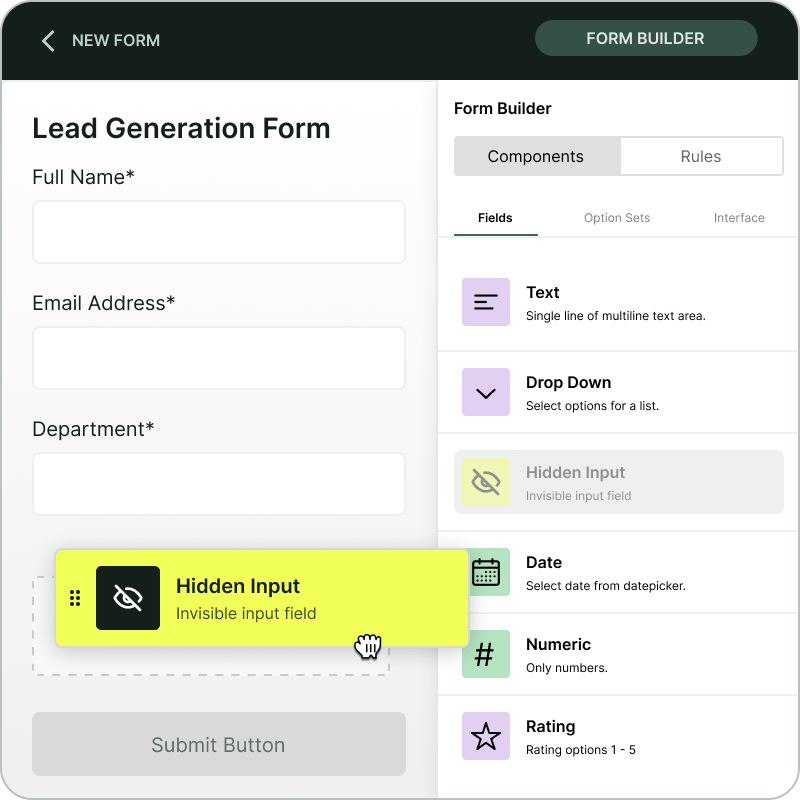
Copy and paste the code block below to add hidden fields to your Contact Form 7 form. Place the hidden fields just above the ‘Submit’ button. These fields should not appear in your form preview. If you see them, re-paste the code and save the form again.
Note: Contact Form 7’s editor can be finicky. Make sure your form is fully set up before adding the hidden fields, then save right away. Additional edits after adding the hidden fields may cause them to show in the preview. Saving may convert the html numeric codes [, ] to characters [, ], this is perfectly normal.
💡 Configure additional Madlitics field value pairs for deeper customization and richer insights.
Use the form field code snippet below, just above the submit button. This is specific to Contact Form 7.
[hidden channel "[channel]"]
[hidden segment1 "[segment1]"]
[hidden segment2 "[segment2]"]
[hidden segment3 "[segment3]"]
[hidden segment4 "[segment4]"]
[hidden lp "[lp]"]
[hidden lpg "[lpg]"]

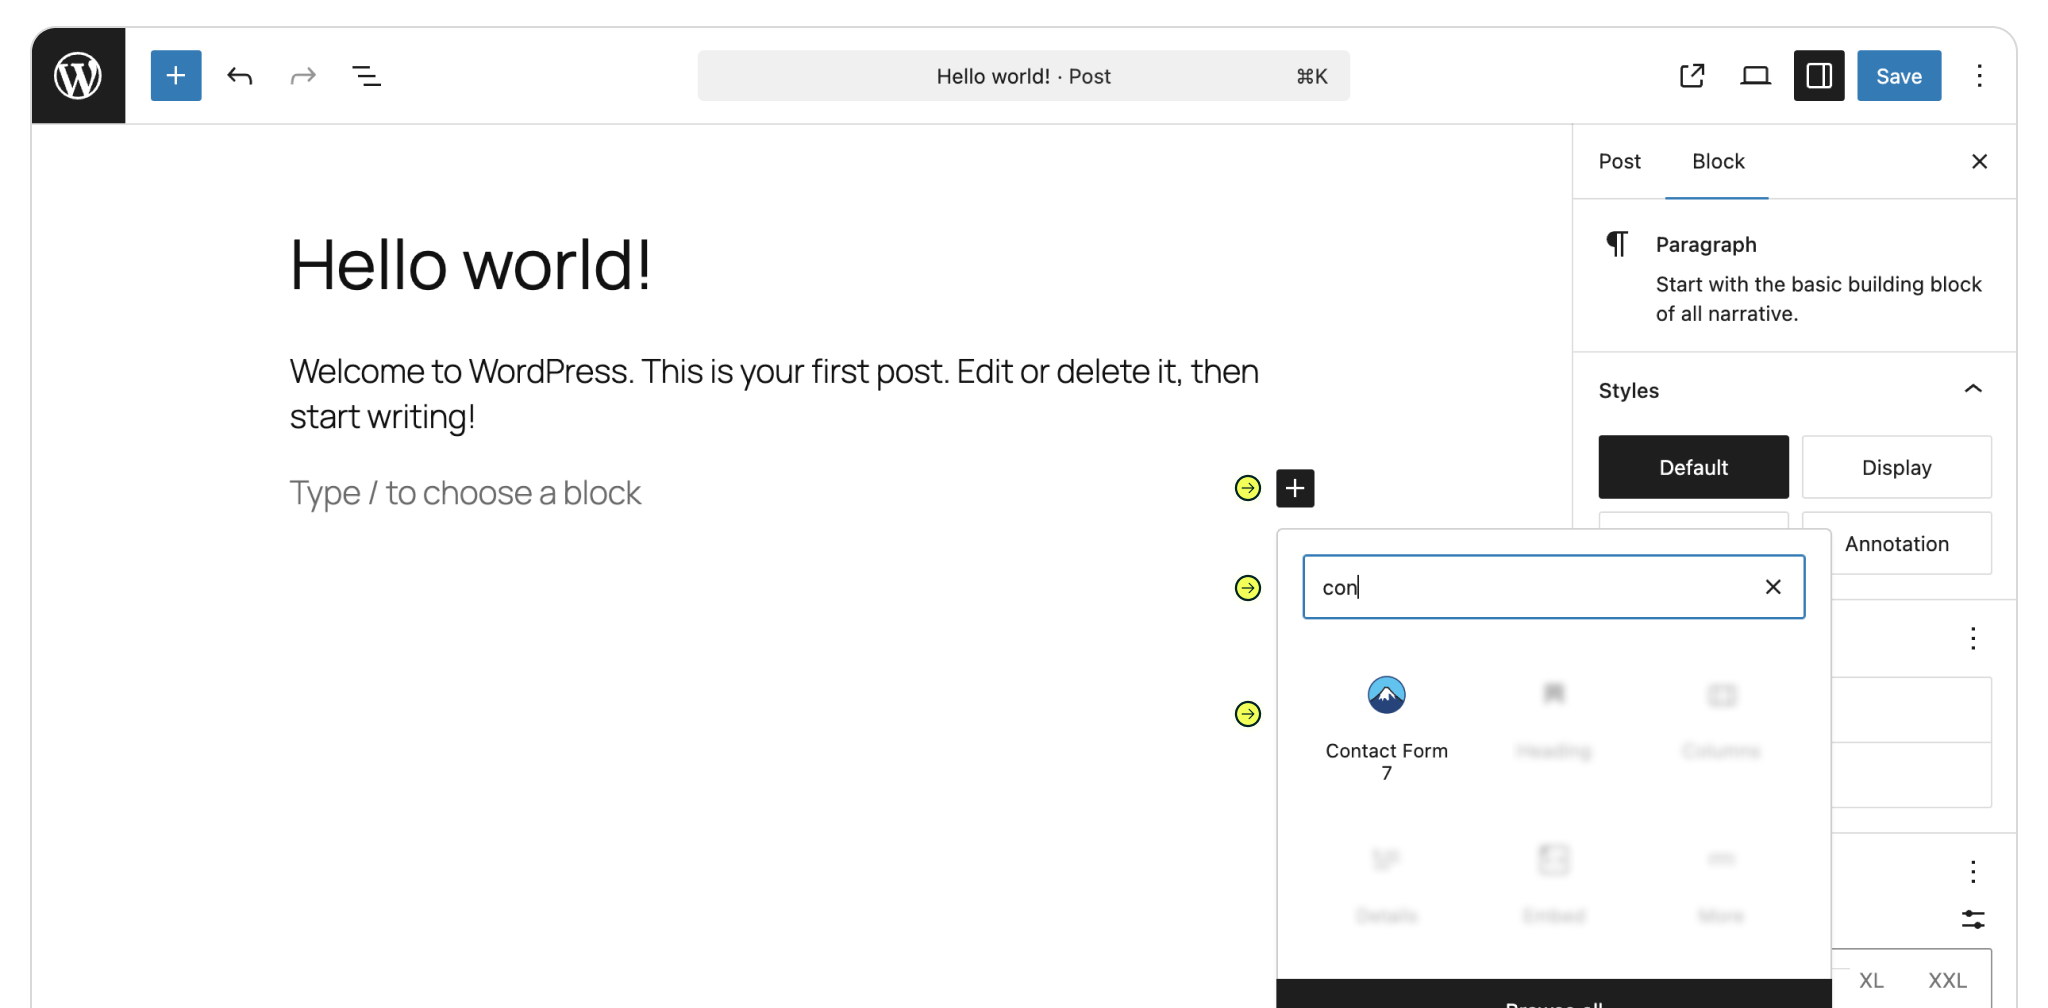
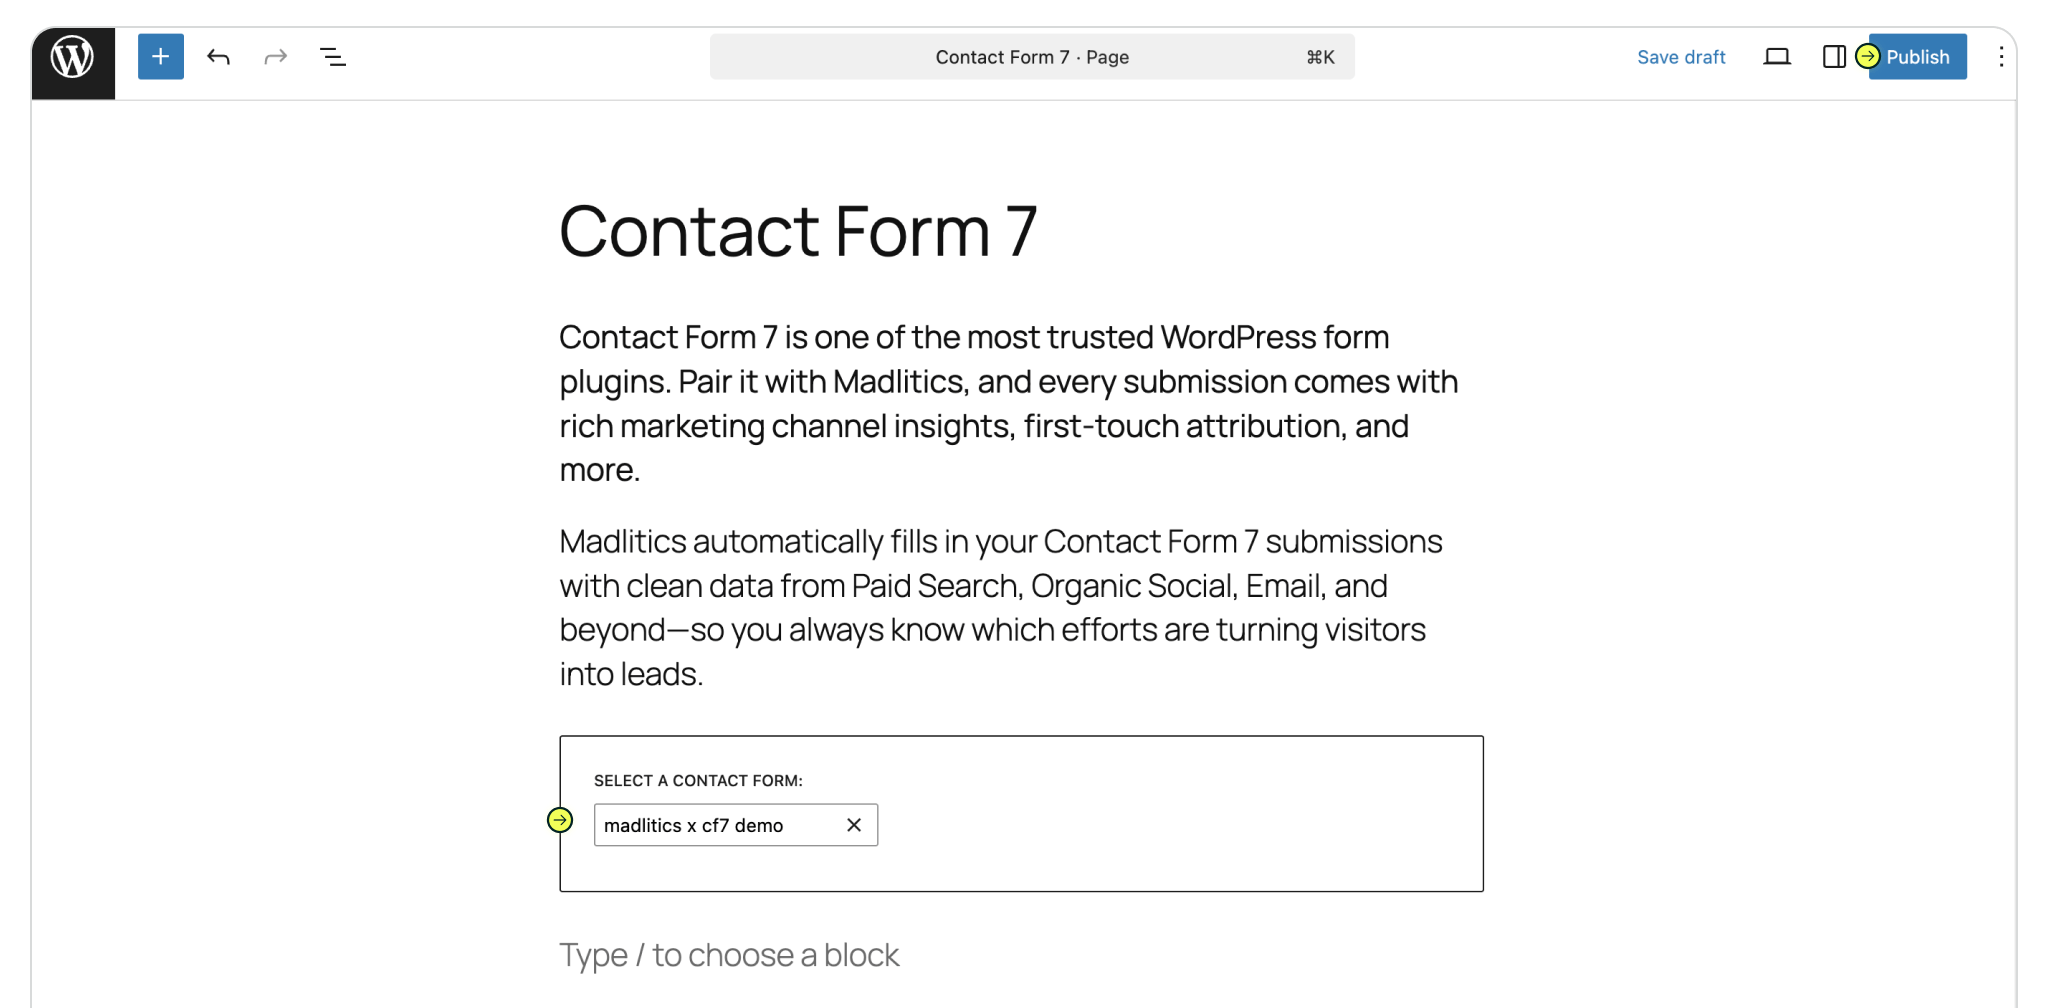
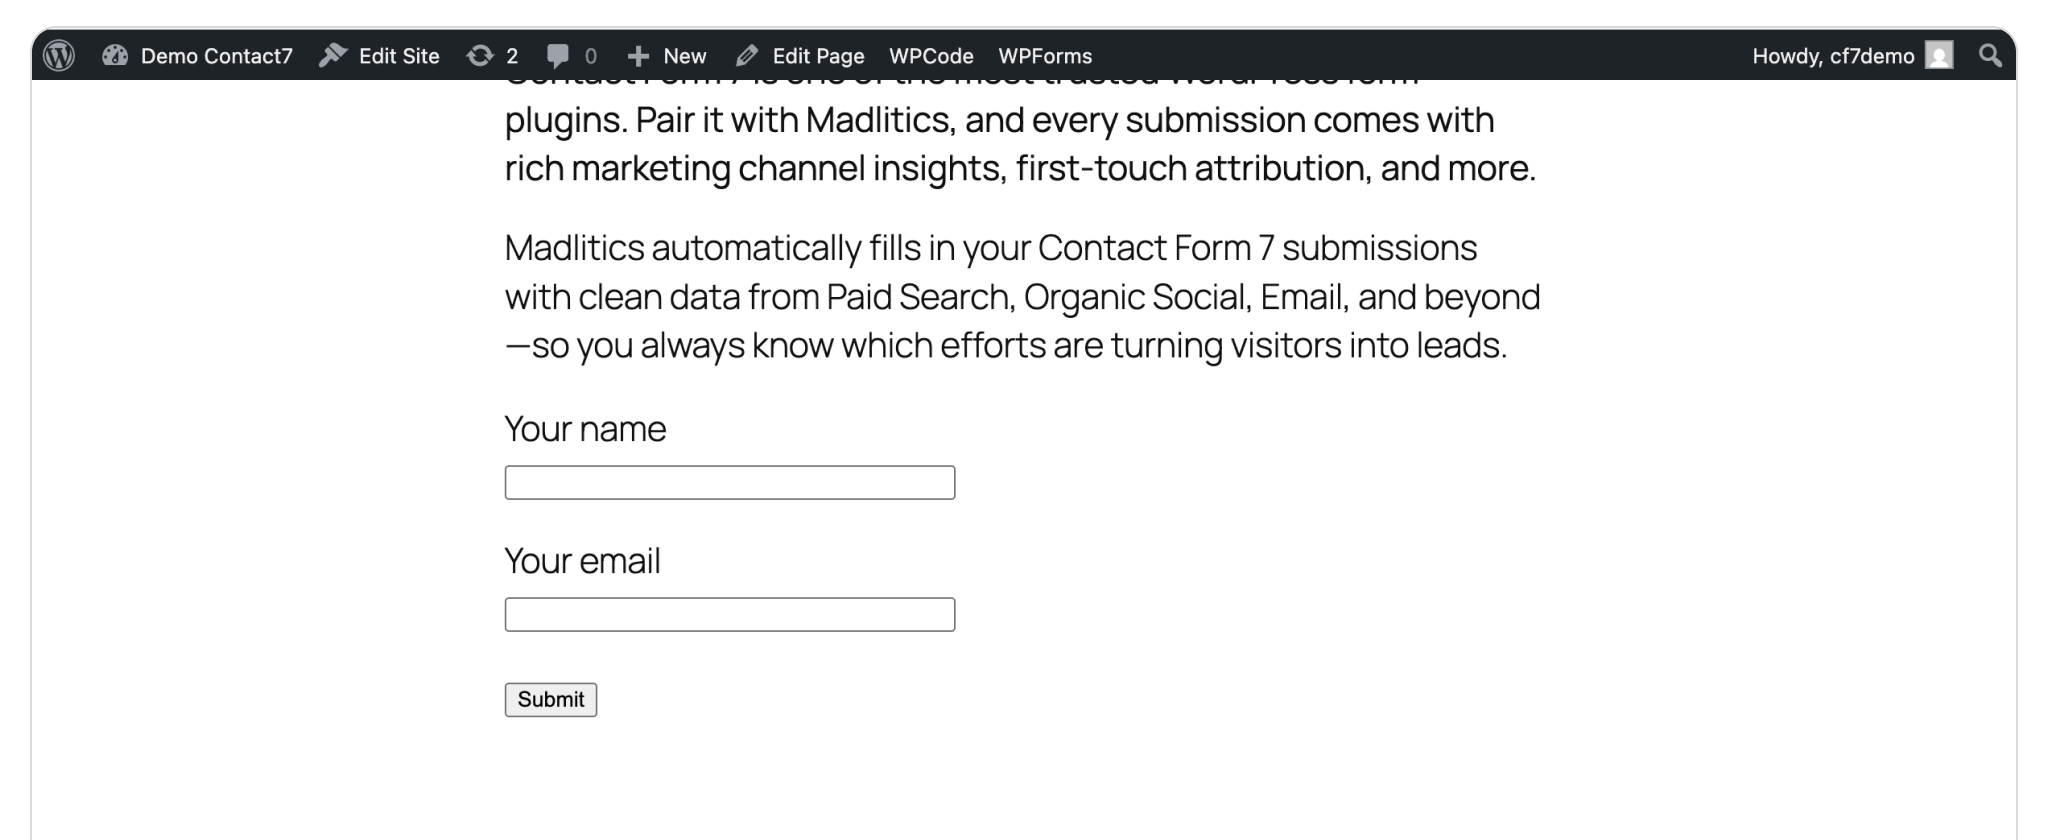
Select the page (or post) you want to begin capturing marketing data on, with the newly created form. In the page editor, select 'Add Block', search for Contact Form 7 and click the Contact Form 7 block component. Select the the name of the form, that includes the hidden fields, from the Select Form dropdown to embed it on the page.
Repeat the steps in this installation guide, on any number of pages, posts and forms across your site to capture marketing attribution data with Contact Forms 7 — any way you need.
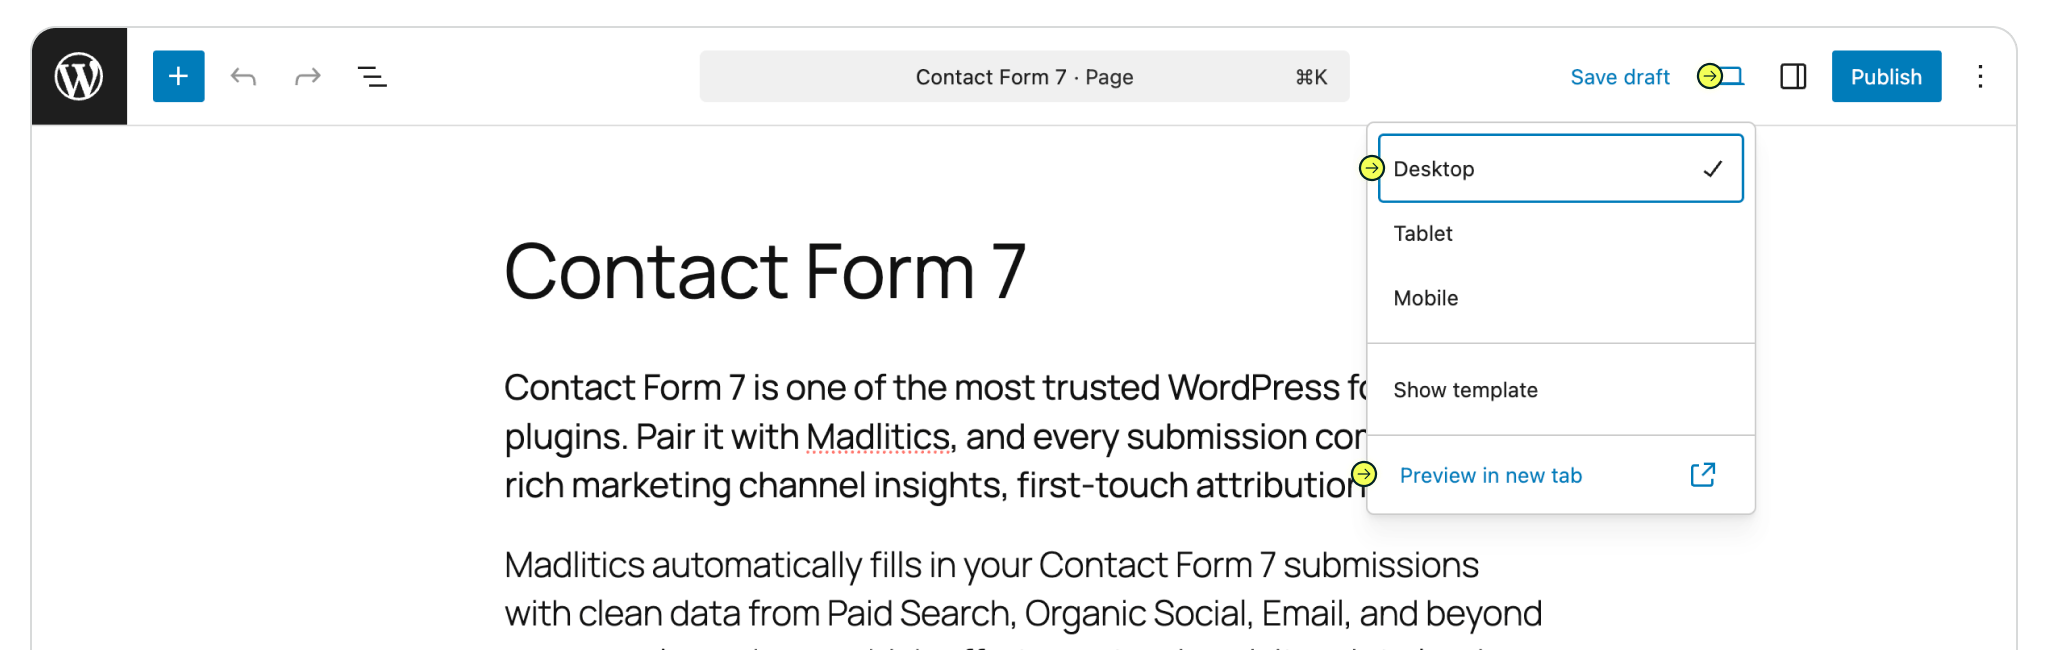
Once your form is ready, hit Preview to make sure everything looks good. If something seems off (like fields showing that should be hidden), don’t worry — it happens. Code input can be finicky and sometimes things don’t save the first time. Just copy the field snippet back in, save again, and refresh the preview.
When it looks right, go ahead and Publish your page. From there, you’re ready to test by submitting a form and confirming data flows through as expected.

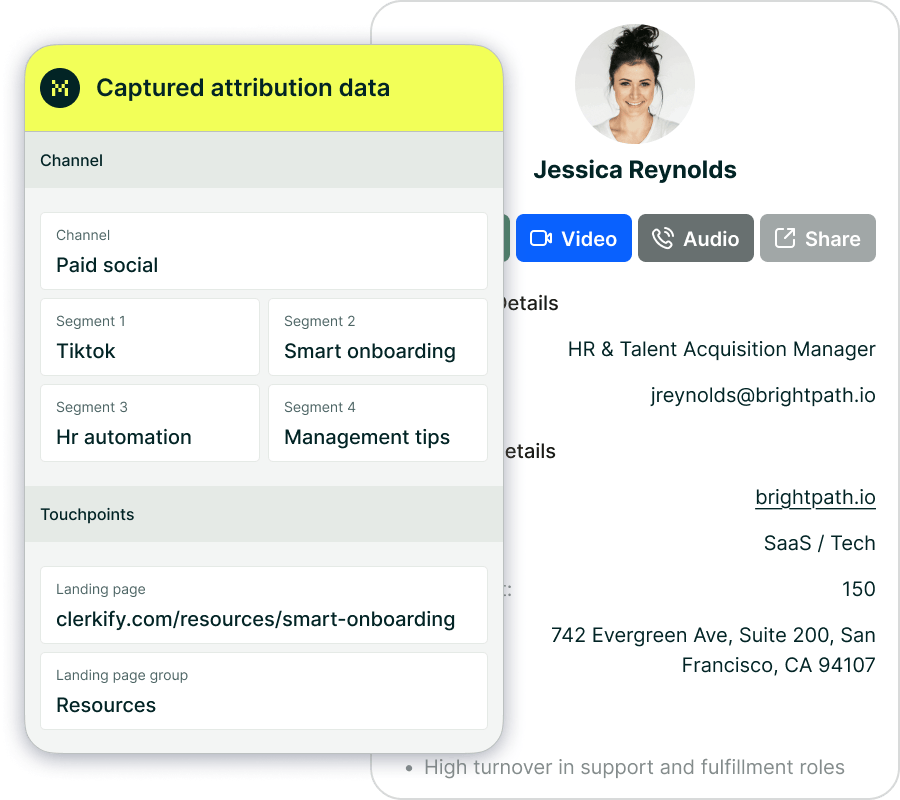


With Madlitics now activated and your forms ready to accept marketing attribution data, you can start tracking valuable insights immediately, and pass attribution data into your CRM, email marketing platform, business intelligence tool or more for advanced reporting.
Answers to common questions about setting up tracking with Madlitics and Contact Form 7