Support
Installing custom code on a Zoho Sites
Add scripts like Madlitics to the header of every page in Zoho Sites.
Start capturing attribution →
Zoho is a popular website builder designed for entrepreneurs, small businesses, and teams looking to launch branded websites without touching a line of code. But for marketers who rely on third-party tools—like analytics, advertising platforms, or attribution services—Zoho also includes built-in features that let you add custom code across your site.
In this guide, we’ll walk you through how to add a custom code snippet—like the one used by Madlitics—into the <head> tag of your Zoho Sites project. This ensures that scripts like tracking pixels or attribution tools run on every page, right when the site loads.
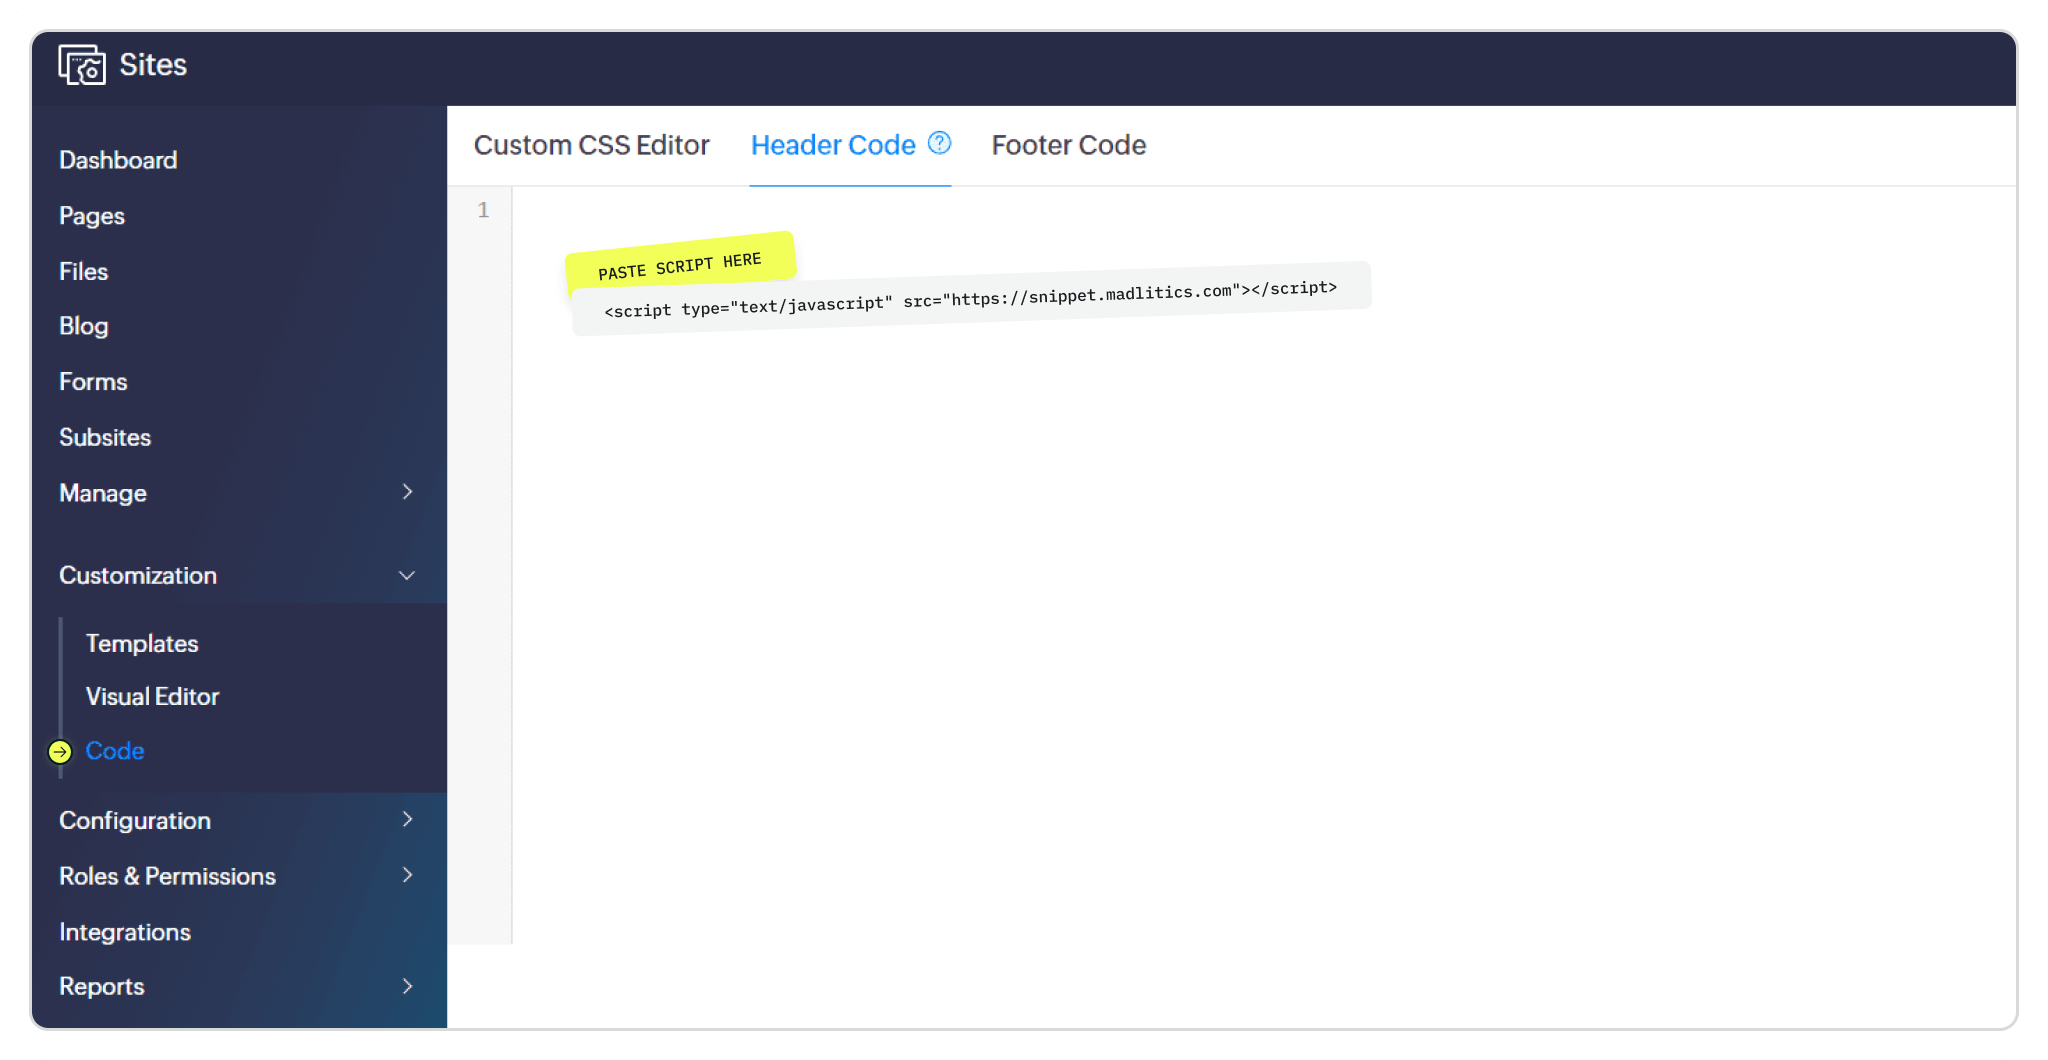
📝 Note: If you're on a limited plan, check your access to the Header and Footer Code section.
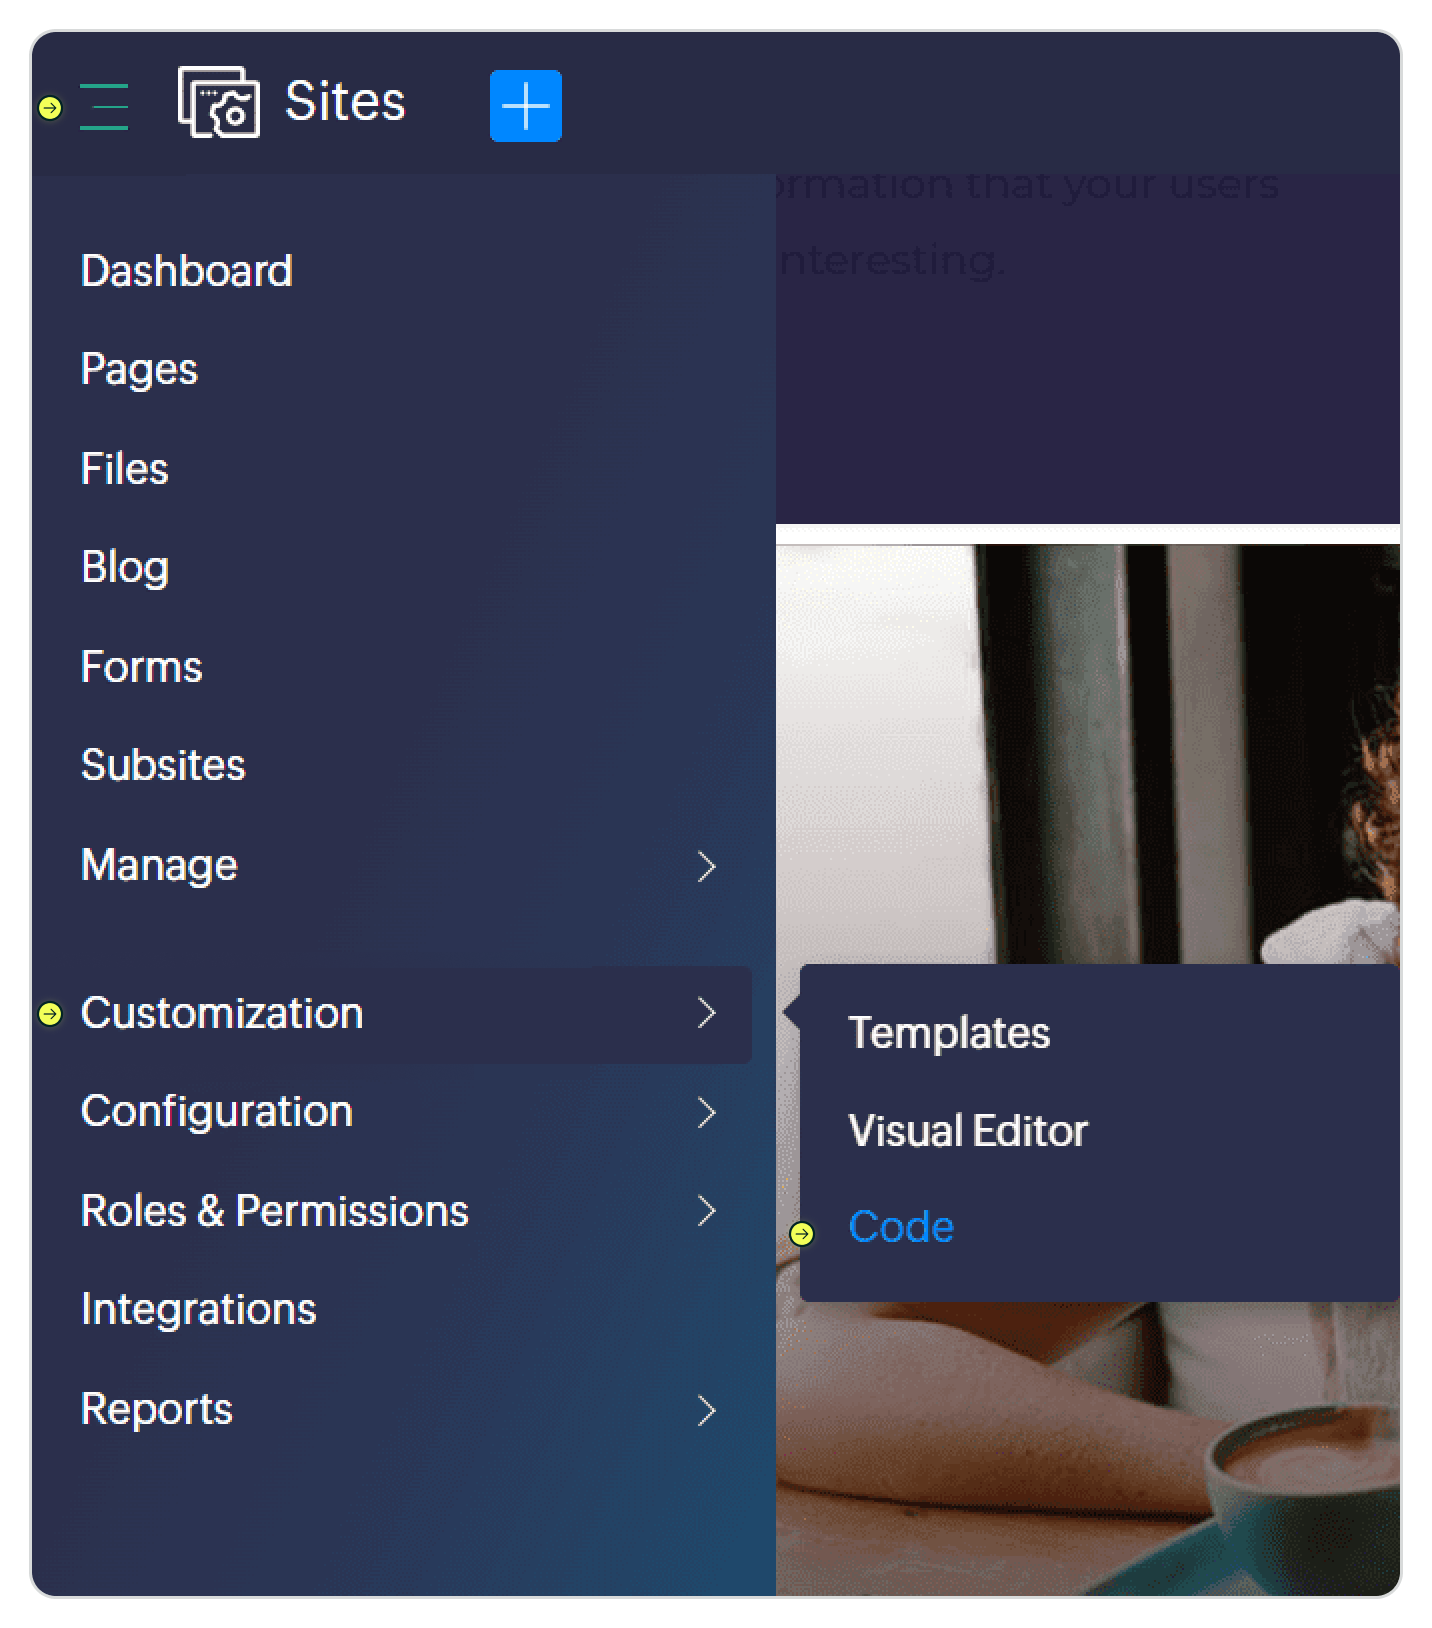
To start, log in to your Zoho Sites dashboard and select the project you want to update.
From the dashboard, navigate to the Customization section using the left-hand sidebar. Then select Code. This opens up the interface where you can insert header and footer scripts.
Within this editor, you’ll see two primary fields: Header Code and Footer Code. To install Madlitics — or any script that needs to load in the <head> — paste your snippet directly into the Header Code box.
Once your code is added, click Save to apply the changes. Then hit Publish to push those changes live across your entire site.


Verifying your Madlitics installation
To confirm your installation, open your site in a browser and right-click anywhere on the page, then select Inspect (or use Cmd + Option + I on Mac / Ctrl + Shift + I on Windows). In the Elements tab, scroll to the <head> section and look for your code snippet — such as the madlitics.com script URL. If it’s there, your injection is active and ready to collect data.


Need Help?
If you're having trouble or want someone to walk through your setup, reach out to our team. We’re happy to help confirm your Madlitics installation or troubleshoot any issues with your custom script.
Answers to common questions around Zoho CRM and Madlitics