Support
How to Capture UTM Parameters in Forms
Learn the common ways UTMs get lost — and the reliable pattern to capture campaign data in every form submission across platforms.
Start capturing attribution →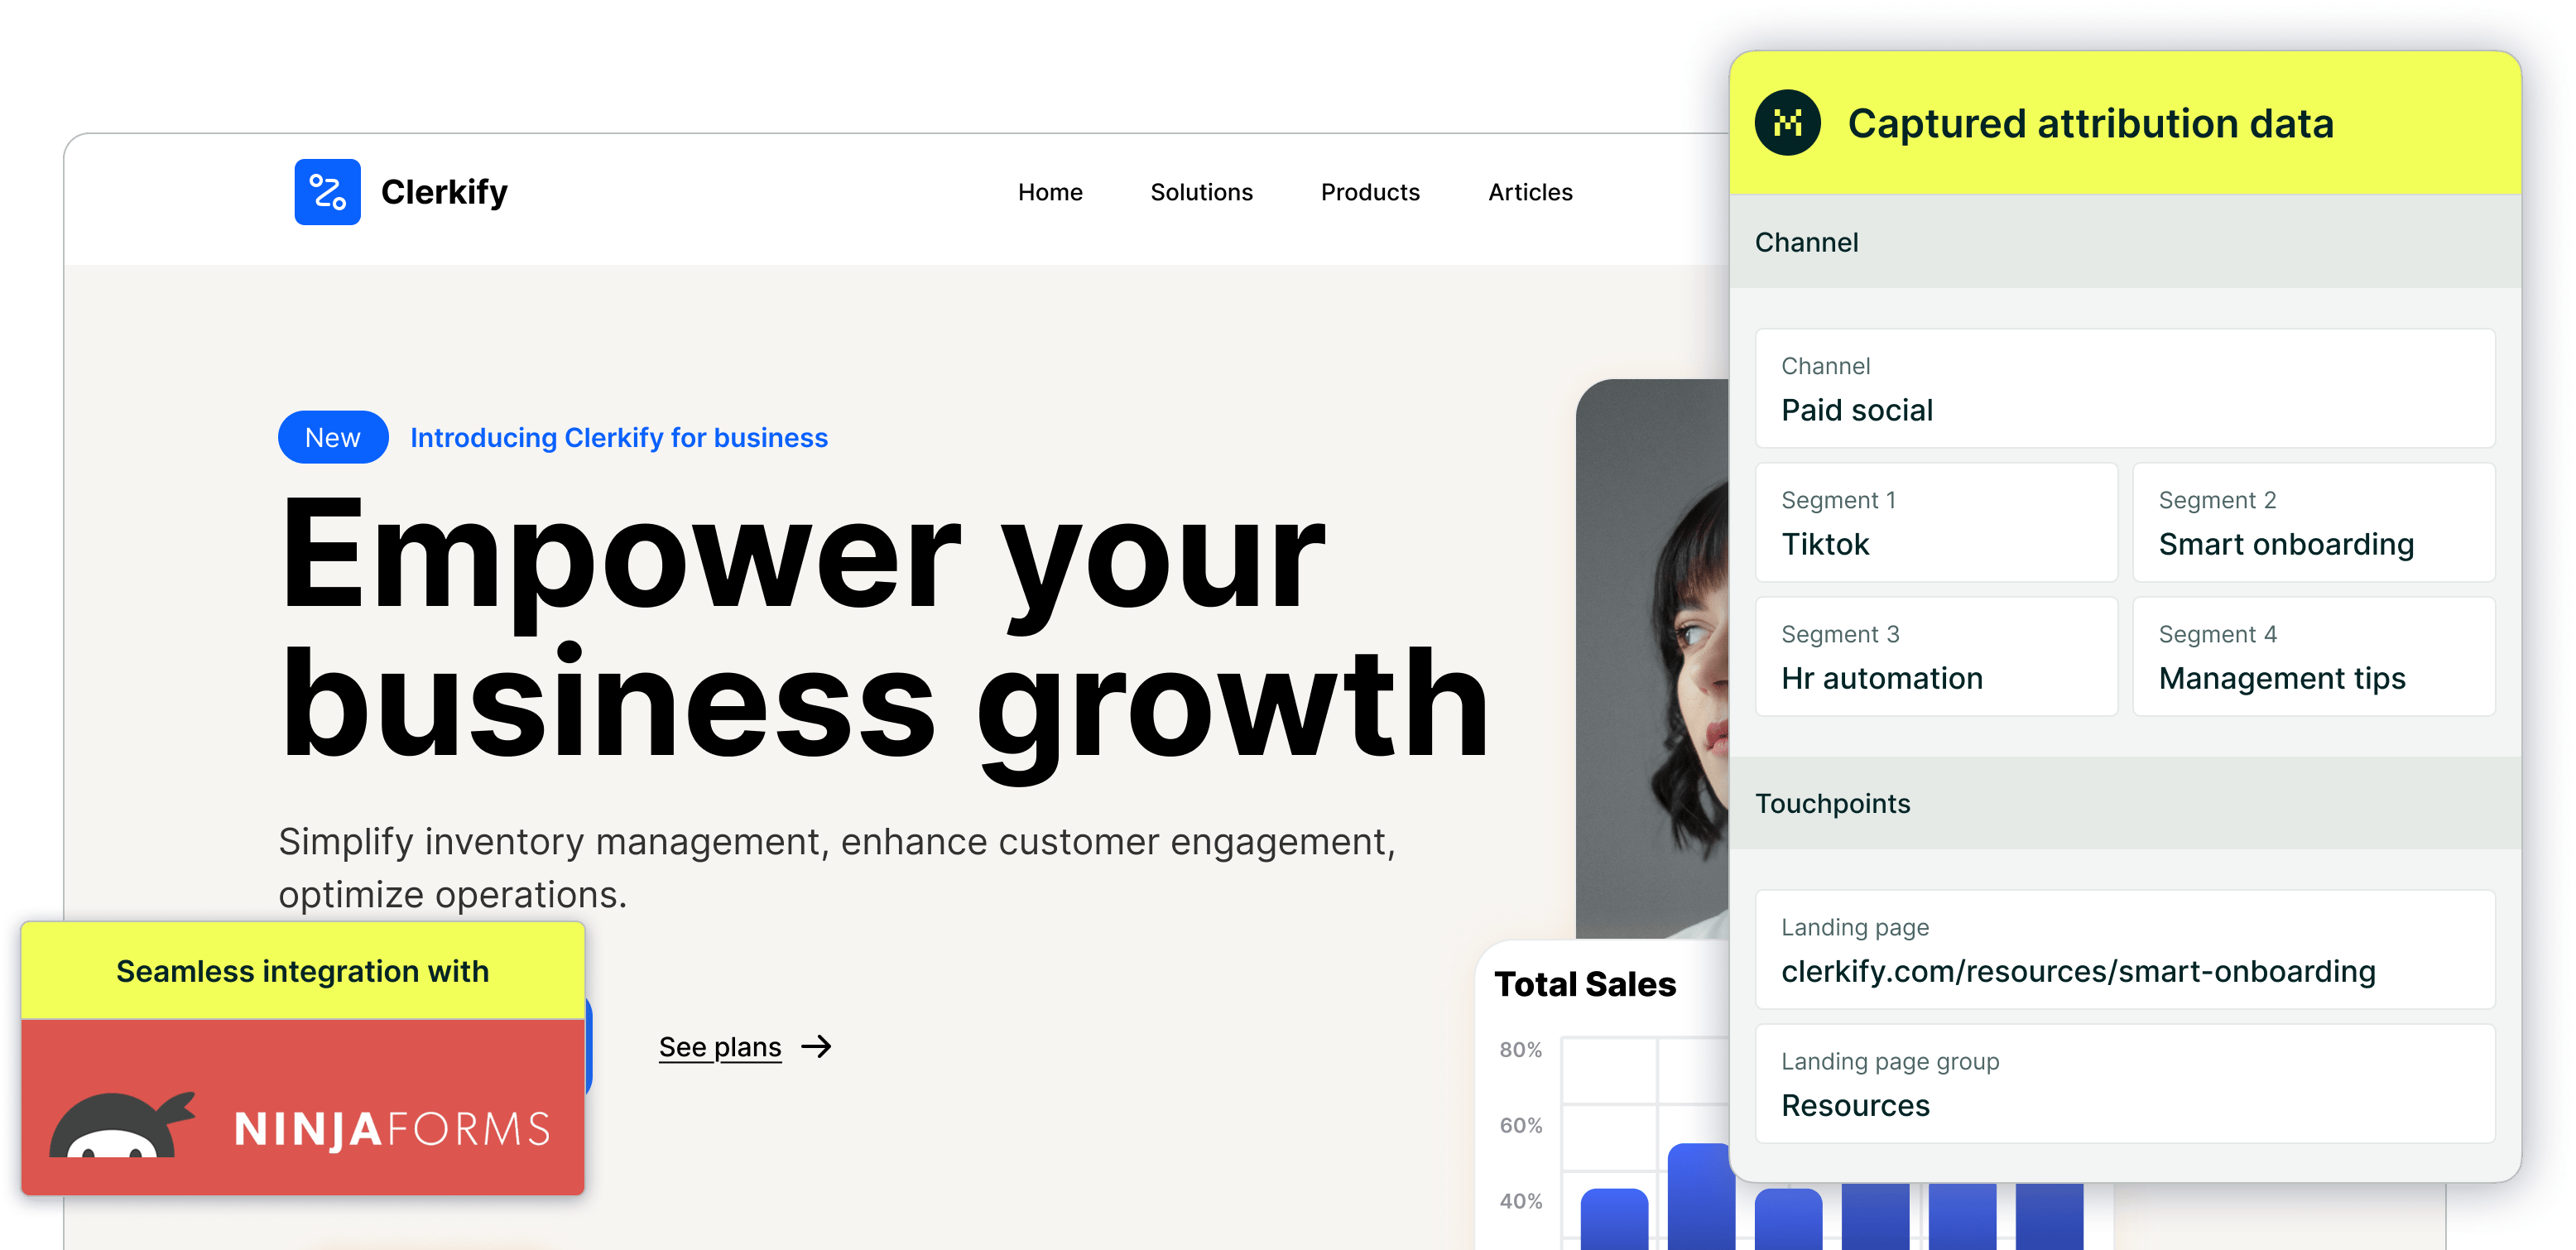
Madlitics makes it simple to pair marketing attribution with form submissions, so you know exactly where every lead came from. By adding a set of hidden fields powered by Madlitics, your forms can automatically collect details like channel, campaign, and landing page — without adding any extra work for your visitors.
Step-by-Step Overview
1. Create a new form
Start by creating a new form inside your form builder. Build it however you normally would—whether it’s a simple contact form, a newsletter signup, or a multi-step lead capture form. Madlitics doesn’t change how your form looks or functions for visitors, so you can add any visible fields you need (name, email, phone, etc.) while preparing to drop in the attribution fields behind the scenes.
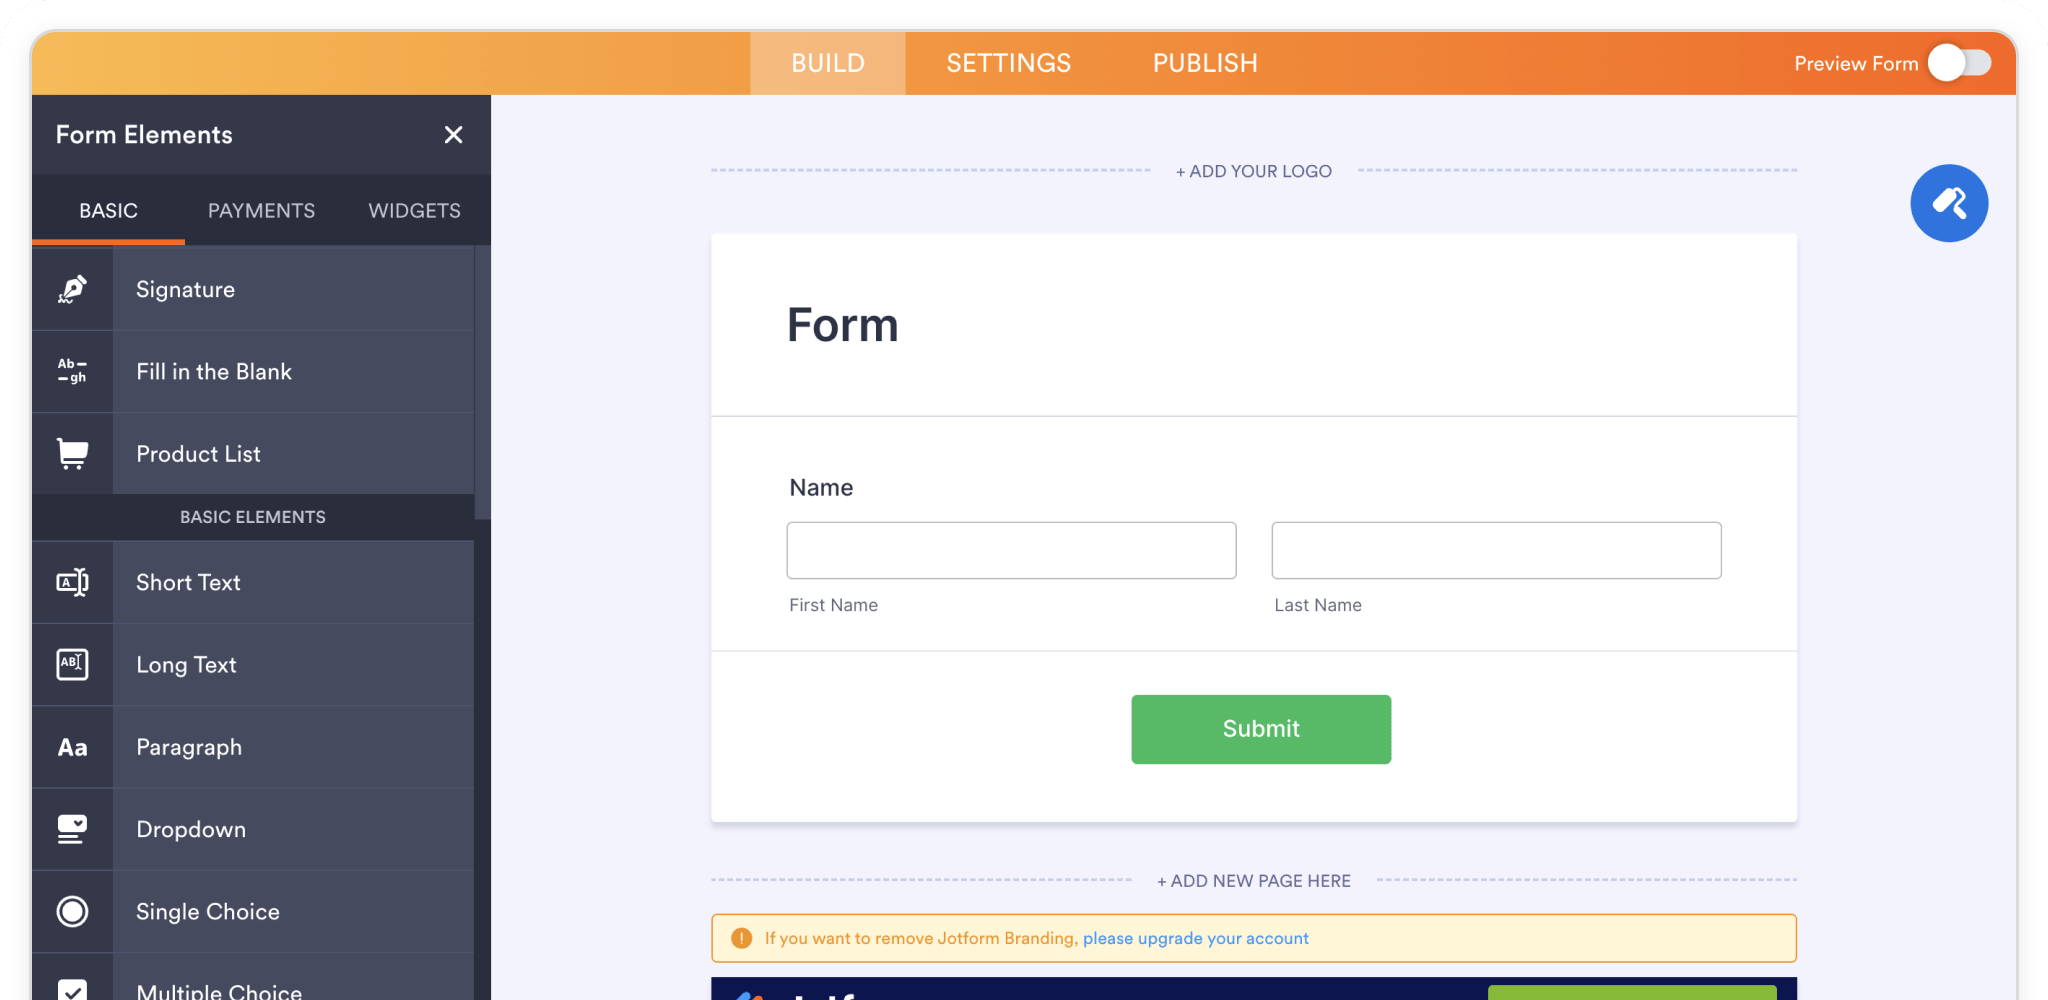
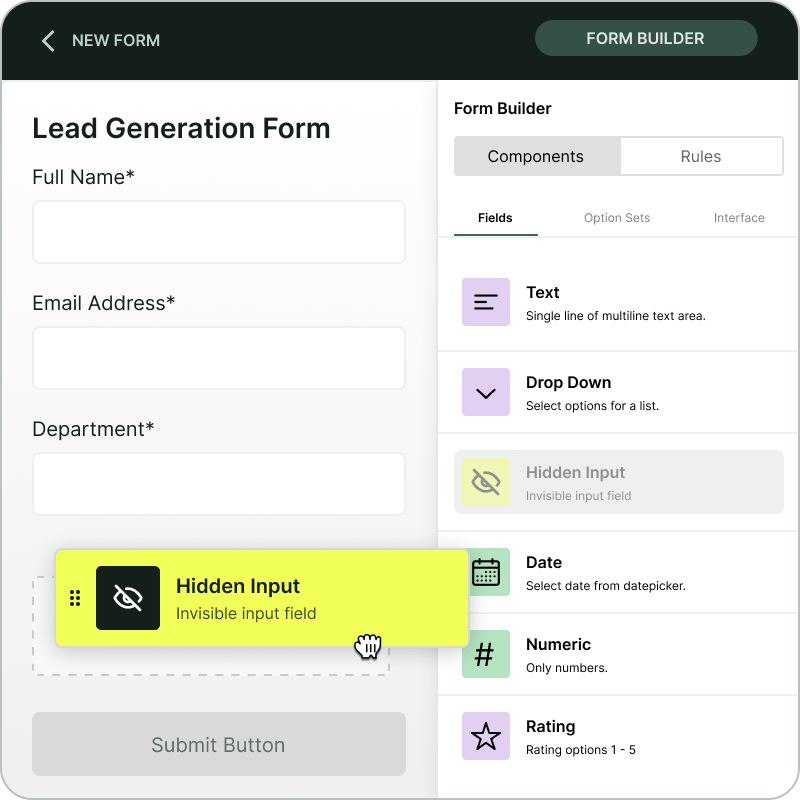
2. Add Madlitics fields
To capture attribution data, you’ll need to add seven (7) Madlitics fields. These fields are hidden from visitors and automatically pull in marketing details from the Madlitics script running on your site. Together, they capture a complete view of how the visitor arrived—including their channel, campaign, and the page where they landed.
Place a field (typ. 'Hidden') in your form to store attribution data from Madlitics. A common pattern is to select the field to access the field properties. Within the field properties panel define the Field Label channel. Next, usually found in an advanced portion of the field properties, define the Default Value to [channel].
Repeat this process for the remaining six (6) Madlitics fields. Once you’ve got all seven Madlitics fields configured, save your form — you’re ready to start capturing rich attribution data alongside your lead details. Configure additional Madlitics field value pairs for deeper customization and richer insights.
Madlitics field 1: Channel
Marketing channel category
Field label: channel
Default value: [channel]
Madlitics field 2: Segment 1
Captures the utm_source parameter
Field label: segment1
Default value: [segment1]
Madlitics field 3: Segment 2
Captures the utm_campaign parameter
Field label: segment2
Default value: [segment2]
Madlitics field 4: Segment 3
Captures the utm_term parameter
Field label: segment3
Default value: [segment3]
Madlitics field 5: Segment 4
Captures the utm_content parameter
Field label: segment4
Default value: [segment4]
Madlitics field 6: Landing Page
Captures the landing page url a visitor first arrived on
Field label: lp
Default value: [lp]
Madlitics field 7: Landing Page Group
Captures the landing page group a visitor first arrived on.
Field label: lpg
Default value: [lpg]

If you are using an HTML form, custom form, or embedded form (not a form builder platform) a sample input would look like:<input type="hidden" name="channel" value="[channel]">
<input type="hidden" name="segment1" value="[segment1]">
<input type="hidden" name="segment2" value="[segment2]">
<input type="hidden" name="segment3" value="[segment3]">
<input type="hidden" name="segment4" value="[segment4]">
<input type="hidden" name="lp" value="[lp]">
<input type="hidden" name="lpg" value="[lpg]">
4. Embed the form on your site
Make sure the form is placed somewhere the Madlitics script is already installed and running — publish the form on a live page where visitors will submit it.
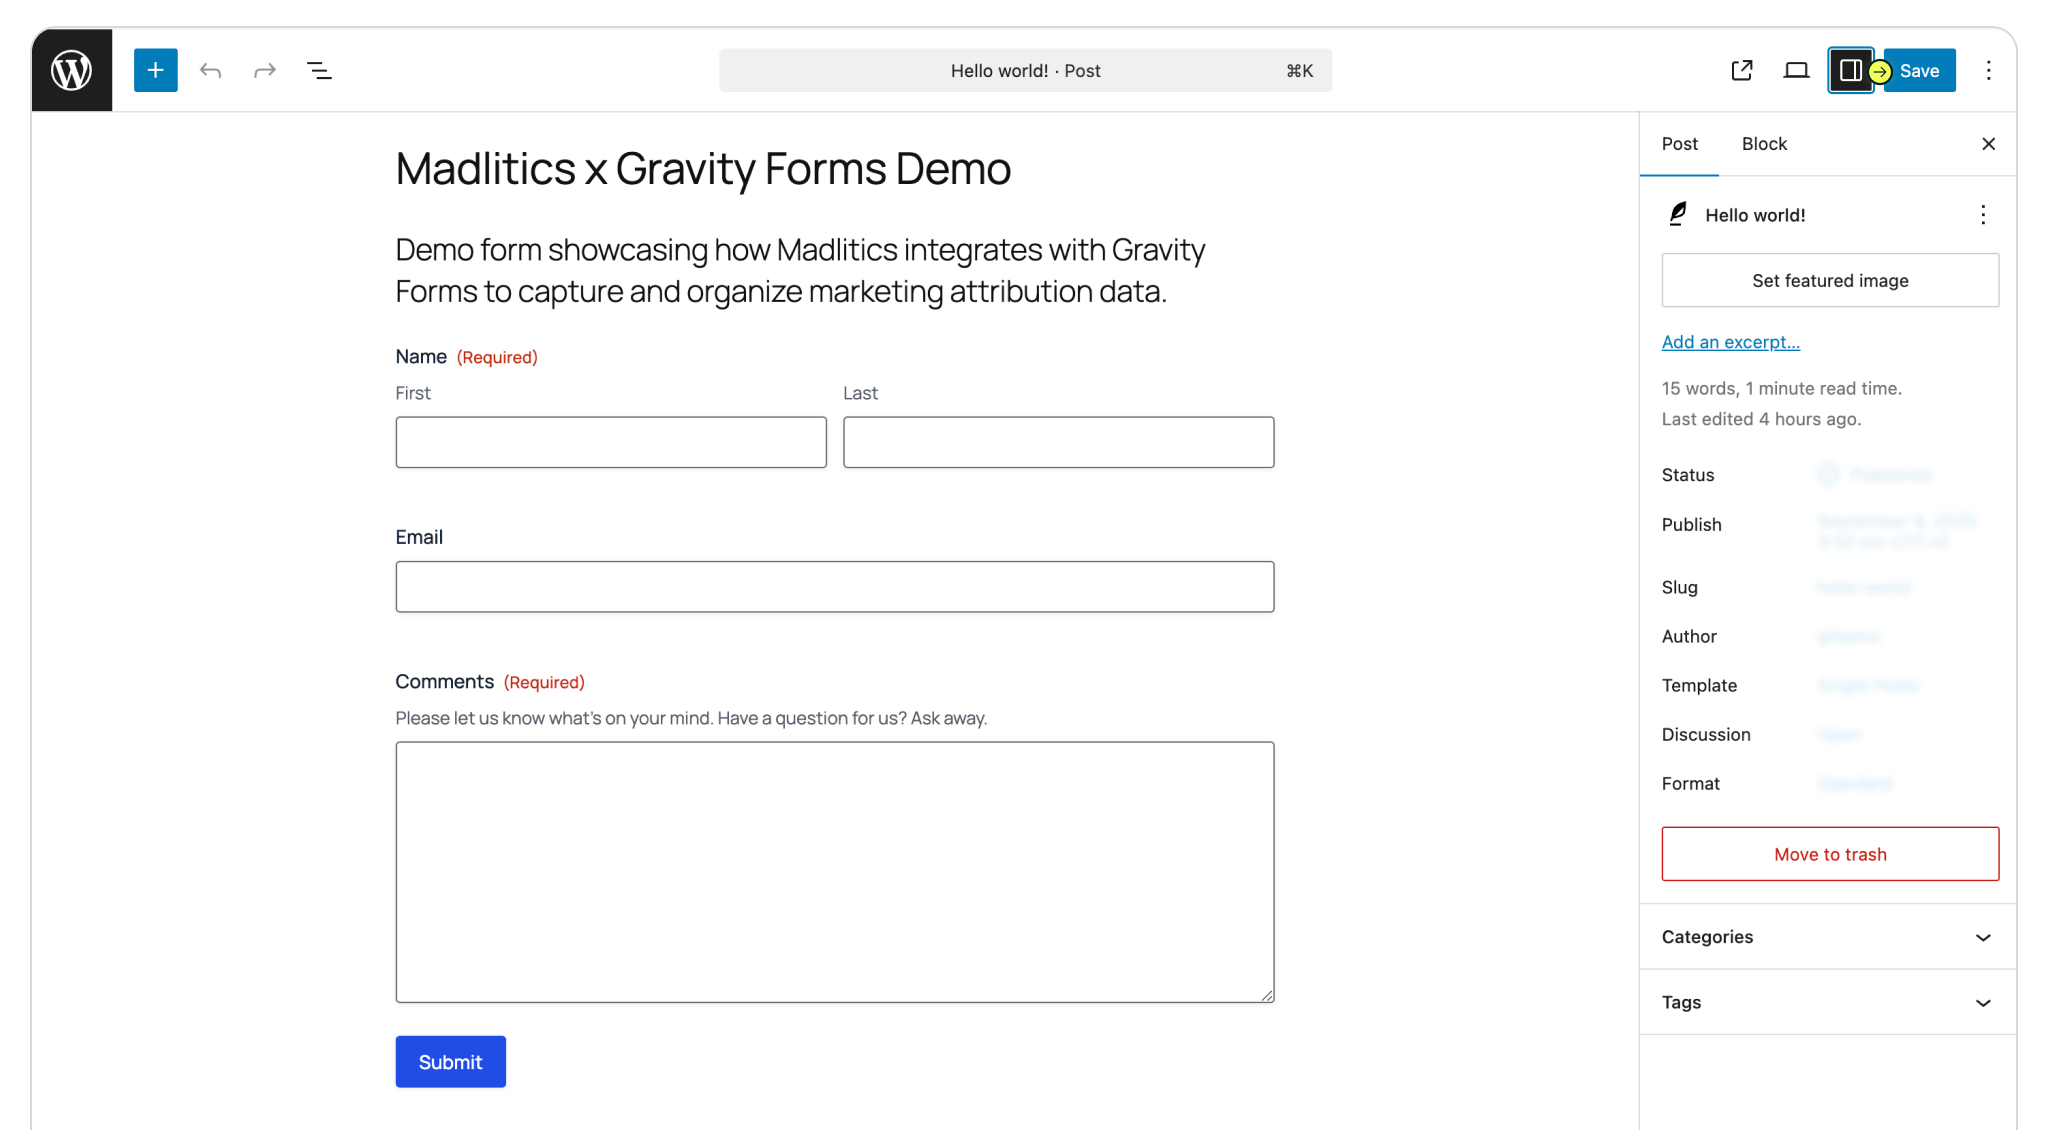
5. Test and publish your form
Choose a page (or post) on your site to embed the form, then publish it live. Once you’ve confirmed the data is flowing correctly, you can be confident that attribution details will pass seamlessly into your connected tools—whether that’s your CRM, analytics platform, or reporting dashboard.
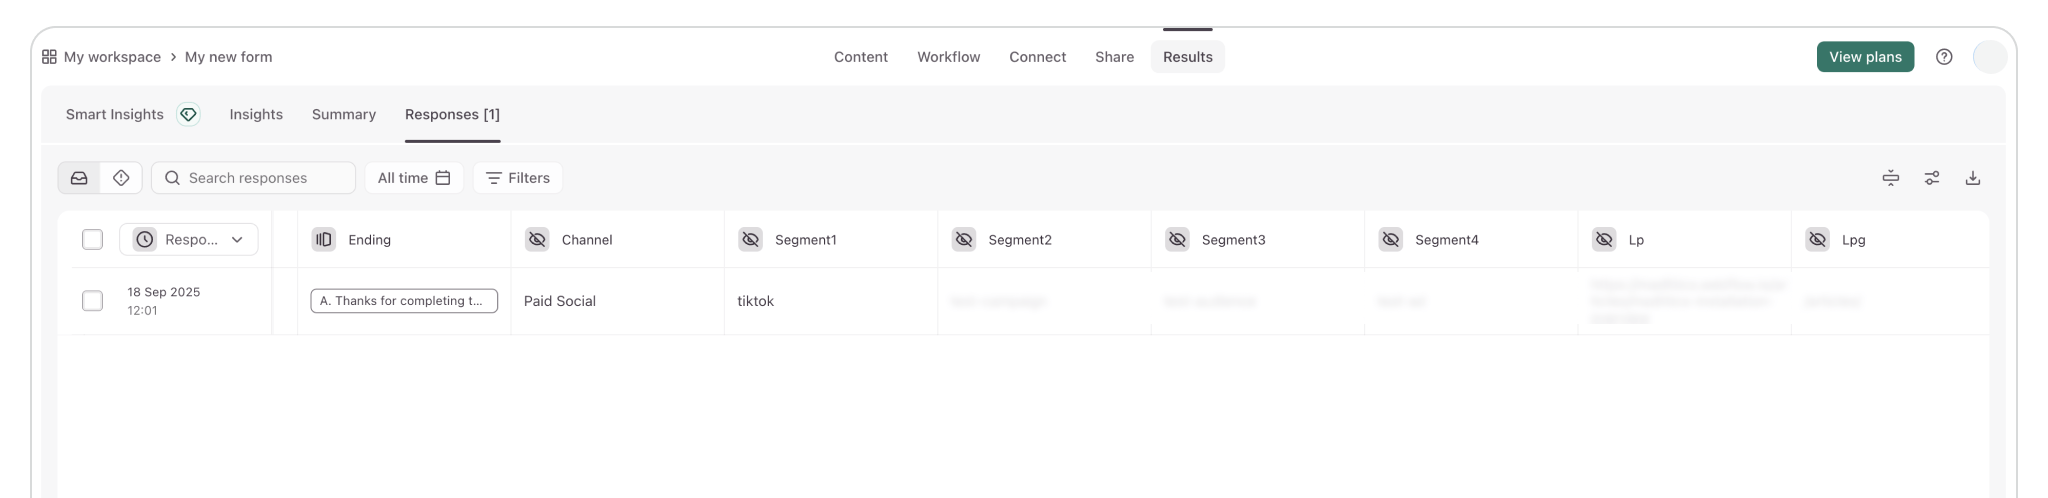

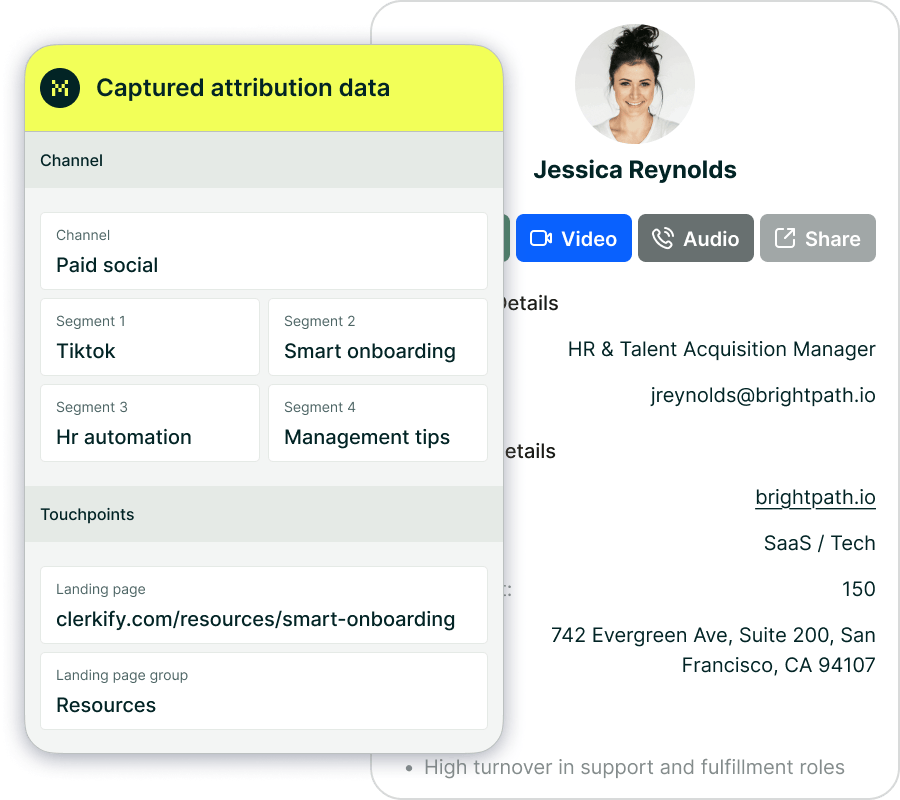

Once your Madlitics fields are set up, your forms are fully equipped to capture clean, consistent attribution data with every submission. Meaning, you’ll know exactly where each lead came from — whether it was a paid ad, social post, or organic search — and how they moved through your site before converting.
Getting attribution right at the form level is a big step toward smarter marketing decisions — and Madlitics makes it simple.


Answers to your top questions about our platform