Support
Installing Madlitics using Google Tag Manager
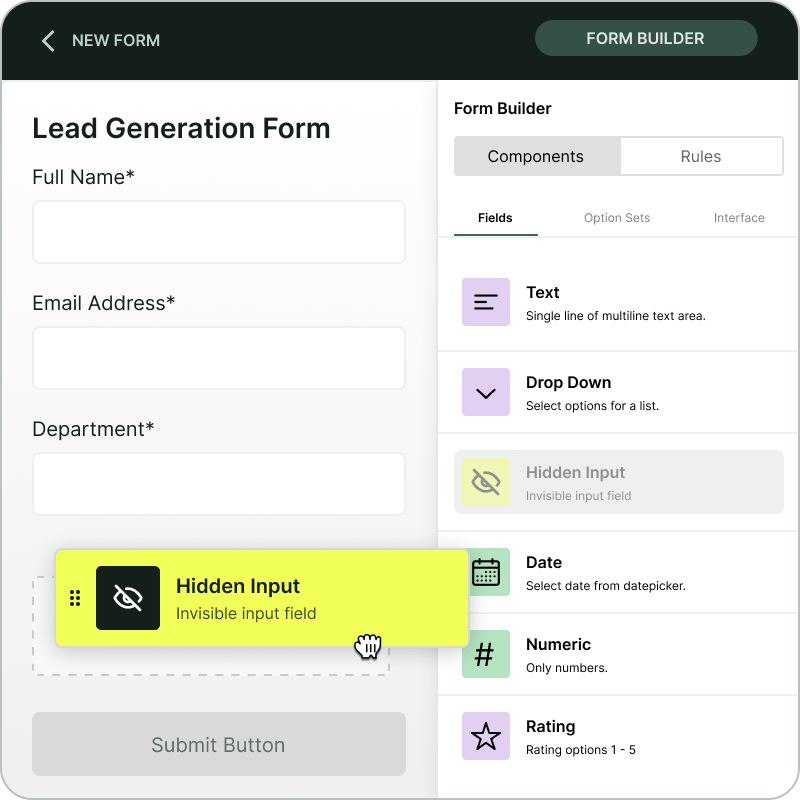
How to install custom code snippets to your site using GTM
Start capturing attribution →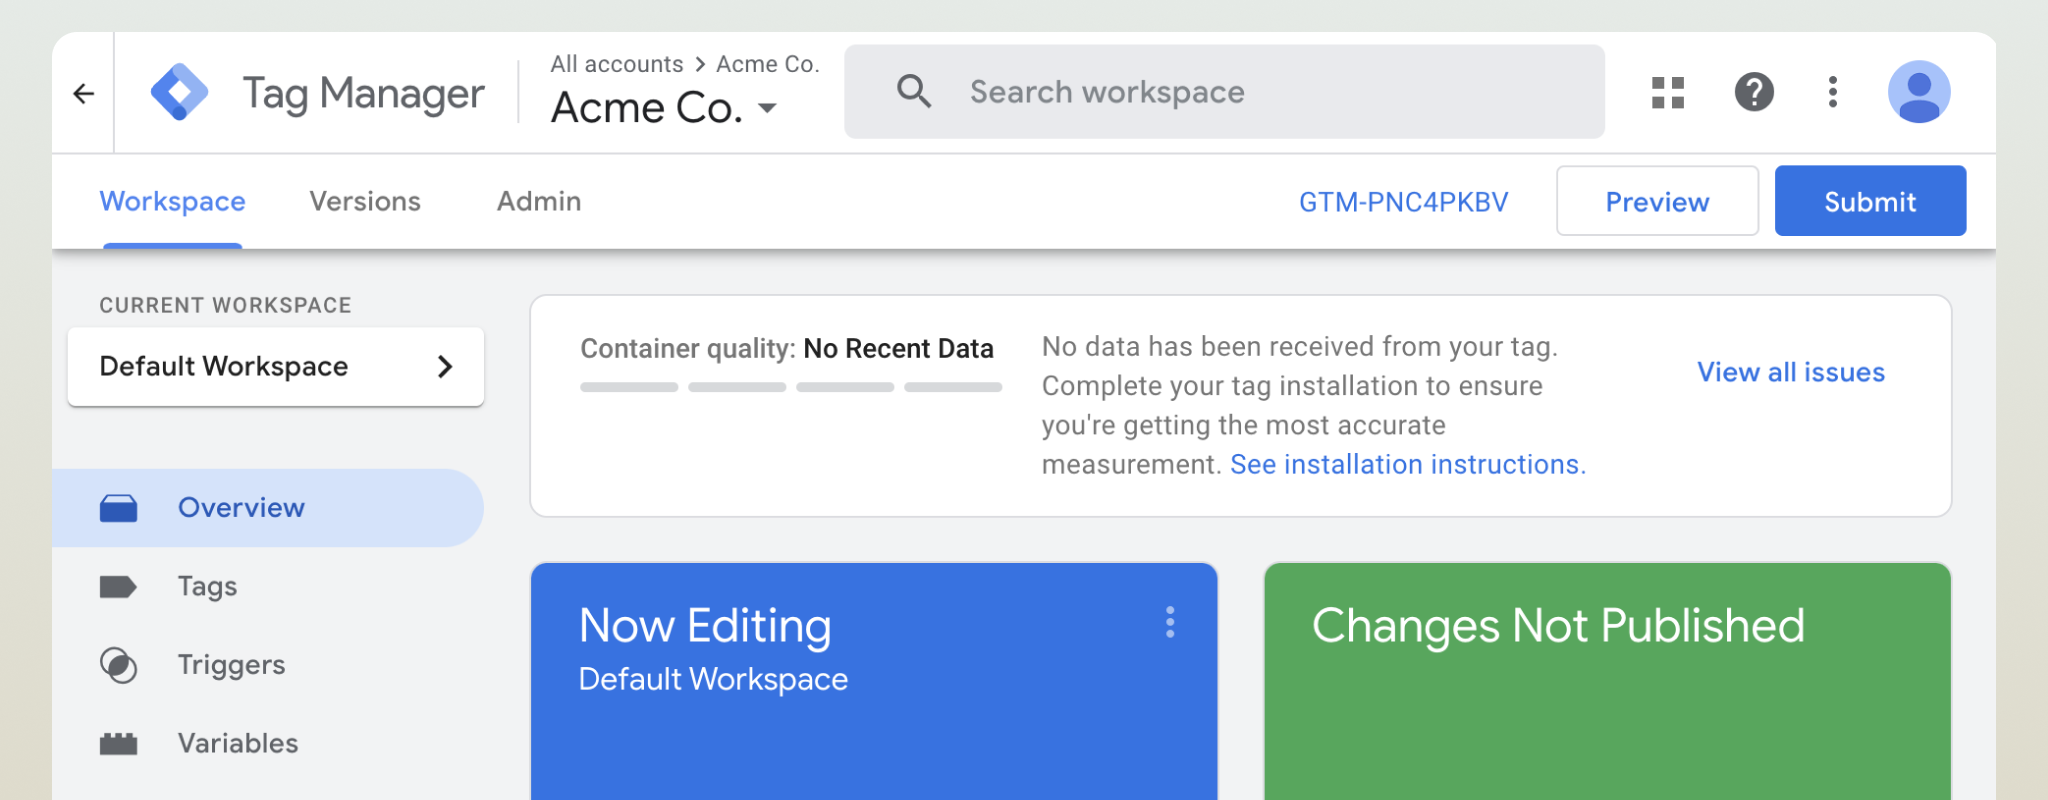
Google Tag Manager (GTM) is one of the easiest ways to manage third-party code on your website — no editing theme files, no digging into plugin settings, no hassle.
With GTM, you control all your tracking scripts from a single dashboard. That means faster updates, cleaner code, and less risk of breaking your site.
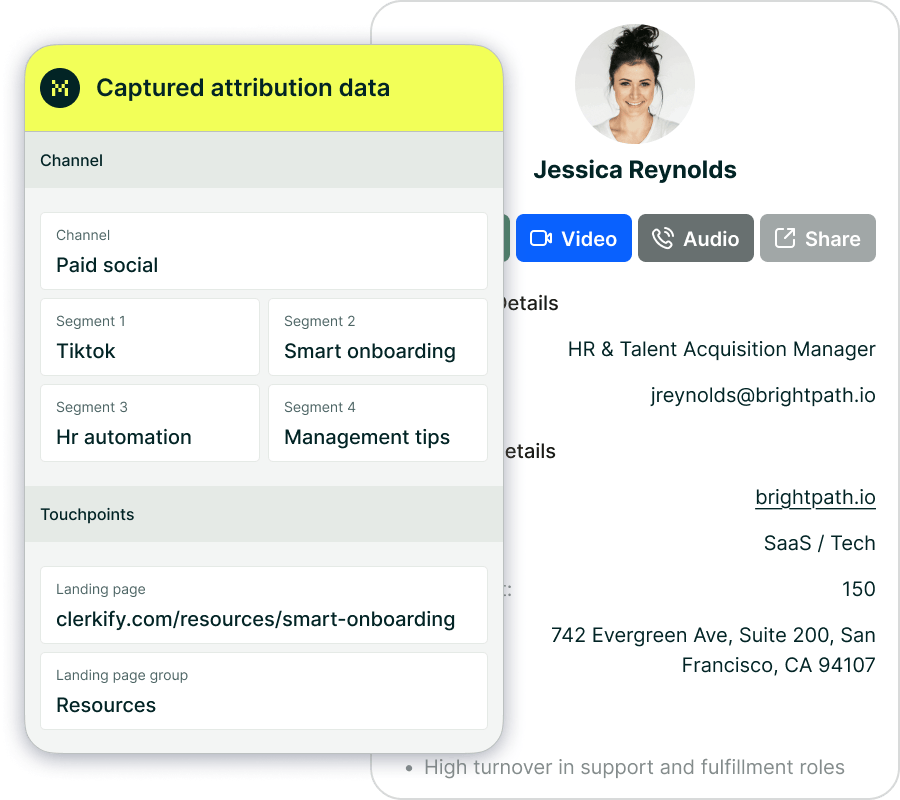
When you pair Madlitics with GTM, you unlock clean, first-party attribution data that flows directly into your CRM and marketing tools — even if a visitor returns days later. Paid Search, Organic Social, Email — all captured automatically, right from the first visit.
We’ll walk you through how to install tracking code on your site using GTM, focusing on the Madlitics snippet for attribution.
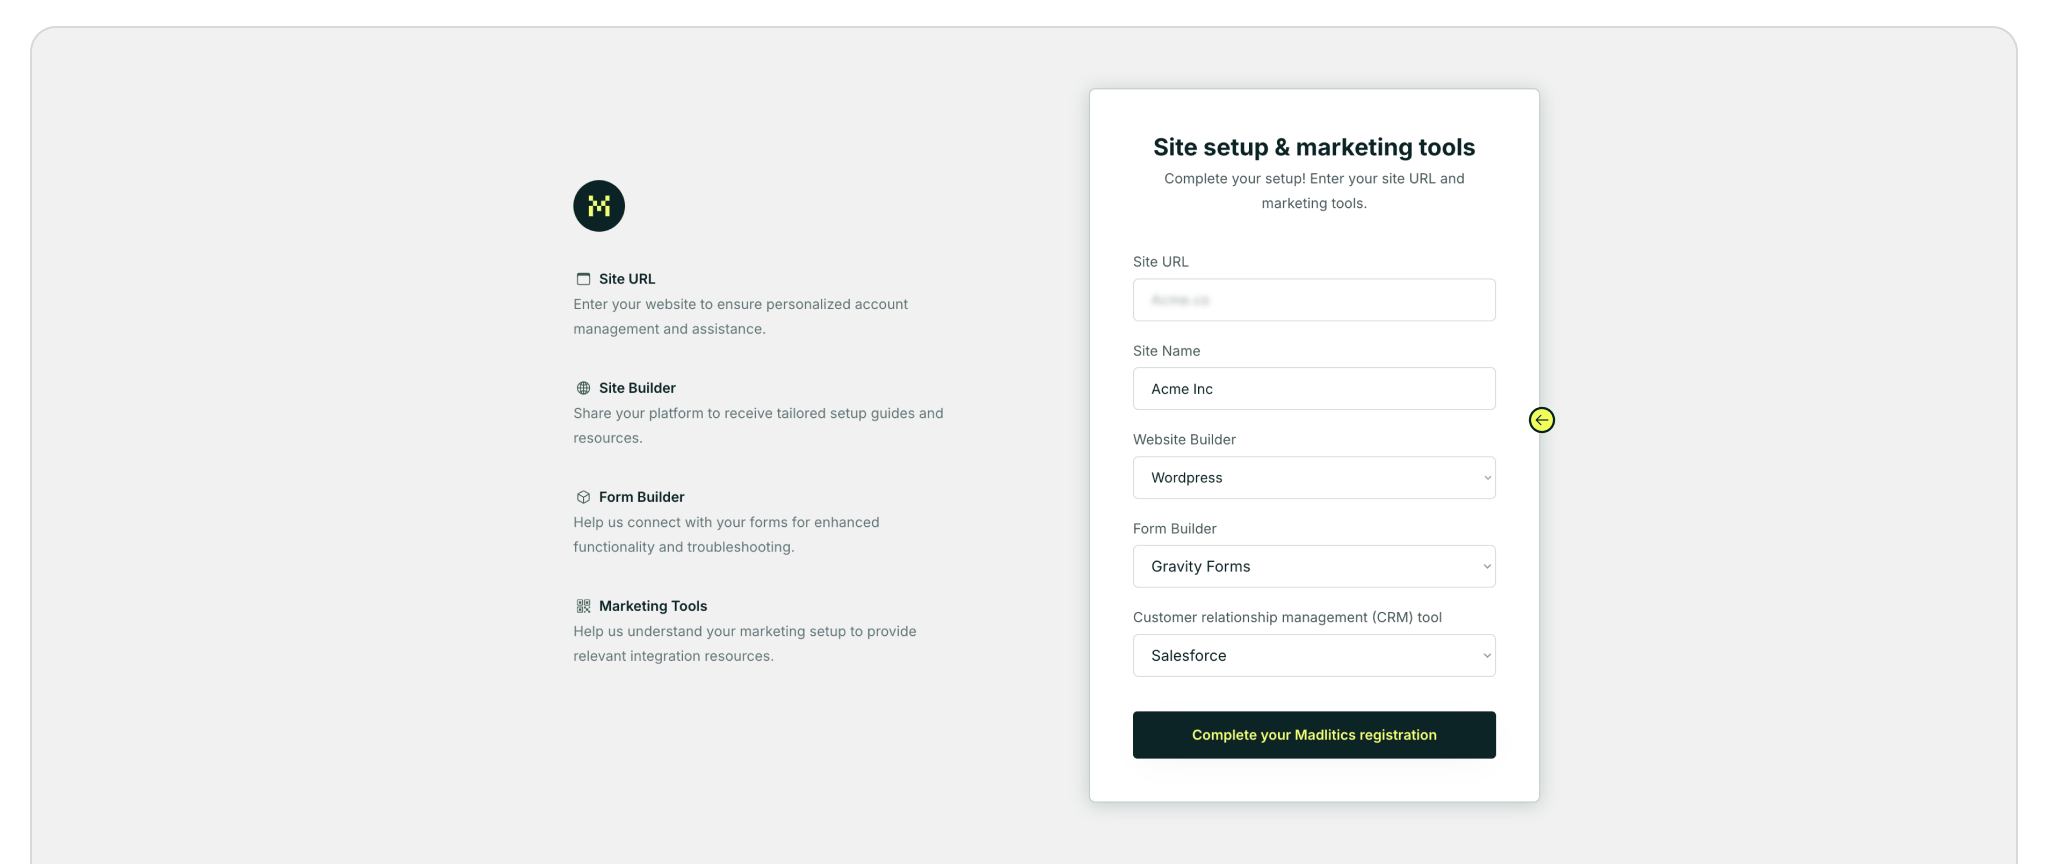
Prerequisite: Before you can install Madlitics, you’ll need to create a Madlitics account. Registration unlocks your dashboard, and copy the code snippet that powers attribution. This step only takes a minute and ensures you have everything ready before moving on to the platform-specific setup.
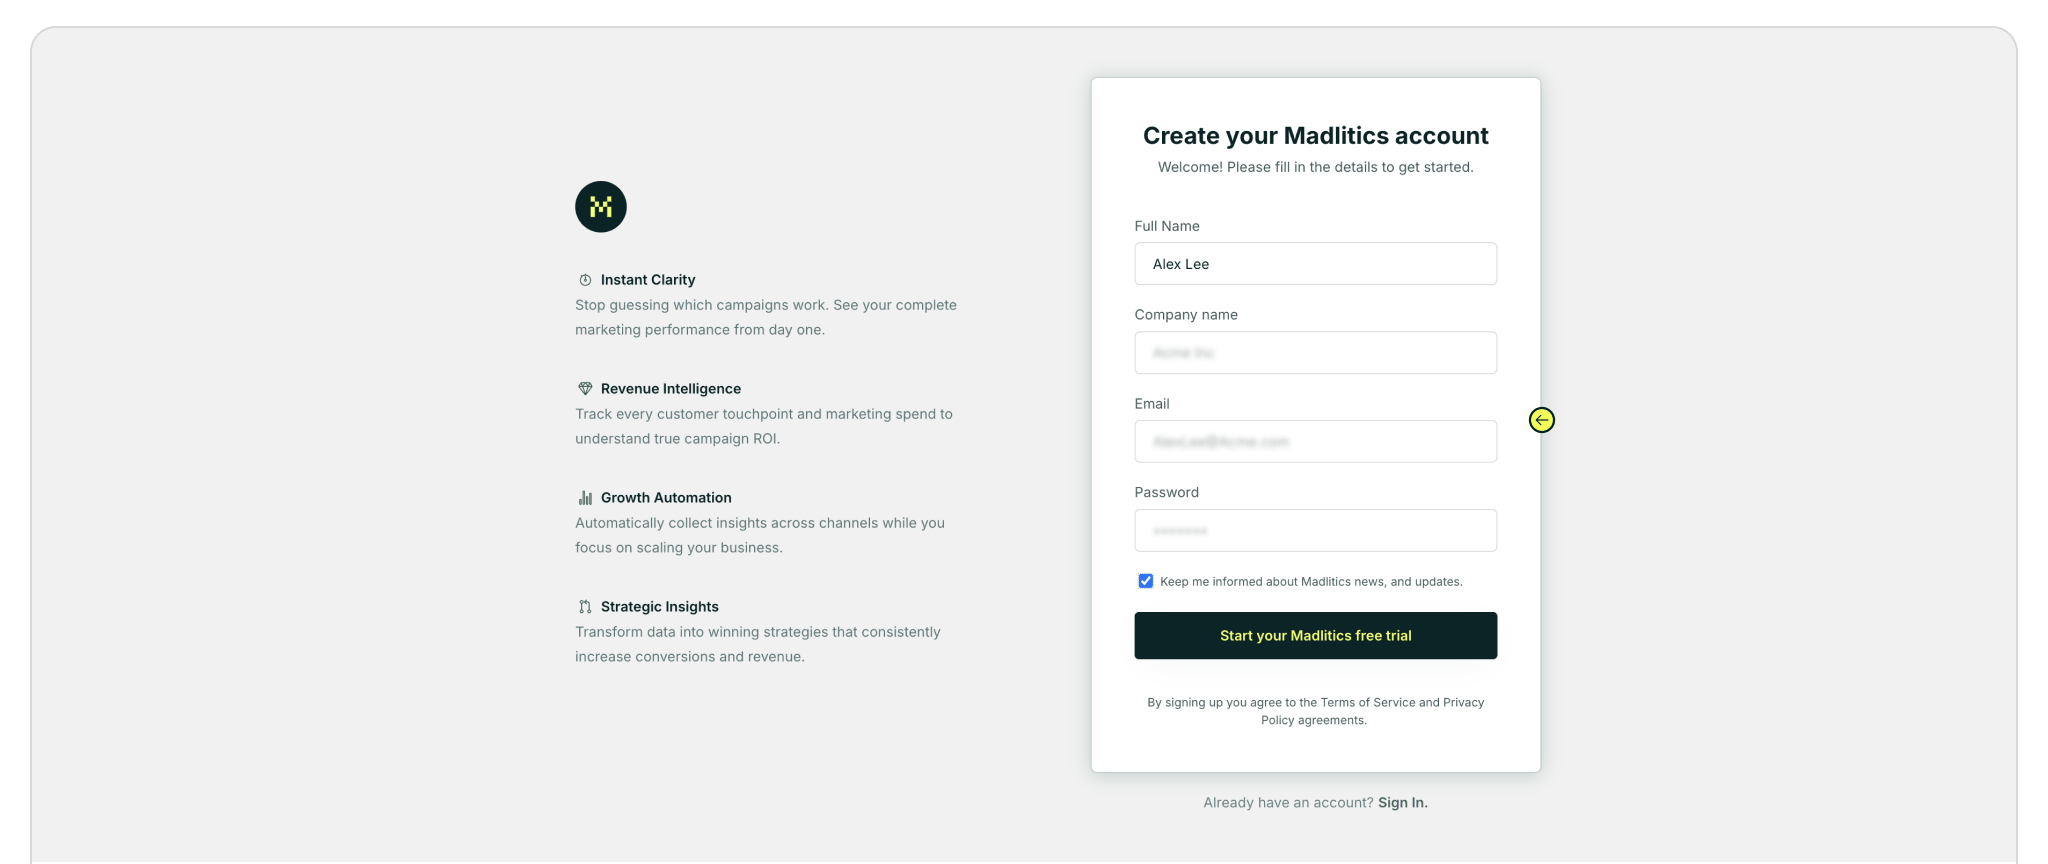
Step 1. Create your Madlitics account
Sign up for a free trial on the Madlitics website to get started. Creating an account unlocks your dashboard, where you’ll manage your sites, view analytics, and access the code snippet you’ll need to install.
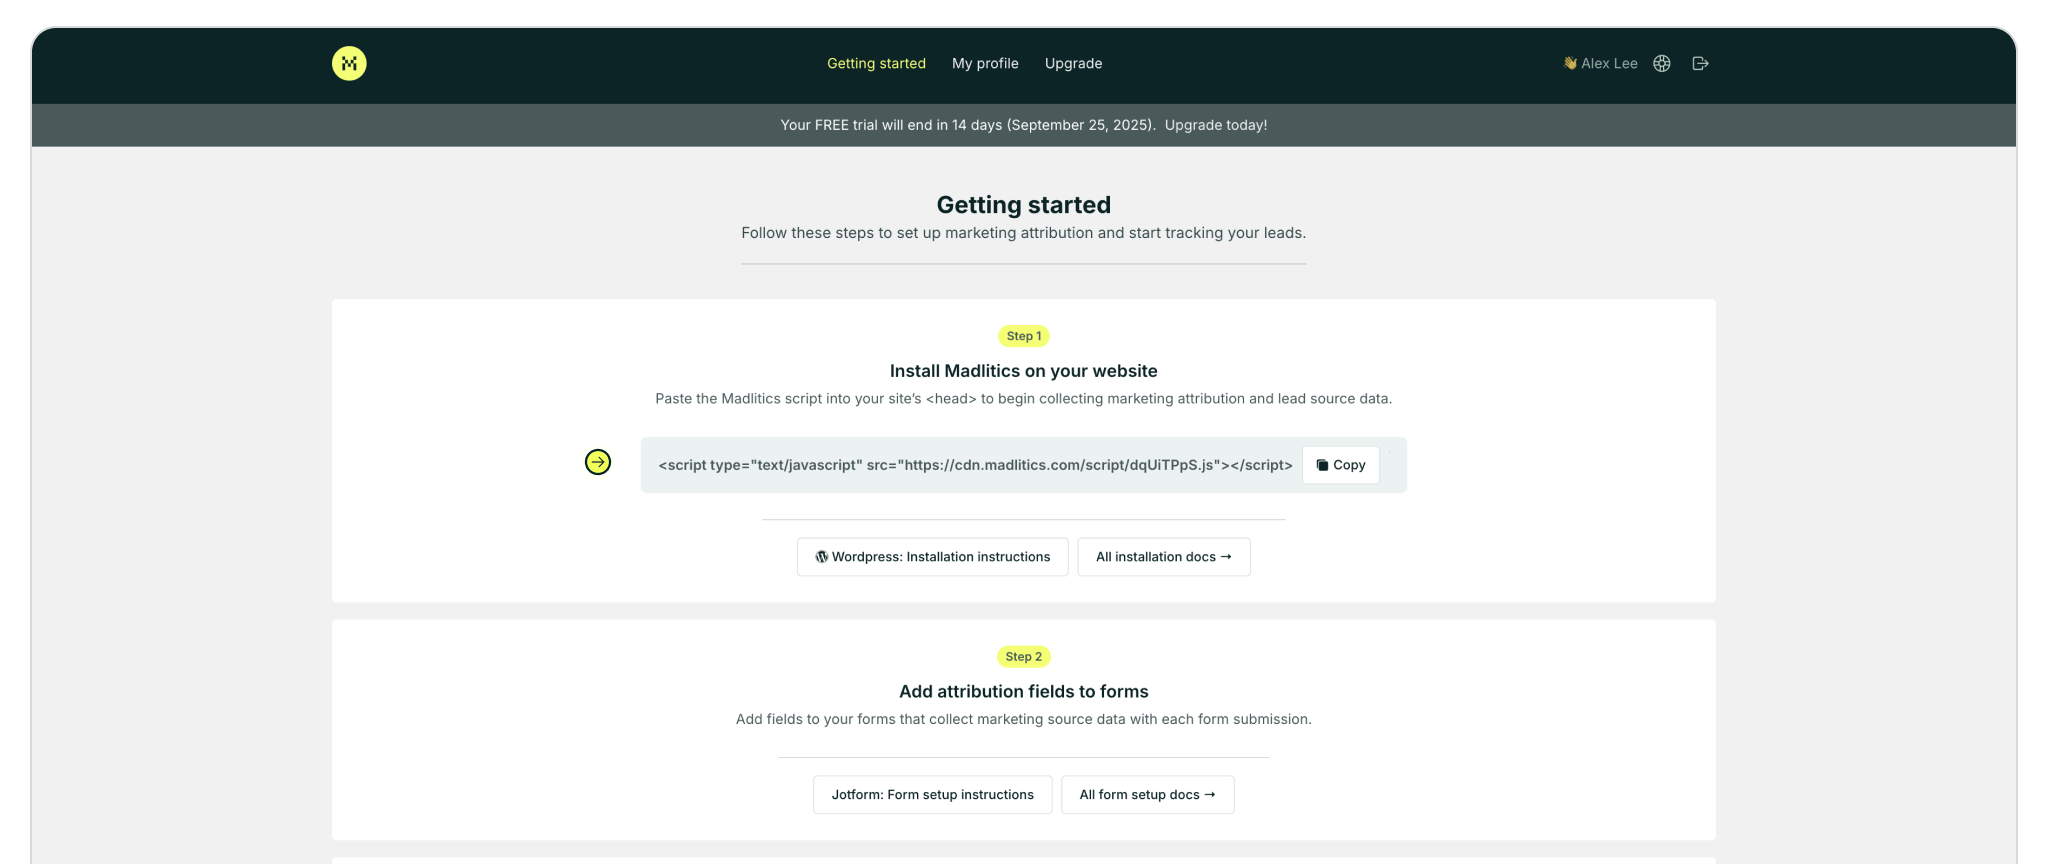
Step 2: Access your installation snippet
Once you’ve registered and logged in, you’ll land in your dashboard’s Get Started section. Here, you’ll find your unique Madlitics installation snippet, which is required to enable tracking on your site.


Before you can start adding tags to your website, you’ll need to set up a Google Tag Manager (GTM) account. Think of your GTM account as the main container for all your tags — including the Madlitics snippet — and the control center for everything tracking-related across your site. If you're just getting started, this step only takes a few minutes and doesn’t require any code.
Step 1: Create account
Head over to tagmanager.google.com, sign in with your Google account, and click Create Account from the top-right corner of the Accounts dashboard.

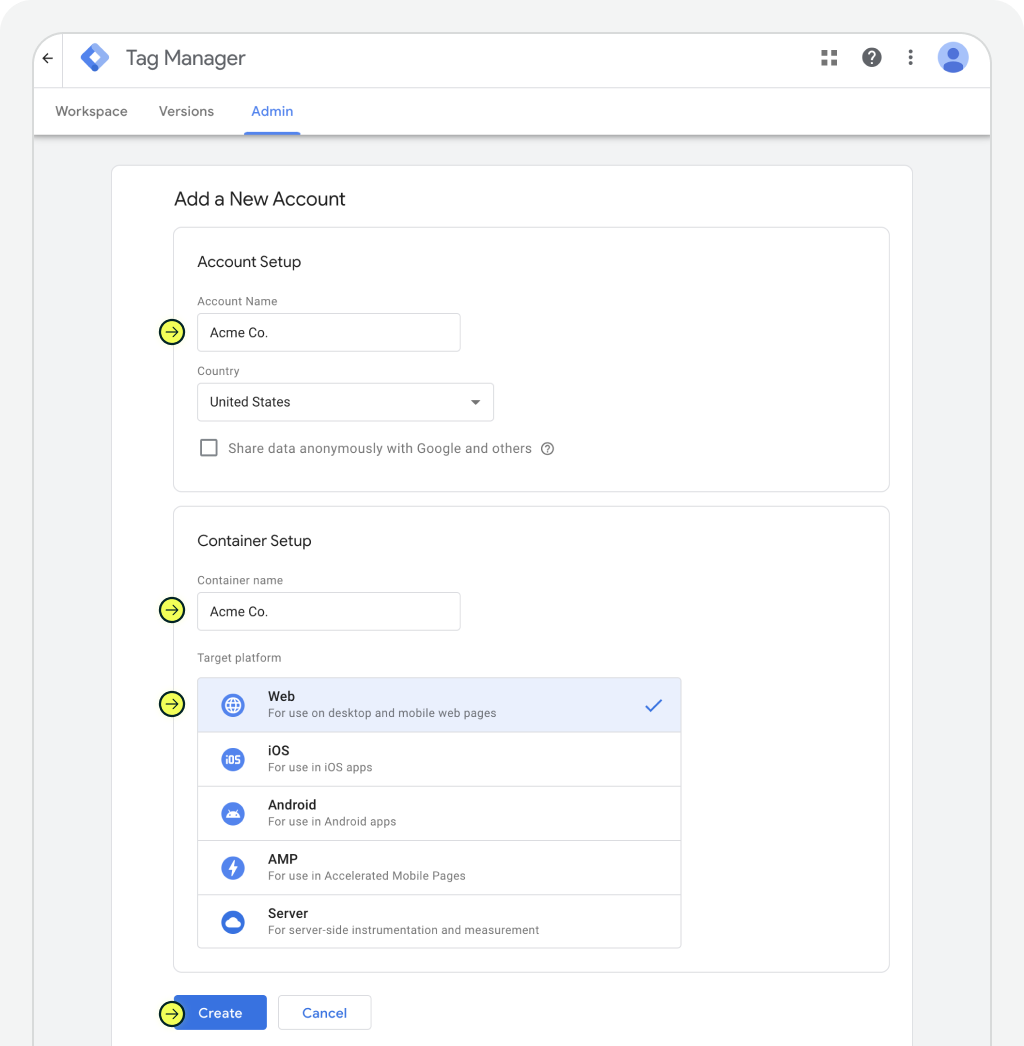
Step 2: Setup account
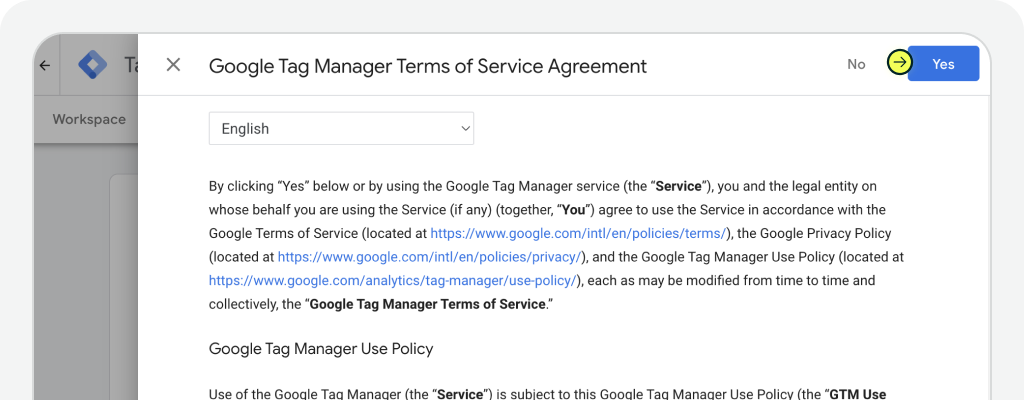
Enter your Account Name (usually your company or brand name), choose your country, and optionally enable data sharing to contribute anonymized usage info to Google. Under Container Setup, give your container a name — typically your website’s domain — and select Web as the target platform. Once complete, click Create, accept the Terms of Service, and you’re in.
Once your container is created, you’ll land in the GTM workspace — and from here, you’ll be able to add and manage your tags without editing your site’s code.
Now that your GTM container is set up, it’s time to add any necessary code snippet(s) as a new tag. Let's walk through how to create a new tag, paste in your code snippet(s) (ie. Madlitics code), and make sure it runs across every page of your website.
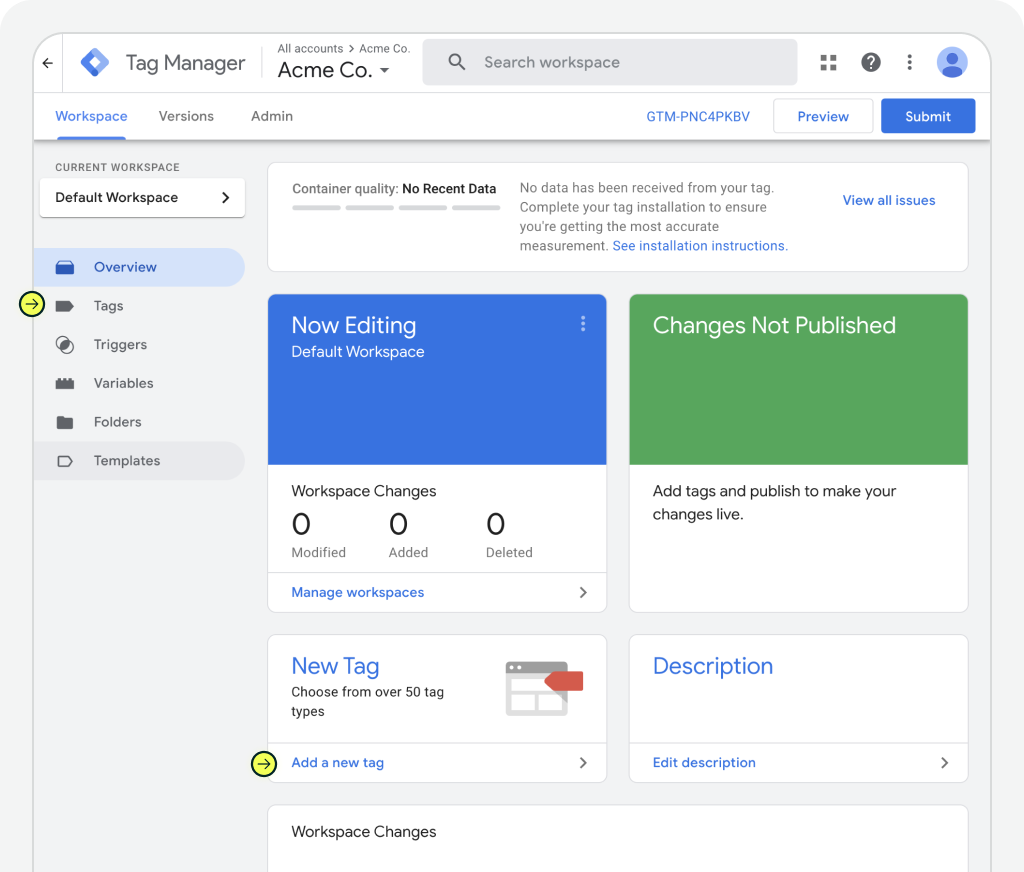
Step 1: Create a tag
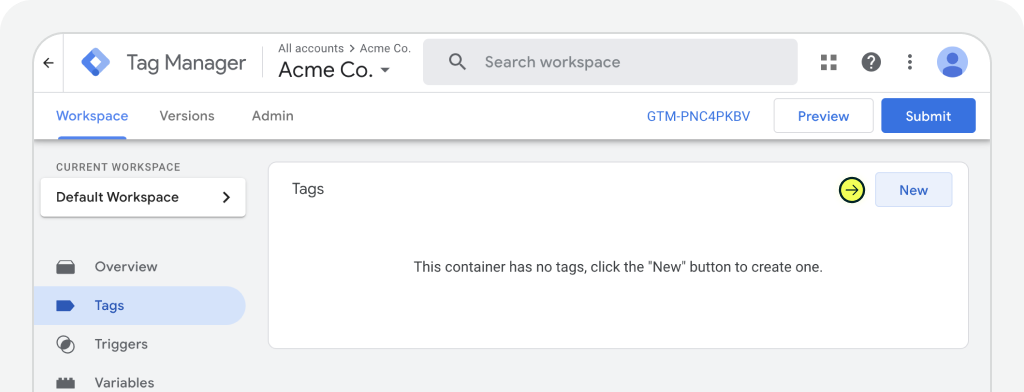
In your GTM workspace, navigate to Tags from the left-hand sidebar, or simply click the New Tag link in your workspace dashboard. This opens up the Tags screen, where you’ll be able to create and manage all your tracking tags. Click the New button in the top right to create your first tag.
Step 2: Name and configure your tag
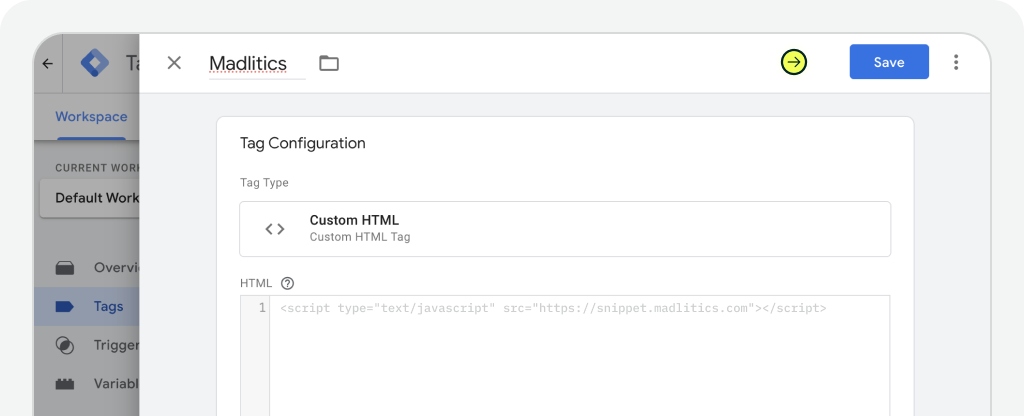
You’ll be taken to the Tag Editor screen. Start by naming your tag something clear, 'Madlitics' works well if you're adding our code. Next, click on the Tag Configuration box. This opens the configuration menu where you’ll choose what kind of tag you’re creating. You’ll set this to Custom HTML in the next step, but for now you’ve officially begun setup.

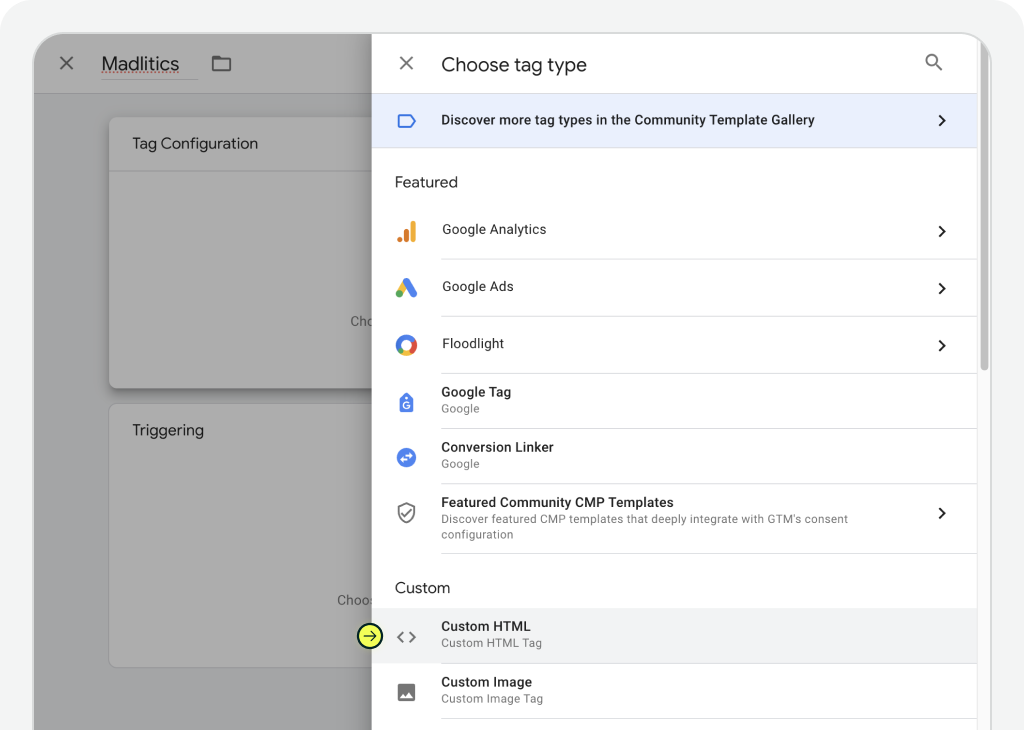
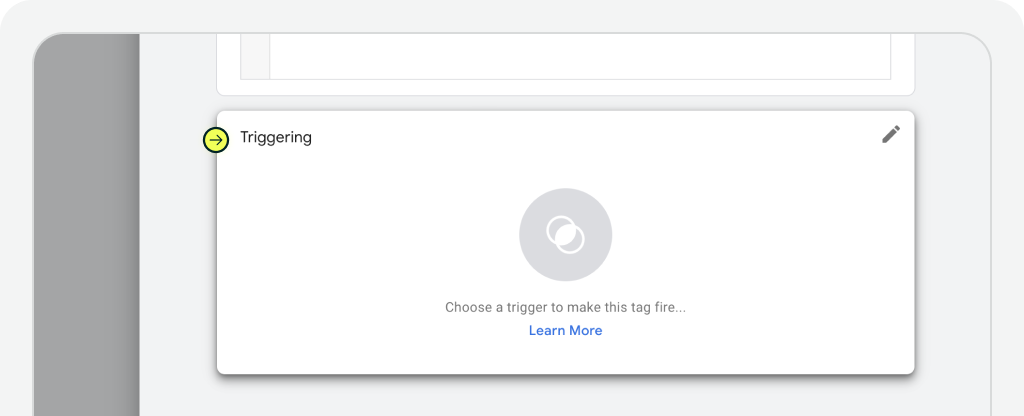
Step 3: Add the code snippet (ie. Madlitics) and set a trigger
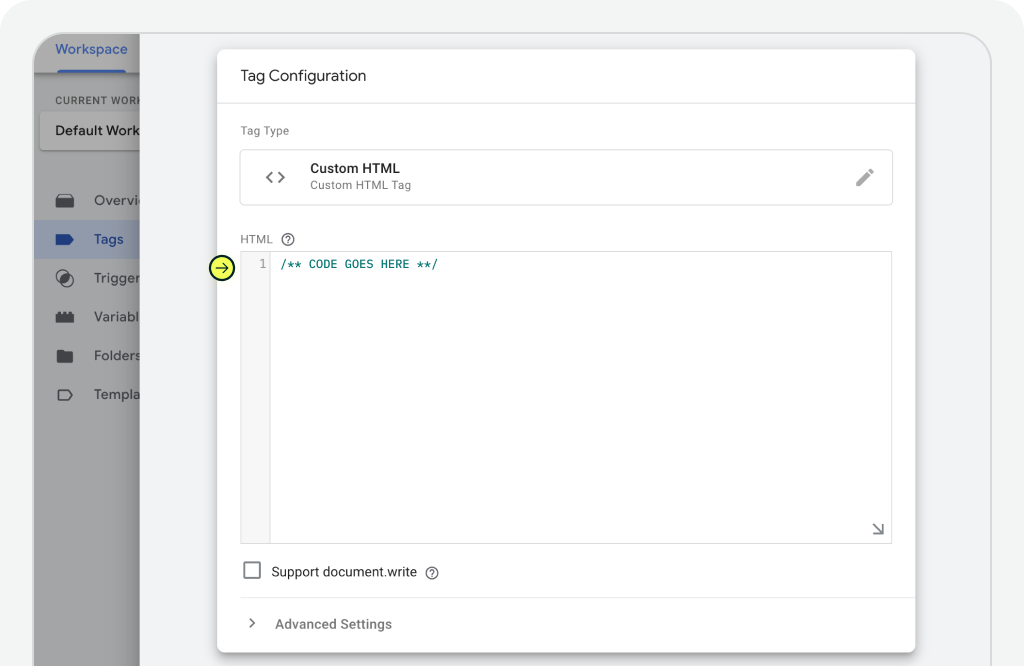
Now that your tag is created and configured as a Custom HTML tag, it’s time to paste in the actual code and tell GTM when the tag should run.
Start by pasting your code snippet, for our purposes the Madlitics snippet (↗) into the HTML field. This small line of code ensures GTM can capture attribution data like Paid Search, Organic Social, and Email and pass it into your CRM or other marketing tools.
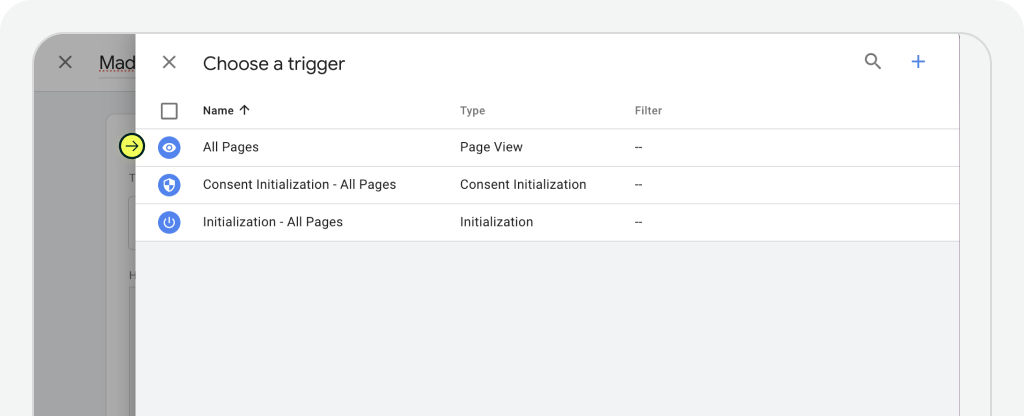
After pasting your code, click into the Triggering box to set the conditions for when this tag should fire. For most use cases, choose All Pages — this ensures your tag loads on every page of your website, giving Madlitics complete visibility into how visitors arrived, even if they return days later.
When everything looks good, hit Save in the top-right corner to finalize the tag setup.
Step 4: Save and publish your tag
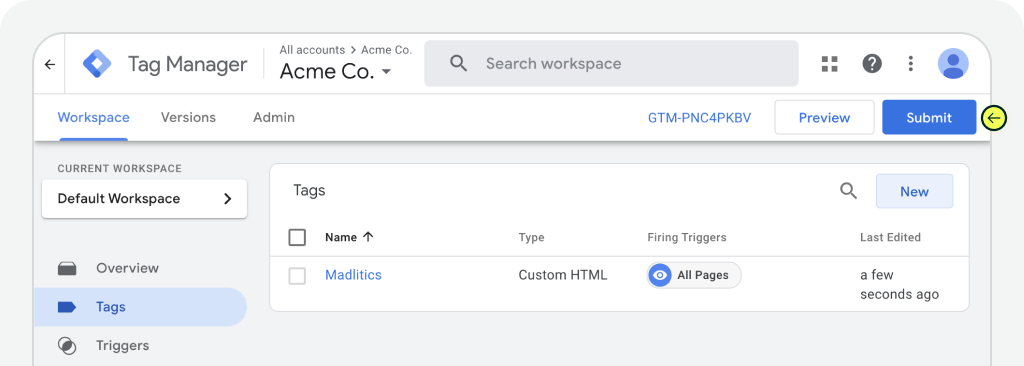
This final step is where Google Tag Manager applies your changes to the live version of your site. Let’s walk through the process. Back to the Tags screen, and in the upper-right corner, click the blue Submit button to begin the publishing process. This tells Google Tag Manager you’re ready to push your tag live.
On the Submission Configuration screen, give this version a clear name like 'Madlitics Custom Snippet'. Adding a version name helps you track changes later on, especially if you’re managing multiple tags. You can also include an optional description to remind your future self or teammates what this version contains. Make sure the option Publish and Create Version is selected at the top of the screen. Then, click the Publish button to save and activate your tag.
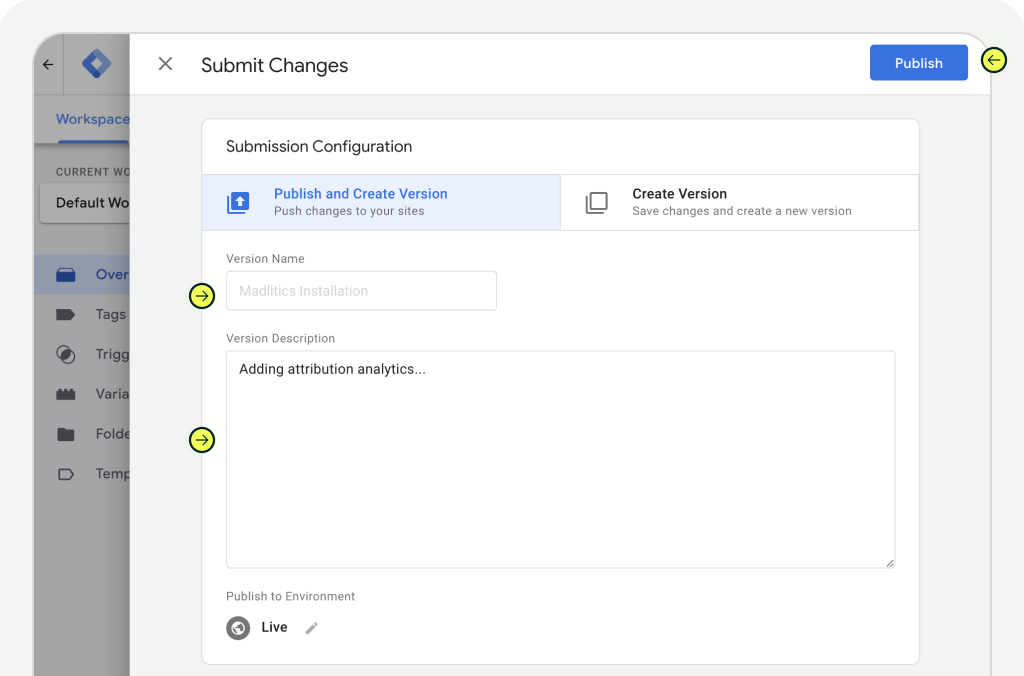
After clicking Publish, GTM redirects you to the Version Summary screen. This shows you that your new tag is now active and lists what changed in the container. You should see your new tag with your custom label name (ex. “Madlitics”) — listed under “Version Changes.”

To complete the setup, you’ll need to install a WordPress plugin that embeds your Google Tag Manager container across your entire site. This makes sure that the Madlitics snippet — and any other tags you’ve added — can actually run. We’ll be using the popular GTM4WP plugin, short for Google Tag Manager for WordPress.
Step 1: Create a tag
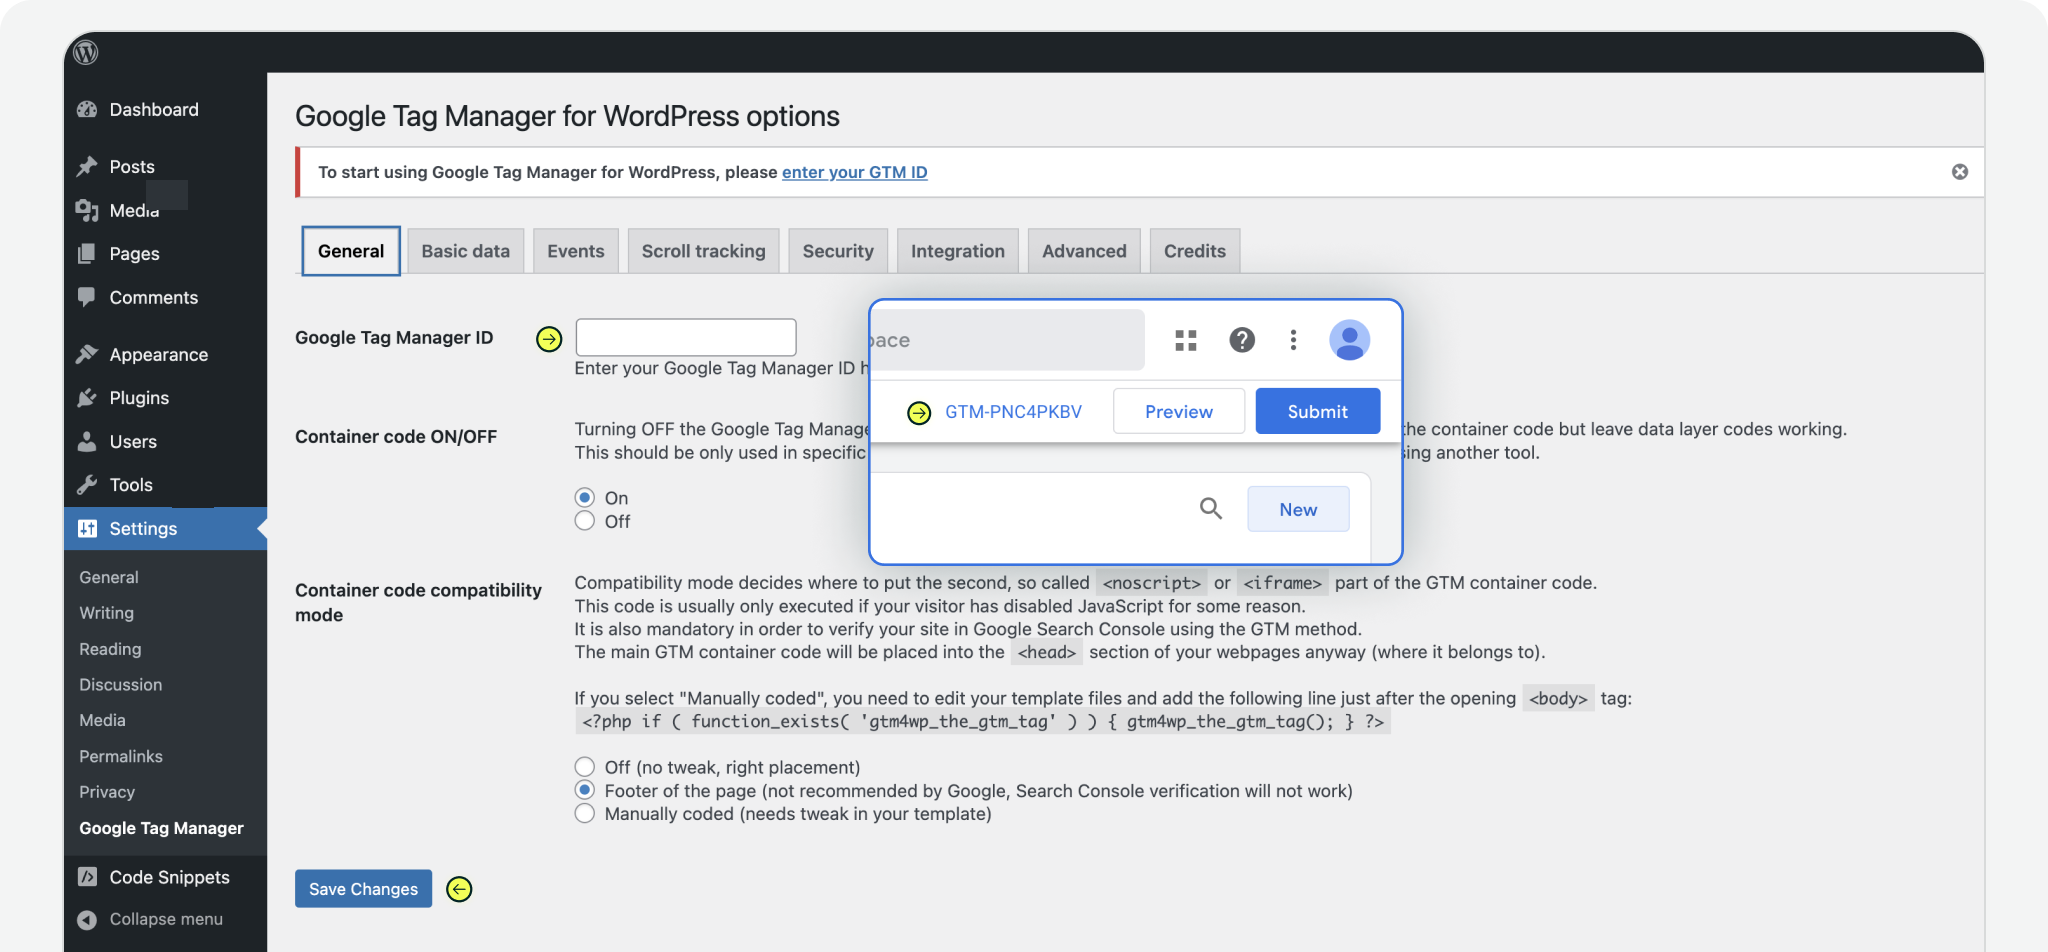
In your WordPress dashboard, navigate to Plugins → Add New, and search for “GTM4WP.” You’re looking for the plugin titled “Google Tag Manager for WordPress” by Thomas Geiger. Click Install, then Activate. Once the plugin is activated, go to Settings → Google Tag Manager in your WordPress sidebar. This will open up the configuration screen where you’ll paste in your GTM ID.


Step 2: Add your GTM container ID
In your Google Tag Manager dashboard, you’ll find your Container ID in the top-right corner — it starts with GTM-. Copy that ID and paste it into the Google Tag Manager ID field in your plugin settings. Leave the other default options unless you know you need to change them. When you're done, click Save Changes.


Installing Madlitics through Google Tag Manager is one of the cleanest, most reliable ways to ensure your attribution data is captured accurately from day one. Whether you’re working with a WordPress site or any modern CMS, GTM gives you a centralized, flexible way to manage scripts without touching code — and when paired with Madlitics, you gain full visibility into how leads are finding your business.
Now that your container is live and your Madlitics tag is active, you’re set up to start collecting first-party attribution data across every session and touchpoint.
Need help verifying everything’s working? Check out our Testing Guide to make sure your tag is firing correctly. And if you ever get stuck, reach out to our team — we’re here to help.
Answers to common questions about Madlitics and Google Tag Manager